This article is a simple tutorial designed to teach you some fundamental skills for creating cross platform web applications. You will build a sample School Plan app, which will provide a dynamic “app-like” experience across many different platforms and work offline. It will use Apache Cordova and Mozilla’s Brick web components.
The story behind the app, written by Piotr
I’ve got two kids and I’m always forgetting their school plan, as are they. Certainly I could copy the HTML to JSFiddle and load the plan as a Firefox app. Unfortunately this would not load offline, and currently would not work on iOS. Instead I would like to create an app that could be used by everyone in our family, regardless of the device they choose to use.
We will build
A mobile application which will:
- Display school plan(s)
- Work offline
- Work on many platforms
Prerequisite knowledge
- You should understand the basics of HTML, CSS and JavaScript before getting started.
- Please also read the instructions on how to load any stage in this tutorial.
- The Cordova documentation would also be a good thing to read, although we’ll explain the bits you need to know below.
- You could also read up on Mozilla Brick components to find out what they do.
Preparation
Before building up the sample app, you need to prepare your environment.
Installing Cordova
We’ve decided to use Apache Cordova for this project as it’s currently the best free tool for delivering HTML apps to many different platforms. You can build up your app using web technologies and then get Cordova to automatically port the app over to the different native platforms. Let’s get it installed first.
- First install NodeJS: Cordova is a NodeJS package.
- Next, install Cordova globally using the
npmpackage manager:npm install -g cordova
Note: On Linux or OS X, you may need to have root access.
Installing the latest Firefox
If you haven’t updated Firefox for a while, you should install the latest version to make sure you have all the tools you need.
Installing Brick
Mozilla Brick is a tool built for app developers. It’s a set of ready-to-use web components that allow you to build up and use common UI components very quickly.
- To install Brick we will need to use the Bower package manager. Install this, again using
npm:npm install -g bower - You can install Brick for your current project using
bower install mozbrick/brickbut don’t do this right now — you need to put this inside your project, not just anywhere.
Getting some sample HTML
Now you should find some sample HTML to use in the project — copy your own children’s online school plans for this purpose, or use our sample if you don’t have any but still want to follow along. Save your markup in a safe place for now.
Stage 1: Setting up the basic HTML project
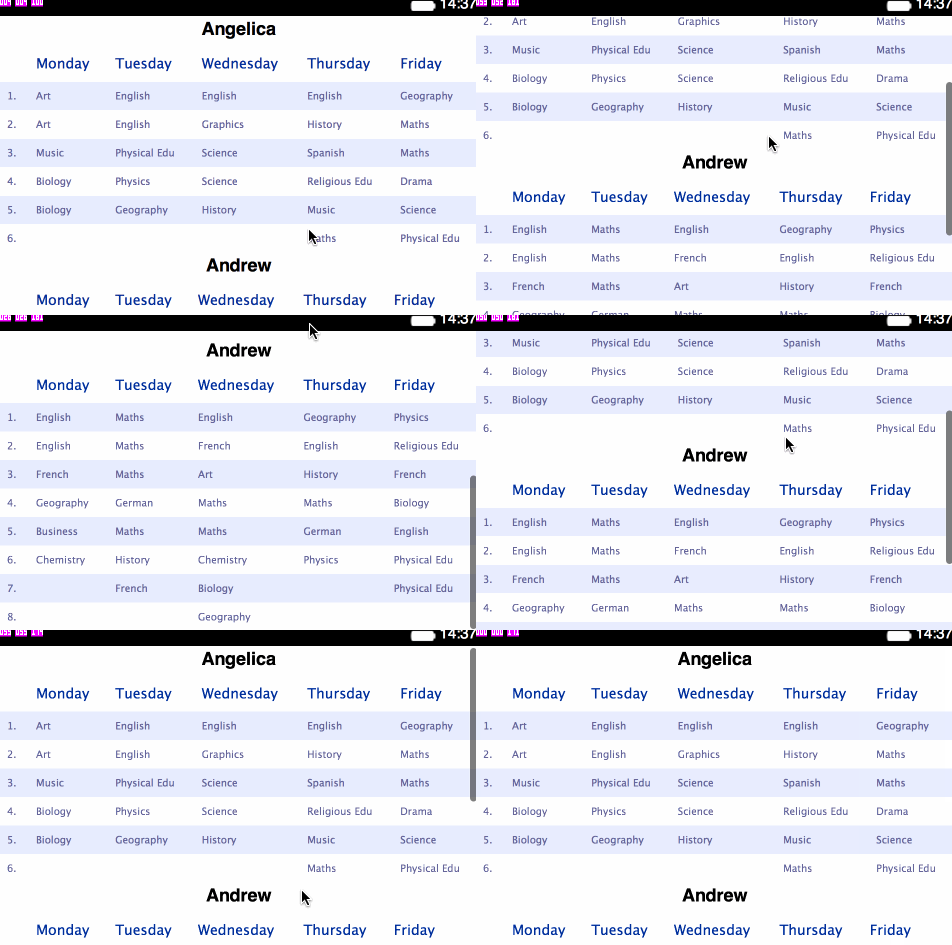
In this part of the tutorial we will set up the basic project, and display the school plans in plain HTML. See the stage 1 code on Github if you want to see what the code should look like at the end of this section.
- Start by setting up a plain Cordova project. On your command line, go to the directory in which you want to create your app project, and enter the following command:
cordova create school-plan com.example.schoolplan SchoolPlanThis will create a
school-plandirectory containing some files. - Inside
school-plan, openwww/index.htmlin your text editor and remove everything from inside the<body>element. - Copy the school plan HTML you saved earlier into separate elements. This can be structured however you want, but we’d recommend using HTML
<table>s for holding each separate plan:</head> <body> <h1>Angelica</h1> <table> <thead> <tr> <th></th> <th>Monday</th> <th>Tuesday</th> <th>Wednesday</th> <th>Thursday</th> <th>Friday</th> </tr> </thead> <tbody> <tr> <td>1.</td> <td>Art</td> <td>English</td> ... - Change the styling contained within
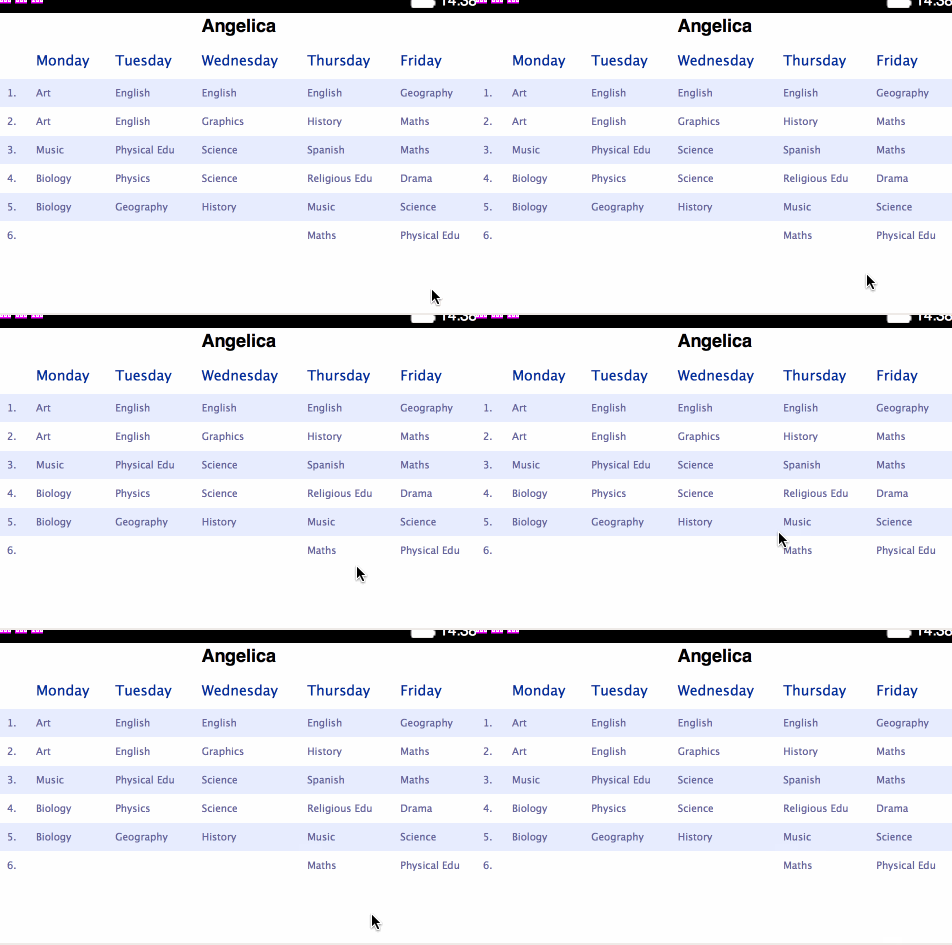
www/css/index.cssif you wish, to make the tables look how you want. We’ve chosen to use “zebra striping” for ease of reading.table { width: 100%; border-collapse: collapse; font-size: 10px; } th { font-size: 12px; font-weight: normal; color: #039; padding: 10px 8px; } td { color: #669; padding: 8px; } tbody tr:nth-child(odd) { background: #e8edff; } - To test the app quickly and easily, add the
firefoxosplatform as a cordova target and prepare the application by entering the following two commands:cordova platform add firefoxos cordova prepareThe last step is needed every time you want to check the changes.
- Open the App Manager in the Firefox browser. Press the [Add Packaged App] button and navigate to the prepared firefoxos app directory, which should be available in
school-plan/platforms/firefoxos/www.Note: If you are running Firefox Aurora or Nightly, you can do these tasks using our new WebIDE tool, which has a similar but slightly different workflow to the App Manager.
- Press the [Start Simulator] button then [Update] and you will see the app running in a Firefox OS simulator. You can inspect, debug and profile it using the App Manager — read Using the App Manager for more details.

- Now let’s export the app as a native Android APK so we can see it working on that platform. Add the platform and get Cordova to build the apk file with the following two commands:
cordova platform add android cordova build android - The apk is build in
school-plan/platforms/android/ant-build/SchoolPlan-debug.apk— read the Cordova Android Platform Guide for more details on how to test this.

Stage 2
In Stage 2 of our app implementation, we will look at using Brick to improve the user experience of our app. Instead of having to potentially scroll through a lot of lesson plans to find the one you want, we’ll implement a Brick custom element that allows us to display different plans in the same place.
You can see the finished Stage 2 code on Github.
We will be using the brick-deck component. This provides a “deck of cards” type interface that displays one brick-card while hiding the others
- First, run the following command in
wwwdirectory to install the needed entire Brick codebase into theapp/bower_components.bower install mozbrick/brick - To make use of it, add the following code to the
<head>of yourindex.htmlfile, to import its HTML and JavaScript:<script src="app/bower_components/brick/dist/platform/platform.js"></script> <link rel="import" href="app/bower_components/brick-deck/dist/brick-deck.html"> - Next, all the plans need to be wrapped inside a
<brick-deck>custom element, and every individual plan should be wrapped inside a<brick-card>custom element — the structure should end up similar to this:<brick-deck id="plan-group" selected-index="0"> <brick-card selected> <table> <!-- school plan 1 --> </table> </brick-card> <brick-card> <table> <!-- school plan 2 --> </table> </brick-card> </brick-deck> - The
brick-deckcomponent requires that you set the height of the<html>and<body>elements to 100%. Add the following to thecss/index.cssfile:html, body {height: 100%} - When you run the application, the first card should be visible while the others remain hidden. To handle this we’ll now add some JavaScript to the mix. First, add some
<link>elements to link the necessary JavaScript files to the HTML:<script type="text/javascript" src="cordova.js"></script> <script type="text/javascript" src="js/index.js"></script> cordova.jscontains useful general Cordova-specific helper functions, while index.js will contain our app’s specific JavaScript.index.jsalready contains a definition of anappvariable. The app is running afterapp.initialize()is called. It’s a good idea to call this whenwindowis loaded, so add the following:window.onload = function() { app.initialize(); }- Cordova adds a few events; one of which —
deviceready— is fired after all Cordova code is loaded and initiated. Let’s put the main app action code inside this event’s callback —app.onDeviceReady.onDeviceReady: function() { // starts when device is ready }, - Brick adds a few functions and attributes to all its elements. In this case
loopandnextCardare added to the<brick-deck>element. As it includes anid="plan-group"attribute, the appropriate way to get this element from the DOM isdocument.getElementById. We want the cards to switch when thetouchstartevent is fired; at this pointnextCardwill be called from the callbackapp.nextPlan.onDeviceReady: function() { app.planGroup = document.getElementById('plan-group'); app.planGroup.loop = true; app.planGroup.addEventListener('touchstart', app.nextPlan); }, nextPlan: function() { app.planGroup.nextCard(); }

Stage 3
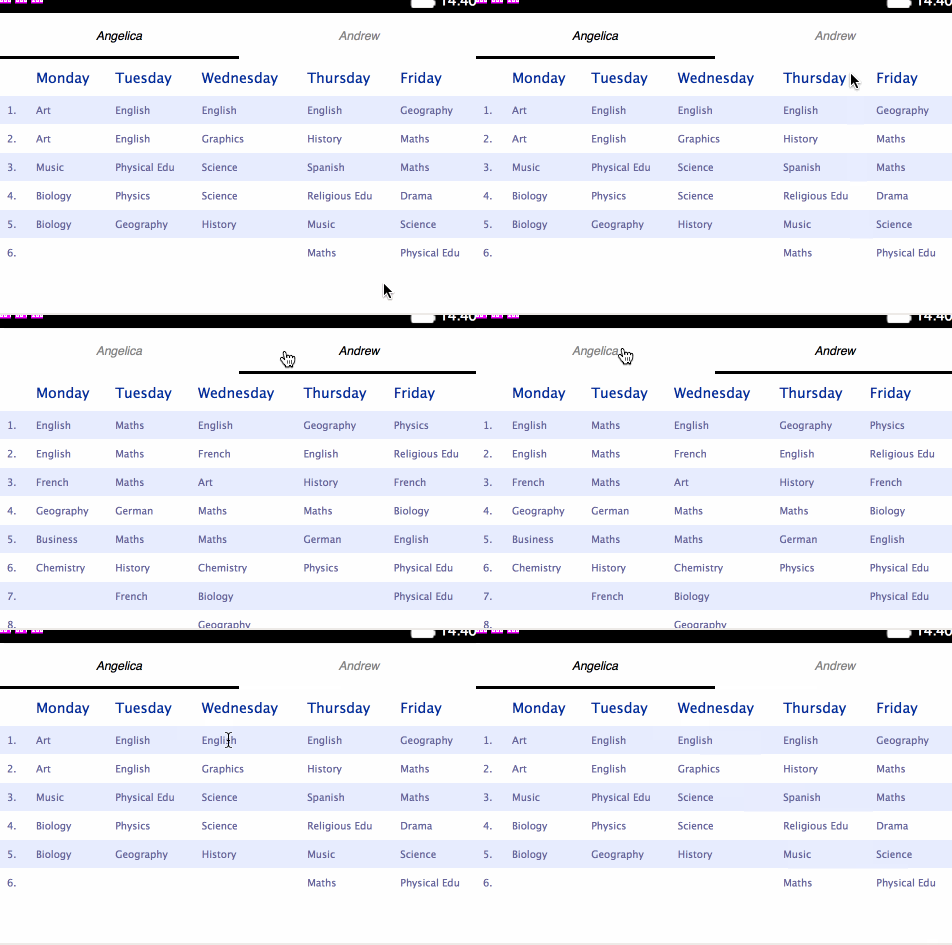
In this section of the tutorial, we’ll add a menu bar with the name of the currently displayed plan, to provide an extra usability enhancement. We will use Brick’s brick-tabbar component. See the finished Stage 3 code on GitHub.
- We need to import the component. Add the following lines to the
<head>of your HTML:<script src="app/bower_components/brick/dist/platform/platform.js"></script> <link rel="import" href="app/bower_components/brick-deck/dist/brick-deck.html"> <link rel="import" href="app/bower_components/brick-tabbar/dist/brick-tabbar.html"> - Next, add an id to all the cards and include them as the values of target attributes on
brick-tabbar-tabelements like so:<brick-tabbar id="plan-group-menu" selected-index="0"> <brick-tabbar-tab target="angelica">Angelica</brick-tabbar-tab> <brick-tabbar-tab target="andrew">Andrew</brick-tabbar-tab> </brick-tabbar> <brick-deck id="plan-group" selected-index="0"> <brick-card selected id="angelica"> ... - The Deck’s
nextCardmethod is called by Brick behind the scenes using tab’srevealevent. The cards will change when the tabbar element is touched. The app got simpler, as we are now using the in-built Brick functionality, rather than our own custom code, and Cordova functionality. If you wished to end the tutorial here you could safely remove the<script>elements that link to index.js and cordova.js from theindex.htmlfile.

Stage 4
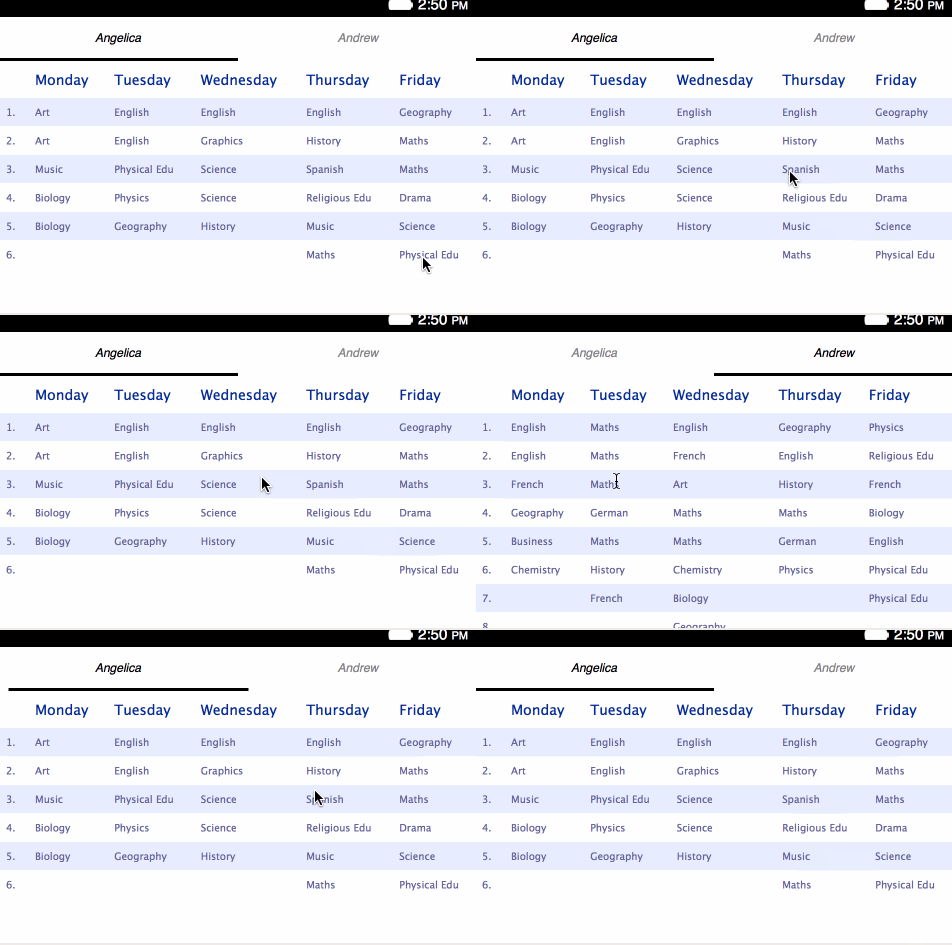
To further improve the user experience on touch devices, we’ll now add functionality to allow you to swipe left/right to navigate between cards. See the finished stage 4 code on GitHub.
- Switching cards is currently done using the
tabbarcomponent. To keep the selected tab in sync with the currentcardyou need to link them back. This is done by listening to theshowevent of eachcard. For each tab from stored inapp.planGroupMenu.tabs:tab.targetElement.addEventListener('show', function() { // select the tab }); - Because of the race condition (
planGroupMenu.tabsmight not exist when the app is initialized) polling is used to wait until the right moment before trying to assign the events:function assignTabs() { if (!app.planGroupMenu.tabs) { return window.setTimeout(assignTabs, 100); } // proceedThe code for linking the tabs to their associated cards looks like so:
onDeviceReady: function() { app.planGroupMenu = document.getElementById('plan-group-menu'); function assignTabs() { if (!app.planGroupMenu.tabs) { return window.setTimeout(assignTabs, 100); } for (var i=0; i < app.planGroupMenu.tabs.length; i++) { var tab = app.planGroupMenu.tabs[i]; tab.targetElement.tabElement = tab; tab.targetElement.addEventListener('show', function() { this.tabElement.select(); }); } }; assignTabs(); // continue below ... - Detecting a one finger swipe is pretty easy in a Firefox OS app. Two callbacks are needed to listen to the
touchstartandtouchendevents and calculate the delta on thepageXparameter. Unfortunately Android and iOS do not fire thetouchendevent if the finger has moved. The obvious move would be to listen to thetouchmoveevent, but that is fired only once as it’s intercepted by thescrollevent. The best way forward is to stop the event from bubbling up by callingpreventDefault()in thetouchmovecallback. That wayscrollis switched off, and the functionality can work as expected:// ... continuation app.planGroup = document.getElementById('plan-group'); var startX = null; var slideThreshold = 100; function touchStart(sX) { startX = sX; } function touchEnd(endX) { var deltaX; if (startX) { deltaX = endX - startX; if (Math.abs(deltaX) > slideThreshold) { startX = null; if (deltaX > 0) { app.previousPlan(); } else { app.nextPlan(); } } } } app.planGroup.addEventListener('touchstart', function(evt) { var touches = evt.changedTouches; if (touches.length === 1) { touchStart(touches[0].pageX); } }); app.planGroup.addEventListener('touchmove', function(evt) { evt.preventDefault(); touchEnd(evt.changedTouches[0].pageX); });
You can add as many plans as you like — just make sure that their titles fit on the screen in the tabbar. Actions will be assigned automatically.

To be continued …
We’re preparing the next part, in which this app will evolve into a marketplace app with downloadable plans. Stay tuned!
[EDIT] See the next part where we separated data from DOM.
About Piotr Zalewa
Piotr Zalewa is a Senior Web Developer at Mozilla's Dev Ecosystem team. Working on web apps. He is the creator of JSFiddle.
More articles by Piotr Zalewa…
About Chris Mills
Chris Mills is a senior tech writer at Mozilla, where he writes docs and demos about open web apps, HTML/CSS/JavaScript, A11y, WebAssembly, and more. He loves tinkering around with web technologies, and gives occasional tech talks at conferences and universities. He used to work for Opera and W3C, and enjoys playing heavy metal drums and drinking good beer. He lives near Manchester, UK, with his good lady and three beautiful children.


12 comments