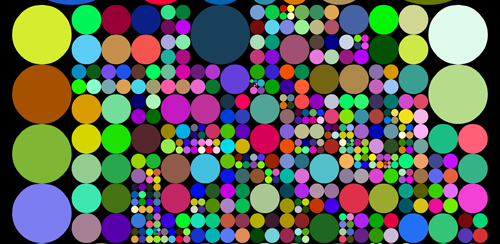
One day I was browsing reddit when I came across this peculiar link posted on it: http://www.cesmes.fi/pallo.swf
The game was addictive and I loved it but I found several design elements flawed. Why did it start with four circles and not one? Why was the color split so jarring? Why was it written in flash? (What is this, 2010?) Most importantly, it was missing a golden opportunity to split into dots that form an image instead of just doing random colors.
Creating the project
This seemed like a fun project, and I reimplemented it (with my design tweaks) using D3 to render with SVG.
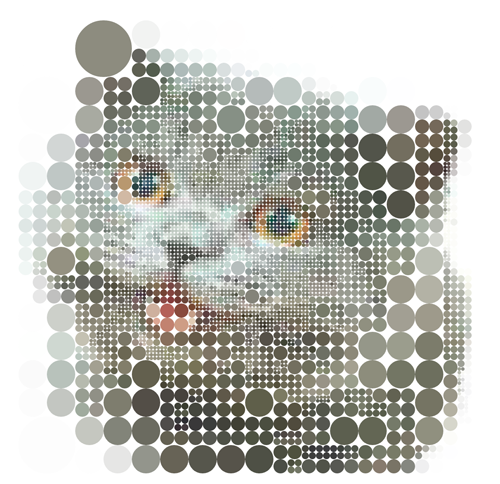
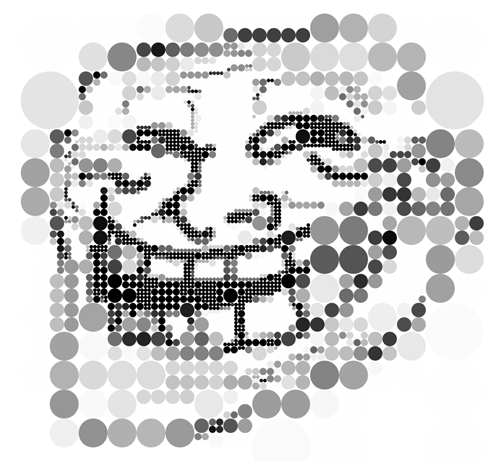
The main idea was to have the dots split into the pixels of an image, with each bigger dot having the average color of the four dots contained inside of it recursively, and allow the code to work on any web-based image.
The code sat in my ‘Projects’ folder for some time; Valentines day was around the corner and I thought it could be a cute gift. I bought the domain name, found a cute picture, and thus “koalastothemax.com (KttM)” was born.
Implementation
While the user-facing part of KttM has changed little since its inception, the implementation has been revisited several times to incorporate bug fixes, improve performance, and bring support to a wider range of devices.
Notable excerpts are presented below and the full code can be found on GitHub.
Load the image
If the image is hosted on koalastothemax.com (same) domain then loading it is as simple as calling new Image()
var img = new Image();
img.onload = function() {
 // Awesome rendering code omitted
};
img.src = the_image_source;
One of the core design goals for KttM was to let people use their own images as the revealed image. Thus, when the image is on an arbitrary domain, it needs to be given special consideration. Given the same origin restrictions, there needs to be a image proxy that could channel the image from the arbitrary domain or send the image data as a JSONP call.
Originally I used a library called $.getImageData but I had to switch to a self hosted solution after KttM went viral and brought the $.getImageData App Engine account to its limits.
Extract the pixel data
Once the image loads, it needs to be resized to the dimensions of the finest layer of circles (128 x 128) and its pixel data can be extracted with the help of an offscreen HTML5 canvas element.
koala.loadImage = function(imageData) {
 // Create a canvas for image data resizing and extraction
 var canvas = document.createElement('canvas').getContext('2d');
 // Draw the image into the corner, resizing it to dim x dim
 canvas.drawImage(imageData, 0, 0, dim, dim);
 // Extract the pixel data from the same area of canvas
 // Note: This call will throw a security exception if imageData
 // was loaded from a different domain than the script.
 return canvas.getImageData(0, 0, dim, dim).data;
};
dim is the number of smallest circles that will appear on a side. 128 seemed to produce nice results but really any power of 2 could be used. Each circle on the finest level corresponds to one pixel of the resized image.
Build the split tree
Resizing the image returns the data needed to render the finest layer of the pixelization. Every successive layer is formed by grouping neighboring clusters of four dots together and averaging their color. The entire structure is stored as a (quaternary) tree so that when a circle splits it has easy access to the dots from which it was formed. During construction each subsequent layer of the tree is stored in an efficient 2D array.
// Got the data now build the tree
var finestLayer = array2d(dim, dim);
var size = minSize;

// Start off by populating the base (leaf) layer
var xi, yi, t = 0, color;
for (yi = 0; yi < dim; yi++) {
 for (xi = 0; xi < dim; xi++) {
   color = [colorData[t], colorData[t+1], colorData[t+2]];
   finestLayer(xi, yi, new Circle(vis, xi, yi, size, color));
   t += 4;
 }
}
Start by going through the color data extracted in from the image and creating the finest circles.
// Build up successive nodes by grouping
var layer, prevLayer = finestLayer;
var c1, c2, c3, c4, currentLayer = 0;
while (size < maxSize) {
 dim /= 2;
 size = size * 2;
 layer = array2d(dim, dim);
 for (yi = 0; yi < dim; yi++) {
   for (xi = 0; xi < dim; xi++) {
     c1 = prevLayer(2 * xi    , 2 * yi    );
     c2 = prevLayer(2 * xi + 1, 2 * yi    );
     c3 = prevLayer(2 * xi    , 2 * yi + 1);
     c4 = prevLayer(2 * xi + 1, 2 * yi + 1);
     color = avgColor(c1.color, c2.color, c3.color, c4.color);
     c1.parent = c2.parent = c3.parent = c4.parent = layer(xi, yi,
       new Circle(vis, xi, yi, size, color, [c1, c2, c3, c4], currentLayer, onSplit)
     );
   }
 }
 splitableByLayer.push(dim * dim);
 splitableTotal += dim * dim;
 currentLayer++;
 prevLayer = layer;
}
After the finest circles have been created, the subsequent circles are each built by merging four dots and doubling the radius of the resulting dot.
Render the circles
Once the split tree is built, the initial circle is added to the page.
// Create the initial circle
Circle.addToVis(vis, [layer(0, 0)], true);
This employs the Circle.addToVis function that is used whenever the circle is split. The second argument is the array of circles to be added to the page.
Circle.addToVis = function(vis, circles, init) {
 var circle = vis.selectAll('.nope').data(circles)
   .enter().append('circle');

 if (init) {
   // Setup the initial state of the initial circle
   circle = circle
     .attr('cx',   function(d) { return d.x; })
     .attr('cy',   function(d) { return d.y; })
     .attr('r', 4)
     .attr('fill', '#ffffff')
       .transition()
       .duration(1000);
 } else {
   // Setup the initial state of the opened circles
   circle = circle
     .attr('cx',   function(d) { return d.parent.x; })
     .attr('cy',   function(d) { return d.parent.y; })
     .attr('r',    function(d) { return d.parent.size / 2; })
     .attr('fill', function(d) { return String(d.parent.rgb); })
     .attr('fill-opacity', 0.68)
       .transition()
       .duration(300);
 }

 // Transition the to the respective final state
 circle
   .attr('cx',   function(d) { return d.x; })
   .attr('cy',   function(d) { return d.y; })
   .attr('r',    function(d) { return d.size / 2; })
   .attr('fill', function(d) { return String(d.rgb); })
   .attr('fill-opacity', 1)
   .each('end',  function(d) { d.node = this; });
}
Here the D3 magic happens. The circles in circles are added (.append('circle')) to the SVG container and animated to their position. The initial circle is given special treatment as it fades in from the center of the page while the others slide over from the position of their “parent” circle.
In typical D3 fashion circle ends up being a selection of all the circles that were added. The .attr calls are applied to all of the elements in the selection. When a function is passed in it shows how to map the split tree node onto an SVG element.
.attr('cx', function(d) { return d.parent.x; }) would set the X coordinate of the center of the circle to the X position of the parent.
The attributes are set to their initial state then a transition is started with .transition() and then the attributes are set to their final state; D3 takes care of the animation.
Detect mouse (and touch) over
The circles need to split when the user moves the mouse (or finger) over them; to be done efficiently the regular structure of the layout can be taken advantage of.
The described algorithm vastly outperforms native “onmouseover” event handlers.
// Handle mouse events
var prevMousePosition = null;
function onMouseMove() {
 var mousePosition = d3.mouse(vis.node());

 // Do nothing if the mouse point is not valid
 if (isNaN(mousePosition[0])) {
   prevMousePosition = null;
   return;
 }

 if (prevMousePosition) {
   findAndSplit(prevMousePosition, mousePosition);
 }
 prevMousePosition = mousePosition;
 d3.event.preventDefault();
}

// Initialize interaction
d3.select(document.body)
 .on('mousemove.koala', onMouseMove)
Firstly a body wide mousemove event handler is registered. The event handler keeps track of the previous mouse position and calls on the findAndSplit function passing it the line segments traveled by the user’s mouse.
function findAndSplit(startPoint, endPoint) {
 var breaks = breakInterval(startPoint, endPoint, 4);
 var circleToSplit = []

 for (var i = 0; i < breaks.length - 1; i++) {
   var sp = breaks[i],
       ep = breaks[i+1];

   var circle = splitableCircleAt(ep);
   if (circle && circle.isSplitable() && circle.checkIntersection(sp, ep)) {
     circle.split();
   }
 }
}
The findAndSplit function splits a potentially large segment traveled by the mouse into a series of small segments (not bigger than 4px long). It then checks each small segment for a potential circle intersection.
function splitableCircleAt(pos) {
 var xi = Math.floor(pos[0] / minSize),
     yi = Math.floor(pos[1] / minSize),
     circle = finestLayer(xi, yi);
 if (!circle) return null;
 while (circle && !circle.isSplitable()) circle = circle.parent;
 return circle || null;
}
The splitableCircleAt function takes advantage of the regular structure of the layout to find the one circle that the segment ending in the given point might be intersecting. This is done by finding the leaf node of the closest fine circle and traversing up the split tree to find its visible parent.
Finally the intersected circle is split (circle.split()).
Circle.prototype.split = function() {
 if (!this.isSplitable()) return;
 d3.select(this.node).remove();
 delete this.node;
 Circle.addToVis(this.vis, this.children);
 this.onSplit(this);
}
Going viral
Sometime after Valentines day I meet with Mike Bostock (the creator of D3) regarding D3 syntax and I showed him KttM, which he thought was tweet-worthy - it was, after all, an early example of a pointless artsy visualization done with D3.
Mike has a twitter following and his tweet, which was retweeted by some members of the Google Chrome development team, started getting some momentum.
Since the koala was out of the bag, I decided that it might as well be posted on reddit. I posted it on the programing subreddit with the tile “A cute D3 / SVG powered image puzzle. [No IE]” and it got a respectable 23 points which made me happy. Later that day it was reposted to the funny subreddit with the title “Press all the dots :D” and was upvoted to the front page.
The traffic went exponential. Reddit was a spike that quickly dropped off, but people have picked up on it and spread it to Facebook, StumbleUpon, and other social media outlets.
The traffic from these sources decays over time but every several months KttM gets rediscovered and traffic spikes.
Such irregular traffic patterns underscore the need to write scalable code. Conveniently KttM does most of the work within the user’s browser; the server needs only to serve the page assets and one (small) image per page load allowing KttM to be hosted on a dirt-cheap shared hosting service.
Measuring engagement
After KttM became popular I was interested in exploring how people actually interacted with the application. Did they even realize that the initial single circle can split? Does anyone actually finish the whole image? Do people uncover the circles uniformly?
At first the only tracking on KttM was the vanilla GA code that tracks pageviews. This quickly became underwhelming. I decided to add custom event tracking for when an entire layer was cleared and when a percentage of circles were split (in increments of 5%). The event value is set to the time in seconds since page load.
As you can see such event tracking offers both insights and room for improvement. The 0% clear event is fired when the first circle is split and the average time for that event to fire seems to be 308 seconds (5 minutes) which does not sound reasonable. In reality this happens when someone opens KttM and leaves it open for days then, if a circle is split, the event value would be huge and it would skew the average. I wish GA had a histogram view.
Even basic engagement tracking sheds vast amounts of light into how far people get through the game. These metrics proved very useful when the the mouse-over algorithm was upgraded. I could, after several days of running the new algorithm, see that people were finishing more of the puzzle before giving up.
Lessons learned
While making, maintaining, and running KttM I learned several lessons about using modern web standards to build web applications that run on a wide range of devices.
Some native browser utilities give you 90% of what you need, but to get your app behaving exactly as you want, you need to reimplement them in JavaScript. For example, the SVG mouseover events could not cope well with the number of circles and it was much more efficient to implement them in JavaScript by taking advantage of the regular circle layout. Similarly, the native base64 functions (atob, btoa) are not universally supported and do not work with unicode. It is surprisingly easy to support the modern Internet Explorers (9 and 10) and for the older IEs Google Chrome Frame provides a great fallback.
Despite the huge improvements in standard compliance it is still necessary to test the code on a wide variety of browsers and devices, as there are still differences in how certain features are implemented. For example, in IE10 running on the Microsoft Surface html {-ms-touch-action: none; } needed to be added to allow KttM to function correctly.
Adding tracking and taking time to define and collect the key engagement metrics allows you to evaluate the impact of changes that get deployed to users in a quantitative manner. Having well defined metrics allows you to run controlled tests to figure out how to streamline your application.
Finally, listen to your users! They pick up on things that you miss - even if they don’t know it. The congratulations message that appears on completion was added after I received complaints that is was not clear when a picture was fully uncovered.
All projects are forever evolving and if you listen to your users and run controlled experiments then there is no limit to how much you can improve.
About Vadim Ogievetsky
Vadim is a developer at Metamarkets where he uses D3 to build interactive data-driven applications on top of modern web technologies. Prior to working at Metamarkets, Vadim was part of the Stanford Data Visualization group where he contributed to Protovis and other open-source data visualization projects. His open-source development is now focused on DVL, a reactive data flow library for dynamic data visualization built on top of D3.


14 comments