
In Part 1 we developed the UI of the Todo app for Firefox OS. In this part we will make it functional by writing JavaScript code using Backbone.
The source code for the Todo app is available on GitHub
NOTE: I recommend you to review Part 1 before moving on because I added an Edit button for each todo item in #view-todos and button CSS module is changed a bit to make it more reusable.
Required Libraries
First step is to add required js libraries using volo. Execute all of the following volo commands while remaining in root directory (/fos-todo-app) of the project.
Add Requirejs/Text
Text is a loader plugin for loading text resources like template files, CSS, etc.
volo add requirejs/text
Add Backbone.js
The following command will add Backbone including its dependencies i.e. Underscore and jQuery.
volo add backbone
Add Zepto.js
As I mentioned in part 1, we will use Zepto instead of jQuery so we need to add Zepto and replace jQuery with it.
volo add zepto
Now open /fos-todo-app/package.json file and remove following line from it:
"jquery": "github:jquery/jquery/2.0.2",
This will remove the jQuery dependency from our volo project. Now remove the jquery.js file from fos-todo-app/www/js/lib directory. Finally we need to tell Require.js to load Zepto whenever jQuery is requested. We can do so by adding a map property in Require.js configuration in /fos-todo-app/www/js/app.js.
requirejs.config({
  baseUrl: 'js/lib',

  // Map jquery to zepto
  map: { '*': { 'jquery': 'zepto' } },

  paths: {
    app: '../app'
  }
});
Backbone IndexedDB Adapter
I will be using the indexeddb adapter by superfeedr for this tutorial.
volo add superfeedr/indexeddb-backbonejs-adapter/master/backbone-indexeddb.js
Add Paths
Again, open the /fos-todo-app/www/js/app.js file to add the following paths to the Require.js configuration.
paths: {
  app: '../app',
  models: '../app/models',
  collections: '../app/collections',
  views: '../app/views',
  templates: '../app/templates',
  db: '../app/db',
}
Now create all the directories (models, collections, views, templates, db) mentioned in above paths in www/js/app directory. Also remove the www/js/app/main.js file because we won’t be using it.
NOTE: For mobile apps, routes are not that important as it’s for web apps. So we won’t be using Backbone routes in this app.
IndexedDB Configuration
Create a TodosDB.js file in www/js/app/db which returns an object containing IndexedDB related configurations.
define(['backbone', 'backbone-indexeddb'], function (Backbone, idxdb) {
  Backbone.sync = idxdb.sync;

  return {
    id: 'todos-db',
    migrations: [{
      version: 1,
      migrate: function (transaction, next) {
        var store = transaction.db.createObjectStore('todos');
        next();
      }
    }]
  };
});
Note the Backbone.sync method is replaced with the sync method returned from IndexedDB adapter. Now instead of syncing with the server, it will sync with IndexedDB locally.
The id in the returned object is the unique id for the database. migrations property contains the version and migrate methods. Once migrate is executed, database version changes to specified as a value (in our case it’s 1). migrate method is called by the driver to perform the migration. For more details, read under Implementation heading.
Todo Model
Now create www/js/app/models/Todo.js file and add following code in it.
define(['backbone', 'db/TodosDB'],
function (Backbone, TodosDB) {
  var Todo = Backbone.Model.extend({
      database: TodosDB,
      storeName: 'todos',

      defaults: {
        task: 'my task',
        completed: false,
        created_on: new Date()
      },

      validate: function (attrs) {
        if (!attrs.task) {
            return 'Task can't be empty';
        }
      }
  });

  return Todo;
});
The only thing to note in above Model is database, and storeName properties. You simply need to assign database configurations returned from TodosDB to database property and storeName is the name of the store used for the objects of this Model. Remember that it’s not same as unique id defined in database configurations.
The rest is pretty regular Backbone stuff. If you know Backbone, you can easily understand what’s going on.
Todo Collection
Now add following the collection in www/app/js/collections/todos.js.
define(['backbone', 'models/Todo', 'db/TodosDB'],
function (Backbone, Todo, TodosDB) {
    var Todos = Backbone.Collection.extend({
      database: TodosDB,
      storeName: 'todos',
      model: Todo,
      comparator: function (m) {
        return m.get('created_on').getTime();
      }
    });

    var todos = new Todos();

    //fetch all records from IndexedDB
    todos.fetch();

    return todos;
});
Whenever a module returns an instance, I write the name of that file starting with small-caps e.g. todos.js for above collection.
Make sure you give the same storeName in this collection and in the previously created model. Other than that we want our collection to stay sorted according to creation date so the comparator method is added which returns the time in milliseconds since 1st Jan, 1970 using getTime method.
After creating the collection, a new instance is created and all records are fetched using todos.fetch() and todos is returned.
Todo Template
Now create a template www/js/app/templates/todo.htm file and add the following code in it.
This is the same HTML code we wrote for a task with one difference. Underscore template related code added to check for completed property of model and printing task property in span element.
Displaying the Todo List
Now instead of showing you each module, I will show you how each feature is implemented so you may have to switch between different modules/files. First thing we need to do is to display list of tasks using www/js/app/collections/todos.js collection (which is fetched from IndexedDB).
Todo Model View
To display the todo list, we first need to create a view for www/js/app/models/Todo.js model. This view will represent each todo item in the list as li element. Create a new file www/js/app/views/Todo.js.
define(['underscore', 'backbone', 'text!templates/todo.htm'],
function (_, Backbone, todoTempl) {
  var TodoView = Backbone.View.extend({
      tagName: 'li',

      template: _.template(todoTempl),

      //events: {},

      initialize: function () {
        this.$el.attr('role', 'listitem');
      },

      render: function () {
        var self = this;

        //--- render template ---//
        self.$el.html(self.template( self.model.toJSON() ));

        //--- cache DOM elements ---//
        self.$taskEdit = self.$('input[type=text]');
        self.$taskView = self.$('label');
        self.$btnEdit = self.$('.btn.edit');

        return self;
      }
  });

  return TodoView;
});
Above view will create a li element containing the required HTML from the todo.htm template. when it’s rendered. Note that in the initialize method, role of listitem is applied to the li element. Also some DOM elements are cached after template rendering in render method because later we need them repeatedly.
Todos Collection View
Now we will create the View for todos collection which will represent ul#todo-list in section#view-todos. This view will create a new instance of the above defined TodoView and append it to itself. Add the following code in www/js/app/views/Todos.js
define(['backbone', 'views/Todo', 'collections/todos'],
function (Backbone, TodoView, todos) {
  var TodosView = Backbone.View.extend({
    tagName: 'ul',
    id: 'todo-list',
    className: 'todo-list reset-list',

    initialize: function () {
      this.collection = todos;

      this.listenTo(this.collection, 'add', this.addTodo);
      this.listenTo(this.collection, 'reset', this.render);
      this.listenTo(this.collection, 'sort', this.render);
    },

    addTodo: function (todo) {
      var todoView = new TodoView({model: todo}).render();
      this.$el.append(todoView.el);
    },

    render: function () {
      this.$el.html('');
      this.collection.each(this.addTodo, this);
      return this;
    }
  });

  return TodosView;
});
In the initialize method, the todos collection is assigned to this.collection. Remember that this todos collection is an instance returned from the app/collections/todos.js module. Now whenever we require this module (in other modules), it will always return the same instance of the collection. Basically it’s acting as a Singleton.
addTodo method is used to create a new instance of TodoView (views/Todo.js) by passing it the todo model which is passed as the parameter to the addTodo. Then it’s rendered using the render method in the chain and finally it’s appended to the ul element.
Do render method repeated calls addTodo for each item in this.collection.
ViewTodos View
Now we need to create a view that will represent the section#view-todos region. This is the view where TodosView (app/views/Todos.js) will be appended and it contains the Add, and Delete buttons in the footer. Create the app/views/ViewTodos.js file for this view.
define(['backbone', 'views/Todos', 'collections/todos'],
function (Backbone, TodosView, todos) {
  var ViewTodos = Backbone.View.extend({
    el: '#view-todos',

    //events: {},

    setBtnDelDisabled: function () {
      if (todos.length) {
        this.$btnDel.removeAttr('disabled');
      } else {
        this.$btnDel.attr('disabled', 'disabled');
      }
    },

    initialize: function () {
      //init todo list
      this.todosView = new TodosView().render();

      this.listenTo(todos, 'add', this.setBtnDelDisabled);
    },

    render: function () {
      this.$('.view-content').append(this.todosView.el);

      this.$btnDel = this.$('footer .btn.del');

      this.setBtnDelDisabled();
    }
  });

  return ViewTodos;
});
Above view will not create a new element because tagName is not used, instead the el property is used to select the existing DOM element #view-todos.
The setBtnDelDisabled method is pretty simple. It disables this.$btnDel if no todo item is present in the collection. Otherwise it enables the delete button by removing the disabled attribute. this.$btnDel contains 'footer .btn.del' element (cached in render method).
In the initialize method, a new instance of TodosView (todo list view) is created, rendered, and assigned to this.todosView. Then this view (ViewTodos) starts listening to add event on todos collection. Whenever a new item is added in the todos collection, setBtnDelDisabled will be fired.
In the render method, the todosView collection is appended to the current view (#view-todos). Then .btn.del is cached in $btnDel. Finally setBtnDelDisabled is called to enable or disable $btnDel based on the number of items in the todos collection.
Bootstrap
Now we need to create a new instance of ViewTodos and render it in the app.js file. Replace the requirejs(['app/main']); statement with the following code.
requirejs(['views/ViewTodos', 'collections/todos', 'zepto'], function (ViewTodos, todos, $) {
  new ViewTodos().render();

  //--- for testing only ---//
  window.todos = todos; //todos collection
  window.$ = $;         //zepto
});
The todos collection is made global so you can easily test whether your app is successfully performing operations (Read, Add, Edit, Delete) on this collection.
Testing
Now before adding any new feature in our app, we need to make sure our code runs without any error in the console. If you are testing it in the Firefox browser, make sure you run it using some web server (http://localhost/fos-todo-app) because IndexedDB will give an error when you try it using file:///.
NOTE: I have noticed that Firefox throws IndexedDB InvalidStateError if History is not set to “Firefox will: Remember History” in Privacy. So make sure you set Remember History before testing this. This doesn’t happen in Chrome. Also IndexedDB gives the same error in a Private Browsing window.
In my console, I got the following output when I ran the test for the first time.
opening database todos-db in version #1
onupgradeneeded = 0 => 1
migrate begin version from #0
migrate begin before version #1
migrate done before version #1
migrate begin migrate version #1
migrate done migrate version #1
migrate begin after version #1
migrate done after version #1
Migrated to 1
migrate setting transaction.oncomplete to finish  version #1
migrate done transaction.oncomplete version #1
Done migrating
execute : read on todos for undefined
You will get the above output only if the version number differs from the one defined in app/db/TodosDB.js, otherwise you get a read message in the console.
Add Todo
Let’s implement Add todo before Edit, Delete, or Mark as Complete features because with Add Todo we can test both addition and fetching of todo list from IndexedDB properly.
ViewAdd View
Before implementing this view, let’s review the functionality we want to implement in it.
We want this view to open by using a CSS3 animation. It’s obvious that we want this view to add a new todo item in the todos collection when the done button will be clicked in the footer. But the most important thing is to keep the done button disabled until the user enters some text in the textbox. When the todo item is successfully added in the todos collection and saved in IndexedDB, we want to close this view by using a CSS3 animation and at the end of the animation, we want to hide it using the aria-hidden attribute. Similarly, the cancel (cross) button in the footer will perform the same functionality but without saving the todo item.
Now create a new view file app/views/ViewAdd.js that will handle the section#view-add region.
define(['backbone', 'views/Todos', 'collections/todos'],
function (Backbone, TodosView, todos) {
  var ViewAdd = Backbone.View.extend({
    el: '#view-add',

    //--- Replace click with tap before creating final build ---//
    events: {
      //we assigned id to .btn.done so why not select it using that
      'click #btn-add-done' : 'addTodo',
      //'tap #btn-add-done' : 'addTodo',

      'click .btn.del'      : 'cancel',
      //'tap .btn.del' : 'cancel',

      'keyup #task'         : 'setAddBtnDisabled',
      'keypress #task'      : 'addTodo'
    },

    setAddBtnDisabled: function () {
      var taskLen = this.$task.val().length;

      taskLen ? this.$btnAdd.removeAttr('disabled')
              : this.$btnAdd.attr('disabled', 'disabled');
    },

    addTodo: function (e) {
      var task = this.$task.val();

      console.log('ViewAdd:addTodo');

      //if Done button is clicked or Enter key is pressed and
      //task must have length greater than 0
      if ((e.type === 'click' || e.keyCode === 13) && task.length) {
        todos.create({task: task, created_on: new Date()});
        this.cancel();
        return false;
      }

    },

    cancel: function () {
      this.$el.removeClass('slide-up-in').addClass('slide-down-out');
    },

    hideView: function (e) {
      var $target = $(e.target);

      if (e.animationName === 'slide-down-out') {
        $target.attr('aria-hidden', 'true');
      }
    },

    initialize: function () {
      this.$task = this.$('#task');
      this.$btnAdd = this.$('#btn-add-done');
      this.$el.on('animationend', this.hideView);
    },

    render: function () {
      this.$el.removeAttr('aria-hidden').removeClass('slide-down-out').addClass('slide-up-in');
      this.$task.val('');
      this.$btnAdd.attr('disabled', 'disabled');
      return this;
    }
  });

  return ViewAdd;
});
In the initialize method the #task textbox and the #btn-add-done are cached. In the third line, an animationend event is attached to the current view’s DOM element (#view-add). Whenever the animation on ViewAdd ends, it will fire the hideView method.
hideView method hides the view using aria-hidden only if slide-down-out animation ends because we don’t want to hide the view for opening (slide-up-in) animation.
In the render method, the view is made visible by removing aria-hidden, slide-down-out class, and slide-up-in class is added to show the view by animating it. Then the text in #task is cleared out and $btnAdd is disabled because we want the user to enter something in the #task.
cancel method is an event handler which fires when the user taps/clicks on .btn.del. This method closes the view using animation classes.
The setAddBtnDisabled handler fires on the keyup event. This method simply enables/disables $btnAdd based on character length in #task. The keyup event is used because we need string length after the key is released by the user.
addTodo handler fires on two events ('click #btn-add-done' and 'keypress #task'). In this method, the new task is saved only if user has clicked on #btn-add-done or the Enter key is pressed and the user must have entered some text in #task. In such a case, new task is added in the todos collection and the cancel method is called to hide #view-add.
ViewAdd Rendering
As I mentioned before we will not use routes in our app. So we need to launch/render ViewAdd from ViewTodos when the user clicks on the add button in the footer of ViewTodos. For that load ViewAdd by adding it in the array passed as first parameter to define in ViewTodos.
define(['backbone', 'views/Todos', 'views/ViewAdd', 'collections/todos'],
function (Backbone, TodosView, ViewAdd, todos) {
  //body...
});
Then uncomment the events property in the ViewTodos and add click event handler in it.
events: {
  //'tap footer .btn.add' : 'showAddView'
  'click footer .btn.add' : 'showAddView'
},
Now add showAddView handler which will render ViewAdd.
showAddView: function () {
  console.log('showAddView');

  this.viewAdd = new ViewAdd().render();

  //Redefine showAddView
  this.showAddView = function () {
    this.viewAdd.render();
  };

  //Remove existing events and reattach then
  //using this.events hash
  this.delegateEvents();
},
Above view creates a new instance of ViewAdd, call render method and assign the instance of ViewAdd to this.viewAdd. Then it redefines itself (showAddView) in which only the render method is called without creating new instance of it. In the end modified method needs to rebind and this is done using the Backbone delegateEvents method.
Testing
Now try adding some todo items using ViewAdd and test the todos collection in the console using console.log(todos.toJSON()).

NOTE: I have noticed a bug in Firefox 21 for Ubuntu. The fixed footer in fixed region/view doesn’t animate properly when ViewAdd (#view-add) is rendered. Also sometimes it doesn’t show the footer in ViewAdd. The same code works absolute fine in the Firefox OS Simulator.
Edit Todo
Now let’s make the Edit feature functional but first review how it will work. When the user clicks on the edit icon next to each todo item, a textbox will appear showing the same todo text that’s shown when not in edit mode as shown below.

The user can now edit the text and tap/hit the Enter key on keyboard to save the changes or Esc key to undo changes and exit from edit mode. Of course Esc key feature is not useful for phone users because there’s no Esc key on the Firefox OS onscreen keyboard.
We will implement this in app/views/Todo.js because the Todo view represent each item in the todo list. Add events in the Todo view for click on the edit button, and keypress on textbox.
events: {
  //'tap label'                      : 'editTodo',
  'click .btn.edit'                : 'editTodo',

  'keypress input[type=text]'      : 'saveTodo'
},
Now add the editTodo method in the Todo view.
editTodo: function () {
  var self = this;
  console.log('editTodo');

  self.$taskEdit.val(self.$taskView.find('span').text());

  self.$btnEdit.attr('aria-hidden', 'true');

  self.$taskEdit
      .removeAttr('aria-hidden')
      .removeClass('slide-left-out')
      .addClass('slide-right-in')
      .focus();

  self.$taskView.attr('aria-hidden', 'true');

  return false;
},
Before entering edit mode, the text in span is copied to textbox. Then the edit button ($btnEdit) is hidden. Textbox ($taskEdit) is made visible using CSS3 animations and it’s focused so the user can directly edit it. Finally we need to hide $taskView so the user only sees $taskEdit. Now the user is in edit mode and can edit the task text.
But we also need to save the changes when the user taps/hits the Enter key and return to view mode. Similarly on Esc key, exit edit mode without saving the changes. Add saveTodo handler which will perform these operations.
saveTodo: function (e) {
  var self = this;

  //save in case of enter/return
  if (e.keyCode === 13) {
    console.log('enter');
    self.$taskView.find('span').text(self.$taskEdit.val());

    self.model
        .set({
          task: self.$taskEdit.val()
        })
        .save();
  }

  //27 is for escape key
  if (e.keyCode === 13 || e.keyCode === 27) {
    self.$taskEdit
        .removeClass('slide-right-in')
        .addClass('slide-left-out');

    self.$btnEdit.removeAttr('aria-hidden');
  }
},
The saveTodo event handler is pretty simple. In case of Enter key, the text is copied from the textbox to the span and saved in the model. In case of Enter or Esc key, textbox ($taskEdit) is made hidden and the edit button ($btnEdit) is made visible. But you’re maybe wondering why $taskView is not made visible? Yes we need to show it when the animation on $taskEdit completes. To do that, add the following event hander in the render method right before return false;
self.$taskEdit
    .on('animationend', function (e) {
      if (e.animationName === 'slide-left-out') {
        self.$taskEdit.attr('aria-hidden', 'true');
        self.$taskView.removeAttr('aria-hidden');
      }
    });
Testing
Try editing different todo items and also try to refresh the app (in both Firefox and Firefox OS Simulator) to verify it’s saving in IndexedDB or not. If you are testing Firefox browser, remember Force Refresh sometimes doesn’t get modified files loaded using Require.js
Mark Todo As Complete
We will implement the Mark As Complete feature also in Todo view where we implemented the Edit feature. First add an event handler on the checkbox which marks the todo item as complete.
//'tap input[type=checkbox]'   : 'markCompleted',
'click input[type=checkbox]' : 'markCompleted',
Now add markCompleted handler in Todo view.
markCompleted: function (e) {
  var isCompleted = !this.model.get('completed');
  console.log('markCompleted');

  this.model
      .set({
        completed: isCompleted
      })
      .save();
},
Here the completed property is reversed and saved again in model.
Testing
Try marking different todo items as complete or not complete. Then try todos.toJSON() in console to make sure it’s changing the completed flag.
Delete Todos
We will implement Delete in a dynamic manner giving the user extra possibilities. Here’s how delete will work. If user has marked one or more todo items as complete, then delete button will function as “Delete Completed Items” otherwise it will work as “Delete All Items”.
Its implementation will span multiple files. First open ViewTodos and add a handler for the delete button.
//'tap footer .btn.del' : 'delTodos',
'click footer .btn.del' : 'delTodos',
Add delTodos handler.
delTodos: function () {
  /**
   * Other possible solution for following if condition is
   * this.$('#todo-list input[type=checkbox]:checked').length
   * But I didn't used it just to avoid DOM access
   */

  if (todos.where({completed: true}).length) {
    //function as Delete Completed

    if (confirm('Delete Completed Tasks?')) {
      this.todosView.delCompleted();
    }
  } else {
    if (confirm('Delete All Tasks?')) {
      //function as Delete All
      this.todosView.delAll();
    }
  }

  this.setBtnDelDisabled();

},
In this handler, total completed todo items are checked using Backbone’s where method. If there are completed items, it will call the delCompleted method of TodosView (which we will implement in a while). Otherwise it calls the delAll method. In the end, setBtnDelDisabled is called which is already discussed above in this tutorial.
Now open app/view/Todos.js and add the delCompleted method in it.
delCompleted: function () {
  this.collection.remove(
    this.collection.where({completed: true})
  );
},
The Above method simply removes all models whose completed property is true. Now add delAll method in the same view.
delAll: function () {
  /**
   * We can remove all models using reset
   * this.collection.reset([]);
   *
   * But I used remove method because I want remove
   * event to get fired for each model
   */

  this.collection.remove(this.collection.models);
},
delAll simple removes all models from the collection.
Remove from DOM
One final thing we need to do is to remove the corresponding DOM element whose model is deleted. Add the following statement in the initialize method of app/views/Todo.js view.
this.listenTo(this.model, 'remove', this.destroy);
Todo view will start listening for remove event from its model. destroy method will be called if the model fires remove event. So add destroy method in the same view.
destroy: function () {
  this.$el.remove();
  this.model.destroy();
},
It simply removes itself from DOM and destroy is used to remove it from IndexedDB.
Testing
Try deleting some todo items using delete button. Test both cases. Add some todo items and mark a few of them as completed. Then try using the delete button and make sure the items are deleted by refreshing your app. Similarly try delete all cases. Don’t mark any item as complete and press the delete button. It must delete all the items in the list.
Add/Pick Contact Web Activity
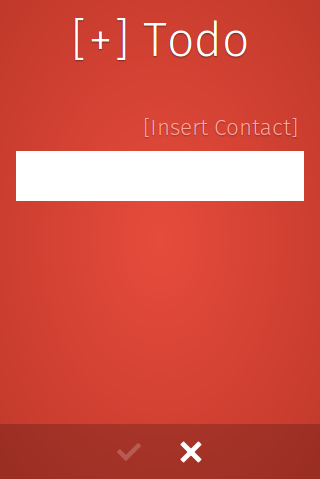
The app is almost complete. We have implemented all the CRUD operations. One final thing I would like to show you is Web Activities. We want to give user an option to insert contact information in the textbox in the ViewAdd (#view-add). Web Contact pick activity will be fired when the user tap on Insert Contact link in ViewAdd so we need to add an event handler for the Insert Contact link.
'click #activities .add-contact' : 'addContact'
Now add addContact handler.
addContact: function () {
  var self = this,
      pick = new MozActivity({
        name: 'pick',
        data: {
          type: 'webcontacts/contact'

}
      });

  pick.onsuccess = function () {

    var res = this.result;
    self.$task.val(self.$task.val() + res.name[0] + '(' + res.number + ')');
  };

  pick.onerror = function () {

    alert('ERROR: Unable to add contact!');
  };

  return false;
},
In above handler, the pick activity is fired using MozActivity. All the apps that can handle type webcontacts will be shown in the list in the case there is more than one app that can handle contact types. If the contact is picked successfully, the onsuccess handler will be fired and the contact information is stored in this.result. From result name and number information is appended to #task textbox.
Testing
You can’t test this feature in the Firefox browser. You need the Firefox OS Simulator or a real phone to test it.
That’s it. I hope you enjoyed this tutorial. Kindly give feedback in the comments.
About Fawad Hassan
I am a JavaScripter and I love working on single page apps, Firefox OS, PhoneGap based mobile apps, and Node.js/Express.js backend. Currently I am working for PLUMgrid (SDN related startup) and I am working on HTML5 based GUI of Network Operating System. Other than that I am Mozillian and in my free time I promote Mozilla products.
More articles by Fawad Hassan…
About Robert Nyman [Editor emeritus]
Technical Evangelist & Editor of Mozilla Hacks. Gives talks & blogs about HTML5, JavaScript & the Open Web. Robert is a strong believer in HTML5 and the Open Web and has been working since 1999 with Front End development for the web - in Sweden and in New York City. He regularly also blogs at http://robertnyman.com and loves to travel and meet people.
6 comments