
Laptops, computers, smartphones, tablets, TVs, even fridges have one thing in common — they can probably run a browser, so you can probably play an HTML5 game on them. Rendering the game on screen is one thing, but you also have to control it somehow, and there are plenty of different options suited for various platforms. From touch, through mouse and keyboard, to gamepad, even a TV remote or … bananas — these interfaces are covered in a series of new articles about control mechanisms now available on MDN.
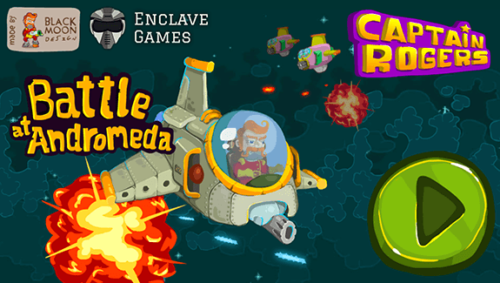
To showcase their real-life use in a project, these control mechanisms are implemented in the Captain Rogers: Battle at Andromeda demo game built with Phaser, so you can see how the gameplay is affected by the platform. You can also see that you don’t need separate builds dedicated to different platforms — the multi-platform nature of the Web can help you adjust the controls to the device the game is played on without much coding effort.
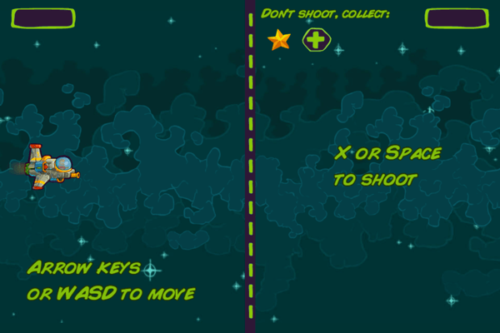
There’s a small pure JavaScript controls demo open-sourced on GitHub, so you can exactly see how those mechanisms were implemented, and try it yourself in your own gamedev project. Dive into the code right away, or follow the highlights of the key parts below.
Mobile touch
Let’s start with mobile touch support due to the popularity of the mobile first approach in HTML5 games:
document.addEventListener("touchstart", touchHandler);
document.addEventListener("touchmove", touchHandler);
function touchHandler(e) {
    if(e.touches) {
        playerX = e.touches[0].pageX - canvas.offsetLeft - playerWidth / 2;
        playerY = e.touches[0].pageY - canvas.offsetTop - playerHeight / 2;
    }
}
Those few lines of JavaScript code are all you need for very basic touch controls in your game, so it can be played on mobile devices. The first two lines set up event listeners for the touch events we are interested in — when you touch the screen, and when you slide your finger across it. The function checks if any touches are performed, and then sets the player’s coordinates so the ship can be rendered in the right place on the game Canvas.
Those are just the basics, and you can (and should) expand the possibilities, for example implementing multi-touch or gestures. It all depends on what type of game you have, and what should be controlled (and how). You can also offer on-screen buttons to perform given actions, for example movement arrows and a shoot button. See the Mobile touch controls article for more details.
Desktop mouse and keyboard
Since we’re speaking of “movement arrows”, you can print them on screen for mobile devices, but you can implement them for desktop too. Cursor keys or WASD keys are popular ways of moving a character in the game. For example the case below handles the cursor keys:
document.addEventListener("keydown", keyDownHandler);
function keyDownHandler(e) {
    if(e.keyCode == 39) {
        rightPressed = true;
    }
    else if(e.keyCode == 37) {
        leftPressed = true;
    }
    if(e.keyCode == 40) {
        downPressed = true;
    }
    else if(e.keyCode == 38) {
        upPressed = true;
    }
}
It’s all about constantly detecting and then saving information about which key was pressed, so it can be processed in the drawing loop:
function draw() {
    ctx.clearRect(0, 0, canvas.width, canvas.height);
    if(rightPressed) {
        playerX += 5;
    }
    else if(leftPressed) {
        playerX -= 5;
    }
    if(downPressed) {
        playerY += 5;
    }
    else if(upPressed) {
        playerY -= 5;
    }
    ctx.drawImage(img, playerX, playerY);
    requestAnimationFrame(draw);
}
The player’s x and y position variables are adjusted and then the image of a ship is built out in the new spot.
Desktop mouse and mobile touch are very similar from a coding point of view: all you need to do is to get the info on where the touch or click occurred and update the player’s position:
document.addEventListener("mousemove", mouseMoveHandler);
function mouseMoveHandler(e) {
    playerX = e.pageX - canvas.offsetLeft - playerWidth / 2;
    playerY = e.pageY - canvas.offsetTop - playerHeight / 2;
}
The mousemove event is detected, and the player’s position is adjusted to place the ship in the middle of the mouse’s pointer whenever it changes. That’s all it takes to make your game playable on desktop using both keyboard and mouse — for more details see the Desktop mouse and keyboard controls article.
Gamepad
My favorite controller — I use the Gamepad API to control all my HTML5-based slides during presentations. I’ve talked about it a few times, written a couple of articles, implemented some games, and included all the relevant info in the Gamepad API Content Kit. It’s really awesome that we’re able to feel the console experience on a computer, and it works thanks to Web technologies! Playing Captain Rogers with a gamepad enriches the experience and just feels a lot better.
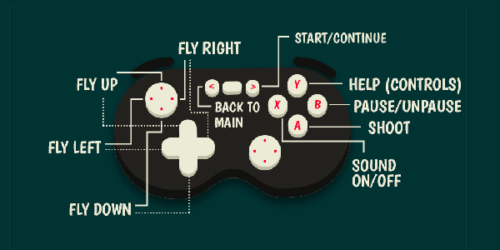
Covering Gamepad API support is a little bit more complex than touch or keyboard, but still quite straightforward:
window.addEventListener("gamepadconnected", gamepadHandler);
function gamepadHandler(e) {
    controller = e.gamepad;
}
function gamepadUpdateHandler() {
    buttonsPressed = [];
    if(controller.buttons) {
        for(var b=0; b<controller.buttons.length; b++) {
            if(controller.buttons[b].pressed) {
                buttonsPressed.push(b);
            }
        }
    }
}
function gamepadButtonPressedHandler(button) {
    var press = false;
    for(var i=0; i<buttonsPressed.length; i++) {
        if(buttonsPressed[i] == button) {
            press = true;
        }
    }
    return press;
}
When the gamepad is connected, an event is fired so we can get the reference to its data in a variable that we will use later on. On every update, a new array of pressed buttons is created so the current state is always the latest. There’s also a function that will loop through that array to see if a specific button we are interested in is pressed. This information can then be used in the drawing loop, in a similar fashion to the keyboard check:
function draw() {
    // ...
    gamepadUpdateHandler();
    if(gamepadButtonPressedHandler(0)) {
        playerY -= 5;
    }
    else if(gamepadButtonPressedHandler(1)) {
        playerY += 5;
    }
    if(gamepadButtonPressedHandler(2)) {
        playerX -= 5;
    }
    else if(gamepadButtonPressedHandler(3)) {
        playerX += 5;
    }
    if(gamepadButtonPressedHandler(11)) {
        alert('BOOM!');
    }
    // ...
}
That way we can control the player’s ship by pressing the corresponding DPad buttons, and even fire a bomb explosion with the A button. You could also detect the axes, or even build your own small library for handling gamepad input — check out the Desktop gamepad controls article for more details on that.
Unconventional controls
If you like, you can go even further and play a game with remote control on a huge TV screen standing in your living room, waving your hand in front of the laptop, or pressing everyday food connected with wires to your PC.
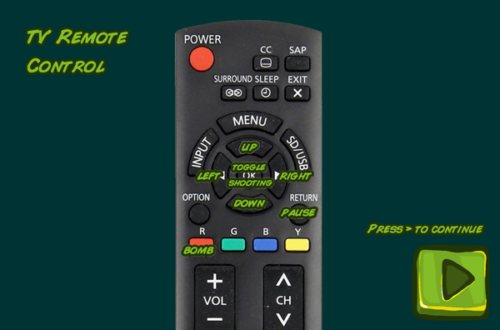
For example, Panasonic’s TV remote is surprisingly easy to implement controls with, as it reuses keyboard events, and the directional arrows have the exact same codes as keyboard cursor keys – 37, 38, 39 and 40, so it works out of the box. If you need more remote-specific buttons, here’s a full list, along with more detailed information.
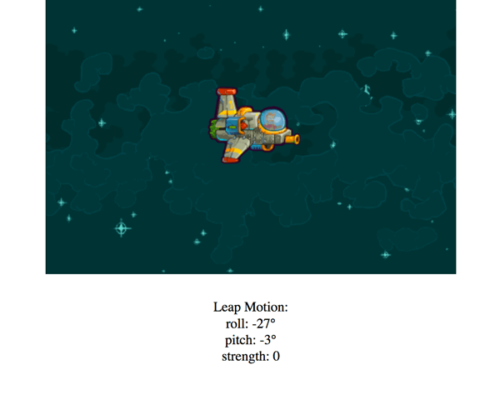
Instead of pressing the buttons on a remote, you can use the ability of a Leap Motion device to detect your hand position and other parameters to take control of the player’s ship without touching anything. In a predefined loop we can get the hand details…
Leap.loop({
    hand: function(hand) {
        horizontalDegree = Math.round(hand.roll() * toDegrees);
        verticalDegree = Math.round(hand.pitch() * toDegrees);
        grabStrength = hand.grabStrength;
    }
});
…and use them to update the player’s position:
function draw() {
    // ...
    if(horizontalDegree > degreeThreshold) {
        playerX -= 5;
    }
    else if(horizontalDegree < -degreeThreshold) {
        playerX += 5;
    }
    if(verticalDegree > degreeThreshold) {
        playerY += 5;
    }
    else if(verticalDegree < -degreeThreshold) {
        playerY -= 5;
    }
    if(grabStrength == 1) {
        alert('BOOM!');
    }
    // ...
}
You’ll find the implementation of other interesting control mechanisms like Doppler effect, Proximity API, or even MaKey MaKey in the Unconventional controls article.
Summary
These days, there’s a growing collection of devices large and small you can use to play HTML5 games. Your watch? A voice-activated web game? The possibilities are endless. And remember: the more control mechanisms your game can support, the better, because then it can be played on wide range of devices, on every possible platform. Take advantage of the opportunities enabled by the browser.
About Andrzej Mazur
HTML5 Game Developer, Enclave Games indie studio founder, js13kGames competition creator, and Gamedev.js Weekly newsletter publisher. Tech Speaker passionate about new, open web technologies, excited about WebXR and Web Monetization.
2 comments