
Like any developer, I love any shiny new tech demo that finds its way into my browser; some of the things people are putting together absolutely blows my mind with the level of creativity and technical skill on show.
After attending WebDevConf 2012 in mid October, I felt the usual heightened sense of inspiration that a good conference gives us all. On my way back to London, I happened to see a tweet about the current Mozilla Dev Derby in my Twitter stream and, still inspired, thought about creating something to enter myself. That something turned into a tech demo called Media Query Mario; a mash up of Media Queries, CSS3 Animations and HTML5 audio.
Where to start?
Thinking of the idea came as a result of which new technologies I wanted to experiment with the most at the time. I had been meaning to delve into CSS animation for some time and combining this with media queries – the focus of that months Dev Derby – seemed pretty logical. Letting the CSS fire off the animations instead of needing JavaScript to do this seemed like a very natural fit.
Choosing Mario 3 for the animation was simply the first thing that popped into my head. I wanted the animation to be a side scrolling 2D affair and being a retro game nerd, Mario instantly came to mind. Anyone with more than a fleeting interest in 2D Mario games would then see that Mario 3 was the only real choice for my animation (although I’m free to argue against any opposing opinions on the ‘best’ 2D Mario game anytime!)
One question I’ve been asked since putting the demo out is: why choose CSS animations when other technologies may have been more suitable? The main reason is that I simply wanted to see what they could do. There are plenty of demos showcasing just how awesome canvas and SVG are; my demo is by no means meant to advocate the use of CSS animations over those technologies. I just wanted to give a decent benchmark of where CSS animation is at right now, and at least add them to the conversation when people are choosing which technology is right for their project.
There was only one rule I set myself when starting to put together the demo – I wanted to stick rigidly to animating using CSS wherever possible. If it was possible to do something in CSS, I wanted to use it, irrespective of performance or how fiddly it was to implement. I’ll come back to how I think it performed in retrospect later.
Push any button to start
One of the earliest issues I came up against was knowing what width the user would be viewing the animation at. This was not only important in terms of what size to design the animation to, but especially in terms of how much of the level was on show at any one time. The more of the level on show, the more I would need to animate at any one time.
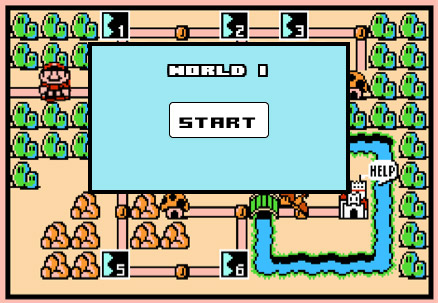
After a little thought around how Mario 3 itself was presented, it made sense to make use of the original menu screen to help control this. As well as acting as a holding screen while the animation assets loaded, it would ensure the user resized their browser window down to a dimension I could specify, before then allowing the animation to be started. This was controlled by adding a conditional media query hiding the animation start button:
@media screen and (max-width: 320px), (min-width: 440px) {
    .startBtn {
        display:none;
    }
}
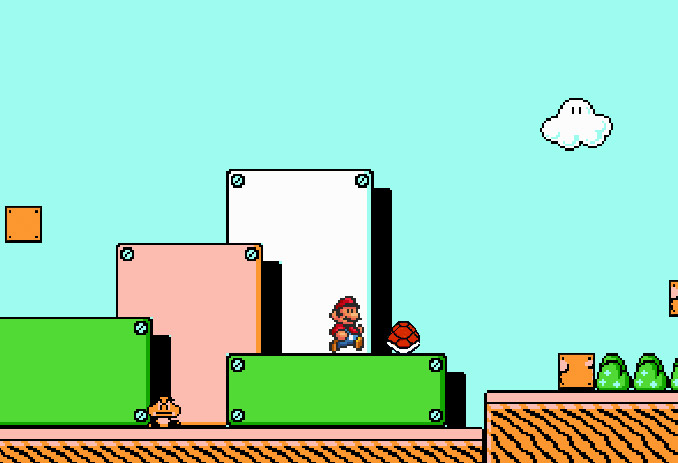
Planning the actual animation itself, I wanted to mirror the way the original game would have been played as much as possible. To help with this I found a video clip that traversed through the level at a pace that I could replicate. This helped me plan the image and sound assets I would need, the speed of the animation and started the thinking around how to animate different enemies and power-ups throughout the level.
With the structure of the demo planned out, I now just needed the assets. As you might expect, you don’t have to search for too long online to find original game images, sprites and sound files. For my demo, I used NESmaps and Mario Mayhem for the level map and character/object sprites and The Mushroom Kingdom for the sound files. I had to do a small amount of image editing myself, but these gave me a really great start.
You can view the final spritesheet I used for the animation below.
![]()
Letsa Go!
So I had an idea planned out and had found my assets; I was ready to start putting it all together in code.
First, I set about learning the specifics of CSS3 animations. A couple of resources really helped me out; MDN is always a great place to start and is no exception for CSS animations. I would also recommend any of these great articles by Peter, Chris or David – all provide an excellent introduction to getting started with CSS3 animations.
I won’t look to replicate the depth those articles cover, but will highlight the key properties I made use of in the demo. For brevity, I’ll be covering the CSS3 syntax unprefixed, but if trying any of this out for yourself, prefixes should be included in your code to ensure the animations work across different browsers.
A quick development tip worth mentioning when using newer CSS3 features such as CSS animations, is that using a preprocessor, such as LESS or SASS, is a massive lifesaver and something I’d highly recommend. Creating mixins that abstract the vendor prefixes out of the code you are directly working with helps keep visual clutter down when writing the code, as well as saving a whole load of time when changing CSS property values down the line.
Before we get into specific techniques used in the demo, we need to understand that an animation consists of two main parts; the animation’s properties and its related keyframes.
Animation Properties
An animation can be built up with a number of related properties. The key properties I made use of were:
//set the name of the animation, which directly relates to a set of keyframes
animation-name: mario-jump;

//the amount of time the animation will run for, in milliseconds or seconds
animation-duration: 500ms;

//how the animation progresses over the specified duration (i.e. ease or linear)
animation-timing-function: ease-in-out;

//how long the animation should wait before starting, in milliseconds or seconds
animation-delay: 0s;

//how many times the animation should execute
animation-iteration-count: 1;

//if and when the animation should apply the rendered styles to the element being animated
animation-fill-mode: forwards;
The use of the animation-fill-mode property was especially important in the demo, as it was used to tell the animation to apply the final rendered styles to the element once the animation had finished executing. Without this, the element would revert to it’s pre-animated state.
So for example, when animating an element’s left position 30 pixels from an initial position of 0px, if no animation-fill-mode is set, the element will return to 0px after animating. If the fill-mode is set to forwards the element will stay positioned at its final position of left: 30px.
Keyframes
The Keyframes at-rule lets you specify the steps in a CSS animation. At its most basic level this could be defined as:
@keyframes mario-move {
    from { left:0px;   }
    to   { left:200px; }
}
Where from and to are keywords for 0% and 100% of the animation duration respectively. To show a more complex example we can also code something like this, which, relating back to the demo, animates Mario jumping between several platforms using multiple keyframes:
@keyframes mario-jump-sequence {
    0% { bottom:30px; left: 445px; }
    20% { bottom:171px; left: 520px; }
    30% { bottom:138px; left: 544px; }
    32% { bottom:138px; left: 544px; }
    47% { bottom:228px; left: 550px; }
    62% { bottom:138px; left: 550px; }
    64% { bottom:138px; left: 550px; }
    76% { bottom:233px; left: 580px; }
    80% { bottom:253px; left: 590px; }
    84% { bottom:273px; left: 585px; }
    90% { bottom:293px; left: 570px; }
    100% { bottom:293px; left: 570px; }
}
So if the above animation was 1 second long, Mario would move from position bottom: 30px; left: 445px; at 0 seconds (0% through the animation) to bottom: 138px; left: 520px; during the first 200ms (or 20%) of your animation. This carries on like this throughout the keyframes defined.
Animating the action
Considering the above, the type of animations I created in the demo can be broken down into 3 broad categories:
- Movement such as Mario jumping or a coin appearing out of a question box.
- Spriting controls the background-image position of characters and objects in the animation.
- Looping any animation that is to be repeated for x number of milliseconds or seconds.
Movement
Movement covers roughly 75% of all of the animations in the demo. For example, this includes character movement (i.e. Mario running and jumping), power-ups appearing and question boxes being hit. What makes each movement animation differ is the animation-timing-function, the animation-duration and the animation-delay properties.
The animation-timing-function property helps control the speed of the animation over its duration. Wherever possible I used easing, such as ease-in or ease-in-out to save having to be too precise when defining animation keyframes. Where this didn’t create the effect I needed, I resorted to setting the animation-timing-function to linear and using the keyframes to specify the exact movement I required.
An example a movement animation can be seen by this jump sequence.
Spriting
To control the image background-position of the characters and objects in the animation, I used the step-end timing-function:
.mario {
    animation-timing-function: step-end;
    ...
}
Initially, I thought I may need to use JavaScript to control the image spriting by adding and removing classes to my elements. However, after experimenting with how the step-end timing keyword was implemented, I found it perfectly stepped through the keyframes I had defined, one keyframe at a time.
To show this in action, take a look at the following examples, which show a simple Mario walking animation and Mario transforming after grabbing a power-up.
Using step-end in this way wasn’t completely pain free however. To my frustration, when these sprite animations were stacked up over multiple media queries, I found that there was a glitch in WebKit that caused the animation to render differently to the keyframes I had defined. Admittedly, the use of CSS animations in this way is an edge case for browser rendering, but I have filed it as a bug in Chromium, and am hopeful this will be looked at in the future and ironed out.
LOOPING
Whenever an animation needed to be repeated over a period of time, looping was defined by adjusting the animation-iteration-count:
//the animation repeats 5 times
animation-iteration-count: 5;

//the animation repeats infinitely
animation-iteration-count: infinite;
An example of this from the demo would be the rotation of the fireball].
Through these 3 types of animation, the whole demo was constructed. The final layer was to add in the audio.
Adding Audio
Although I had previously downloaded all of the sound files I needed in .wav format, I had to convert them into a format that was usable with HTML5 audio; .ogg and .mp3. I used Switch Audio Convertor (on Mac) to do this, but any good audio conversion software should do the job.
Once I had the converted files, I needed to detect which file type to serve to the browser. This required a couple of lines of JavaScript to detect support:
var audio = new Audio(); //define generic audio object for testing
var canPlayOgg = !!audio.canPlayType && audio.canPlayType('audio/ogg; codecs="vorbis"') !== "";
var canPlayMP3 = !!audio.canPlayType && audio.canPlayType('audio/mp3') !== "";
I then created a function to set some default audio parameters for each sound, as well as setting the source file based on the format previously detected to be supported by the browser:
//generic function to create all new audio elements, with preload
function createAudio (audioFile, loopSet) {
    var tempAudio = new Audio();
    var audioExt;

    //based on the previous detection set our supported format extension
    if (canPlayMP3) {
        audioExt = '.mp3';
    } else if (canPlayOgg) {
        audioExt = '.ogg';
    }

    tempAudio.setAttribute('src', audioFile + audioExt); //set the source file
    tempAudio.preload = 'auto'; //preload the sound file so it is ready to play

    //set whether the sound file would loop or not
    //looping was used for the animations background music
    tempAudio.loop = (loopSet === true ? true : false);

    return tempAudio;
}
var audioMarioJump = createAudio("soundboard/smb3_jump"); //an example call to the above function
It was then just a case of playing the sound at the correct time in sync with the animation. To do this, I needed to use JavaScript to listen for the animation events animationstart and animationend – or in WebKit, webkitAnimationStart and webkitAnimationEnd. This allowed me to listen to when my defined animations were starting or ending and trigger the relevant sound to play.
When an event listener is fired, the event returns the animationName property, which we can use as an identifier to play the relevant sound:
mario.addEventListener('animationstart', marioEventListener);

function marioEventListener(e) {
    if (e.animationName === 'mario-jump') {
        audioMarioJump.play();
    }
}
If you have multiple animationstart events for one element, such as Mario in my demo, you can use a switch statement to handle the animationName that has triggered the event listener.
Since writing the demo, I have found that you can also target individual keyframes in an animation by using the Keyframe Event JS shim by Joe Lambert, which gives you even more control over when you can hook into your animation.
Game Complete
The response to the demo has been more positive than I’d ever hoped for since it was released. Like any hack, there are things I’d like to go back and improve with more time, but I think it’s more valuable to put what I learned into my next project. I think that the demo has shown that CSS animations can be used to create some amazing effects from fairly simple code, but also brought one bigger issue to my mind while putting it together.
While complex CSS animations actually perform very well, the creation of such an animation is fairly longwinded. Sure, there are tools out there designed to help with this, such as Adobe Edge Animate and Sencha Animator, but both of these output CSS animations wrapped up in JavaScript. This seems a massive shame to me, as the power of CSS animations is surely in the fact that they shouldn’t have to rely on another technology to execute. I’m not sure if there is a potential way around this, other than coding it by hand yourself, but if anyone knows of any I’d be interested to hear of them in the comments.
Going back to my earlier comment about comparing CSS animations to using canvas and SVG, I think all have a place at the table when discussing what technology to use for animation. However, the sooner the barrier of time spent to craft complex animations like this one can be lowered, the more relevance, and potential use cases, CSS animations will have in the projects that we do.
About Ashley Nolan
Ashley works as a Creative Technologist for TMW. He is an avid fan of all things visual and is very excited by the possibilities new technology is bringing to the web in this area. In his spare time he hacks about with CSS and JavaScript, blogs at dragongraphics.co.uk and can be found tweeting about whatever pops into his head as @dragongraphics.
7 comments