
Version 0.10 of Mozilla’s WebThings Gateway brings support for extension-type add-ons. Released last week, this powerful new capability lets developers modify the user interface (UI) to their liking with JavaScript and CSS.
Although the initial set of extension APIs is fairly minimal, we believe that they will already enable a large amount of functionality. To go along with the UI extensions, developers can also extend the gateway’s REST API with their own handlers, allowing for back-end analytics, for example.
In this post, we’ll walk through a simple example to get you started with building your own extension.
The Basics
If you’re completely new to building add-ons for the WebThings Gateway, there are a couple things you should know.
An add-on is a set of code that runs alongside the gateway. In the case of extensions, the code runs as part of the UI in the browser. Add-ons can provide all sorts of functionality, including support for new devices, the ability to notify users via some outlet, and now, extending the user interface.
Add-ons are packaged up in a specific way and can then be published to the add-on list, so that they can be installed by other users. For best results, developers should abide by these basic guidelines.
Furthermore, add-ons can theoretically be written in any language, as long as they know how to speak to the gateway via IPC (interprocess communication). We provide libraries for Node.js and Python.
The New APIs
There are two new groups of APIs you should know about.
First, the front end APIs. Your extension should extend the Extension class, which is global to the browser window. This gives you access to all of the new APIs. In this 0.10 release, extensions can add new entries to the top-level menu and show and hide top-level buttons. Each extension gets an empty block element that they can draw to as they please, which can be accessed via the menu entry or some other means.
Second, the back end APIs. An add-on can register a new APIHandler. When an authenticated request is made to /extensions/<extension-id>/api/*, your API handler will be invoked with request information. It should send back the appropriate response.
Basic Example
Now that we’ve covered the basics, let’s walk through a simple example. You can find the code for this example on GitHub. Want to see the example in Python, instead of JavaScript? It’s available here.
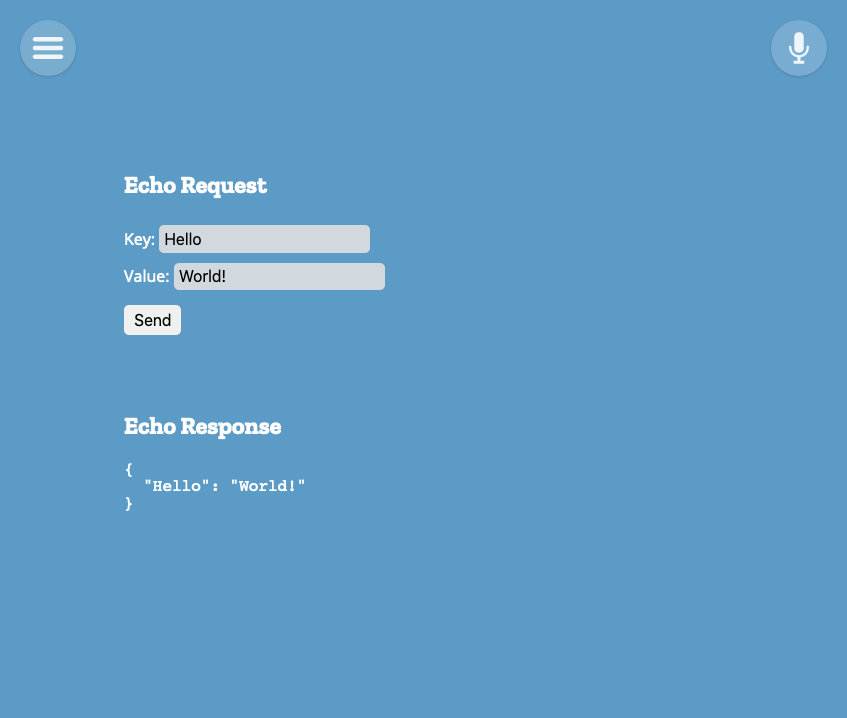
This next example is really basic: create a form, submit the form, and echo the result back as JSON.
Let’s go ahead and create our API handler. For this example, we’ll just echo back what we received.
const {APIHandler, APIResponse} = require('gateway-addon');
const manifest = require('./manifest.json');

/**
* Example API handler.
*/
class ExampleAPIHandler extends APIHandler {
  constructor(addonManager) {
    super(addonManager, manifest.id);
    addonManager.addAPIHandler(this);
  }

  async handleRequest(request) {
    if (request.method !== 'POST' || request.path !== '/example-api') {
      return new APIResponse({status: 404});
    }

    // echo back the body
    return new APIResponse({
      status: 200,
      contentType: 'application/json',
      content: JSON.stringify(request.body),
    });
  }
}
module.exports = ExampleAPIHandler;
The gateway-addon library provides nice wrappers for the API requests and responses. You fill in the basics: status code, content type, and content. If there is no content, you can omit those fields.
Now, let’s create a UI that can actually use the new API we’ve just made.
(function() {
class ExampleExtension extends window.Extension {
constructor() {
super('example-extension');
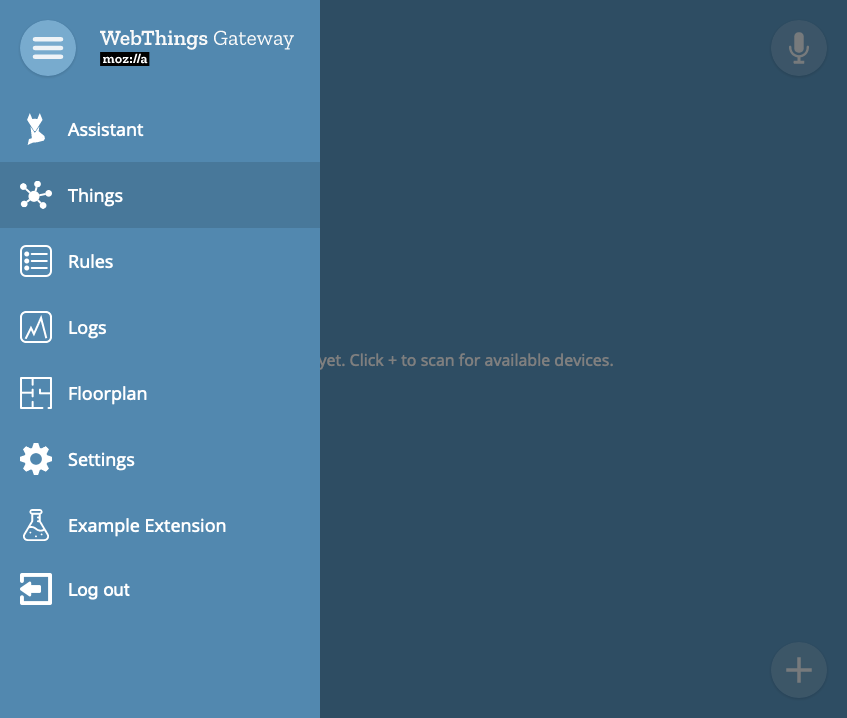
this.addMenuEntry('Example Extension');
this.content = '';
fetch(`/extensions/${this.id}/views/content.html`)
.then((res) => res.text())
.then((text) => {
this.content = text;
})
.catch((e) => console.error('Failed to fetch content:', e));
}
show() {
this.view.innerHTML = this.content;
const key =
document.getElementById('extension-example-extension-form-key');
const value =
document.getElementById('extension-example-extension-form-value');
const submit =
document.getElementById('extension-example-extension-form-submit');
const pre =
document.getElementById('extension-example-extension-response-data');
submit.addEventListener('click', () => {
window.API.postJson(
`/extensions/${this.id}/api/example-api`,
{[key.value]: value.value}
).then((body) => {
pre.innerText = JSON.stringify(body, null, 2);
}).catch((e) => {
pre.innerText = e.toString();
});
});
}
}
new ExampleExtension();
})();The above code does the following things:
- Adds a top-level menu entry for our extension.
- Loads some HTML asynchronously from the server.
- Sets up an event listener for the form to submit it and display the results.
The HTML loaded from the server is not a full document, but rather a snippet, since we’re using it to fill in a <section> tag. You could do all this synchronously within the JavaScript, but it can be nice to keep the view content separate. The manifest for this add-on instructs the gateway which resources to load, and which are allowed to be accessed via the web:
{
  "author": "Mozilla IoT",
  "content_scripts": [
    {
      "css": [
        "css/extension.css"
      ],
      "js": [
        "js/extension.js"
      ]
    }
  ],
  "description": "Example extension add-on for Mozilla WebThings Gateway",
  "gateway_specific_settings": {
    "webthings": {
      "exec": "{nodeLoader} {path}",
      "primary_type": "extension",
      "strict_max_version": "*",
      "strict_min_version": "0.10.0"
    }
  },
  "homepage_url": "https://github.com/mozilla-iot/example-extension",
  "id": "example-extension",
  "license": "MPL-2.0",
  "manifest_version": 1,
  "name": "Example Extension",
  "short_name": "Example",
  "version": "0.0.3",
  "web_accessible_resources": [
    "css/*.css",
    "images/*.svg",
    "js/*.js",
    "views/*.html"
  ]
}
The content_scripts property of the manifest tells the gateway which CSS and JavaScript files to load into the UI. Meanwhile, the web_accessible_resources tells it which files can be accessed by the extension over HTTP. This format is based on the WebExtension manifest.json format, so if you’ve ever built a browser extension, it may look familiar to you.
As a quick note to developers, this new manifest.json format is required for all add-ons now, as it replaces the old package.json format.
Testing the Add-on
To test, you can do the following on your Raspberry Pi or development machine.
- Clone the repository:
cd ~/.mozilla-iot/addons git clone https://github.com/mozilla-iot/example-extension - Restart the gateway:
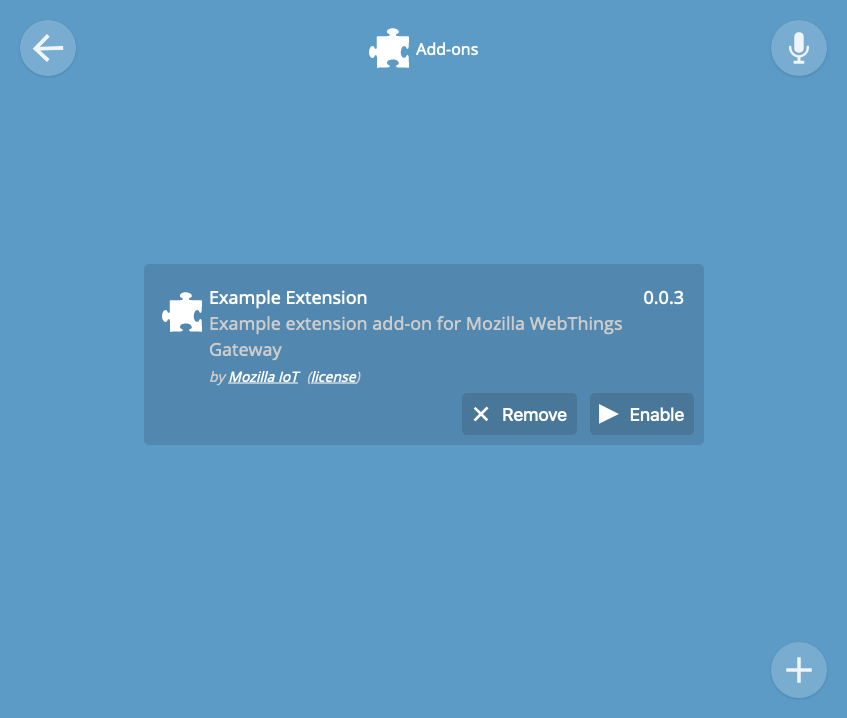
sudo systemctl restart mozilla-iot-gateway - Enable the add-on by navigating to Settings -> Add-ons in the UI. Click the Enable button for “Example Extension”. You then need to refresh the page for your extension to show up in the UI, as extensions are loaded when the page first loads.
Wrapping Up
Hopefully this has been helpful. The example itself is not very useful, but it should give you a nice skeleton to start from.
Another possible use case we’ve identified is creating a custom UI for complex devices, where the auto-generated UI is less than ideal. For instance, an adapter add-on could add an alternate UI link which just links to the extension, e.g. /extensions/<extension-id>. When accessed, the UI will bring up the extension’s interface.
If you have more questions, you can always reach out on Discourse, GitHub, or IRC (#iot). We can’t wait to see what you build!
About Michael Stegeman
Michael is a software engineer at Mozilla working on WebThings.