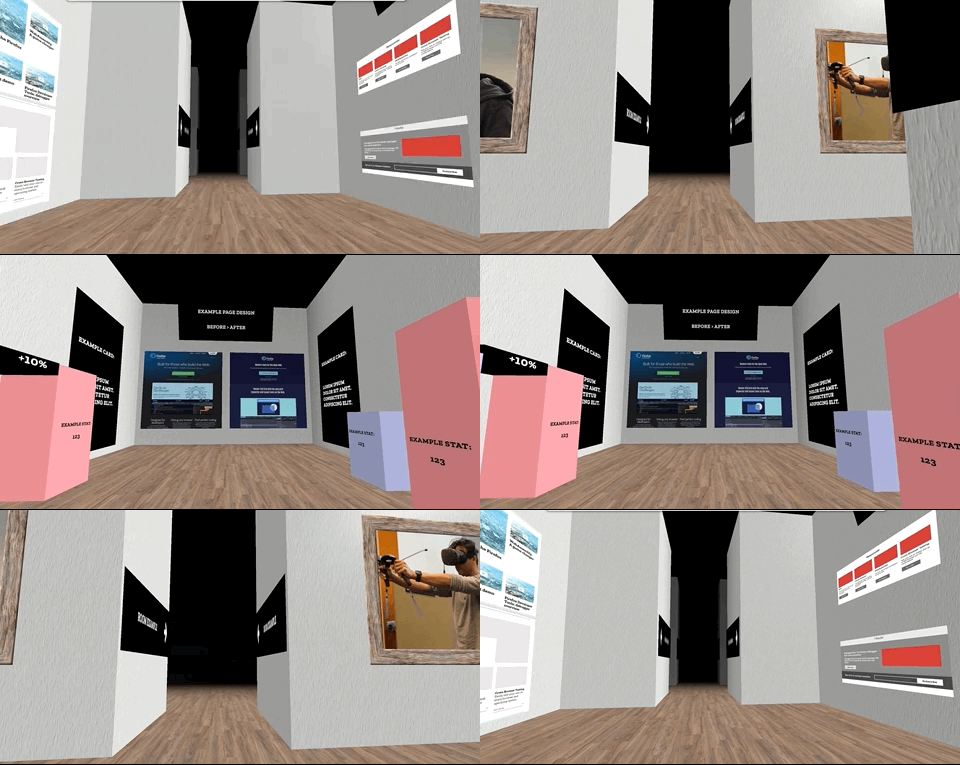
A few months ago, I had the opportunity to try out several WebVR experiences for the first time, and I was blown away by the possibilities. Using just a headset and my Firefox browser, I was able to play games, explore worlds, paint, create music and so much more. All through the open web. I was hooked.
A short while later, I was introduced to A-Frame, a web framework for building virtual reality experiences. The “Hello World” demo is a mere 15 lines of code. This blew my mind. Building an experience in Virtual Reality seems like a task reserved for super developers, or that guy from Mr. Robot. After glancing through the A-Frame documentation, I realized that anyone with a little front-end experience can create something for Virtual Reality…even me – a marketing guy who likes to build websites in his spare time.
My team had an upcoming presentation to give. Normally we would create yet another slide deck. This time, however, I decided to give A-Frame a shot, and use Virtual Reality to tell our story and demo our work.
Within two days I was able to teach myself how to build this (slightly modified for sharing purposes). You can view the GitHub repo here.
The result was a presentation that was fun and unique. People were far more engaged in Virtual Reality than they would have been watching us flip through slides on a screen.
This isn’t a “how-to get started with A-Frame” post (there are plenty of great resources for that). I did, however, find solutions for a few “gotchas” that I’ll share below.
Walking through walls
One of the first snags I ran into was that the camera would pass through objects and walls. After some research, I came across a-frame-extras. It includes an add-on called “kinematic-body” that helped solve this issue for me.
Controls
A-frame extras also has helpers for controls. It gave me an easy way to implement controls for keyboard, mouse, touchscreen, etc.
Generating rooms
It didn’t take me long to figure out how to create and position walls to create a room. I didn’t just want a room though. I wanted multiple rooms and hallways. Manually creating them would take forever. During my research I came across this post, where the author created a maze using an array of numbers. This inspired me to create generate my own map using a similar method:
const map = {
  "data": [
    0, 0, 0, 0, 0, 0, 0, 0, 2, 2, 2, 0, 0, 0, 0, 0, 0, 0, 0,
    0, 0, 0, 0, 0, 0, 0, 2, 0, 0, 0, 2, 0, 0, 0, 0, 0, 0, 0,
    0, 0, 0, 0, 0, 0, 0, 2, 0, 0, 0, 2, 0, 0, 0, 0, 0, 0, 0,
    0, 0, 0, 0, 0, 0, 0, 2, 0, 0, 0, 2, 0, 0, 0, 0, 0, 0, 0,
    0, 0, 0, 0, 0, 0, 0, 0, 1, 0, 1, 0, 0, 0, 0, 0, 0, 0, 0,
    0, 0, 0, 0, 0, 0, 0, 0, 1, 0, 1, 0, 0, 0, 0, 0, 0, 0, 0,
    0, 0, 0, 0, 0, 1, 1, 1, 1, 0, 1, 1, 1, 1, 1, 0, 0, 0, 0,
    0, 0, 0, 0, 1, 0, 0, 0, 1, 0, 1, 0, 0, 0, 1, 0, 0, 0, 0,
    0, 0, 0, 0, 1, 0, 0, 0, 0, 0, 0, 0, 0, 0, 1, 0, 0, 0, 0,
    0, 0, 0, 0, 1, 0, 0, 0, 1, 0, 1, 0, 0, 0, 1, 0, 0, 0, 0,
    0, 0, 0, 0, 0, 1, 1, 1, 1, 0, 1, 1, 1, 1, 0, 0, 0, 0, 0,
    0, 0, 0, 0, 1, 0, 0, 0, 1, 0, 1, 0, 0, 0, 1, 0, 0, 0, 0,
    0, 0, 0, 0, 1, 0, 0, 0, 0, 0, 0, 0, 0, 0, 1, 0, 0, 0, 0,
    0, 0, 0, 0, 1, 0, 0, 0, 1, 0, 1, 0, 0, 0, 1, 0, 0, 0, 0,
    0, 4, 4, 4, 0, 1, 1, 1, 1, 0, 1, 1, 1, 1, 1, 0, 0, 0, 0,
    4, 0, 0, 0, 4, 0, 0, 1, 0, 0, 0, 1, 0, 0, 0, 1, 0, 0, 0,
    4, 0, 0, 0, 4, 4, 4, 1, 0, 8, 0, 0, 0, 0, 0, 1, 0, 0, 0,
    4, 0, 0, 0, 0, 0, 0, 3, 0, 0, 0, 1, 0, 0, 0, 1, 0, 0, 0,
    0, 4, 4, 4, 4, 4, 4, 1, 1, 1, 1, 0, 1, 1, 1, 0, 0, 0, 0
  ],
  "height":19,
  "width":19
}
0 = no walls
1 – 4 = walls with various textures
8 = user start position
9 = log position to console
This would allow me to try different layouts, start at different spots around the map, and quickly get coordinates for positioning items and rooms (you’ll see why this is useful below). You can view the rest of the code here.
Duplicating rooms
Once I created a room, I wanted to recreate a variation of this room at different locations around the map. This is where I learned to embrace the “ object. When you use “ as a container, it allows entities inside the container to be positioned relative to that parent entity object. I found this post about relative positioning to be helpful in understanding the concept. This allowed me to duplicate the code for a room, and simply provide new position coordinates for the parent entity.
Conclusion
I have no doubt that there are better and more efficient ways to create something like this, but the fact that a novice like myself was able to build something in just a couple of days speaks volumes to the power of A-Frame and WebVR. The A-Frame community also deserves a lot of credit. I found libraries, code examples, and blog posts for almost every issue and question I had.
Now is the perfect time to get started with WebVR and A-Frame, especially now that it’s supported for anyone using the latest version of Firefox on Windows. Check out the website, join the community, and start building.
About Dan Brown
Creator, developer, strategist, homebrewer, runner, sock enthusiast, beard evangelist, writer, drummer, adventurer, Oxford comma advocate, and human Swiss Army Knife.


3 comments