
WebVR combines the powerful reach of the Internet with the immersive appeal of virtual reality content. With WebVR, a VR experience is never more than one URL away. Nevertheless, VR equipment is still very expensive and not quite fully adopted for consumer use. For this reason, it is useful to be able to record your VR projects for others to experience and enjoy, at least from a viewer perspective.
Recording VR content
This video tutorial teaches you how to record a virtual experience you’ve created using the mirror mode in SteamVR. Capturing one eye allows your audience to enjoy the video in a regular 2D mode but capturing both eyes will enable a more immersive experience thanks to stereoscopic video.
This video tutorial assumes you have a SteamVR compatible setup and Open Broadcast Software installed.
There are other options for capturing your VR experiences. If you’re a Windows 10 user, perhaps you prefer to use Game DVR, which works out of the box.
Extract a GIF from your favorite cut
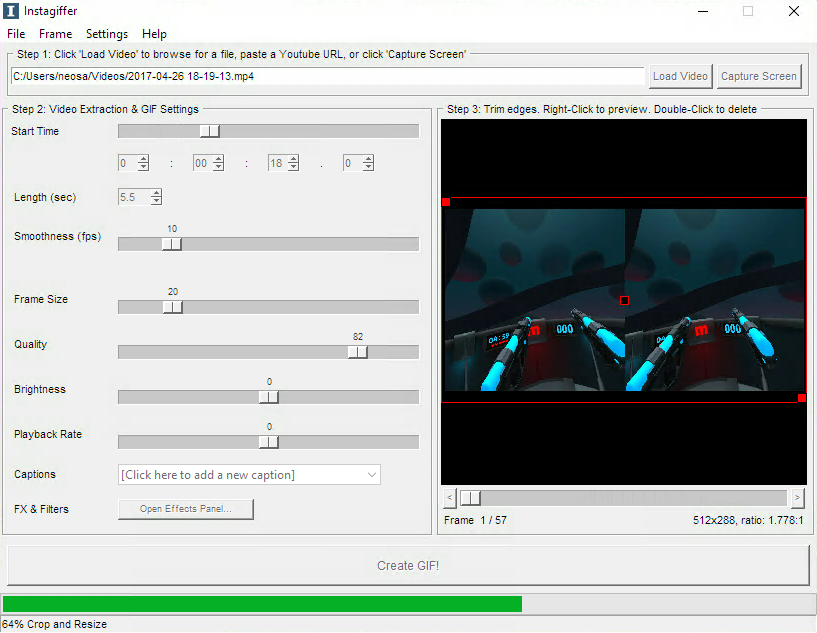
Now that you have a video with your VR content, you can make a GIF from it with Instagiffer for Windows. Instagiffer is not the fastest software out there, but the output quality of the GIFs is superb.
Start by installing and launching Instagiffer. The UI is split into three sections or steps.
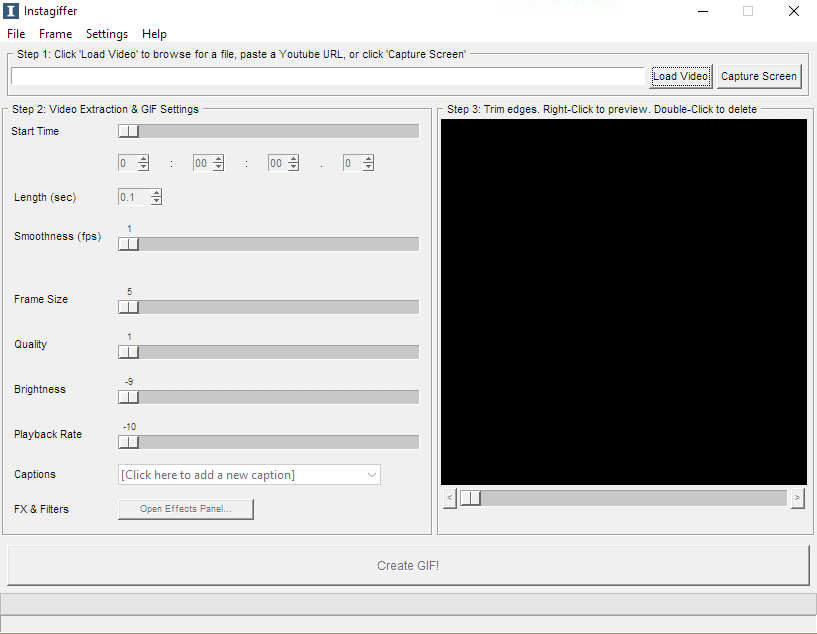
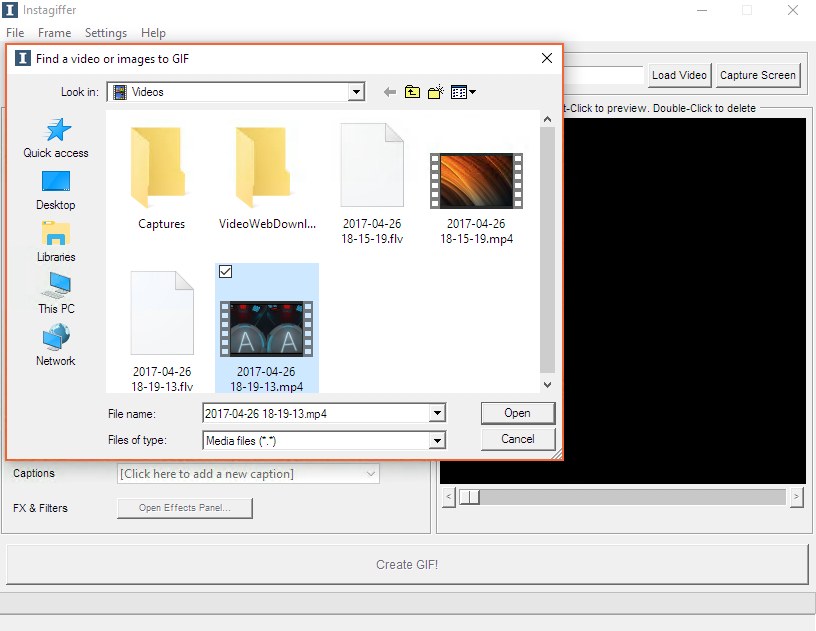
Click on Load Video in the Step 1 section, and select the video from which you want to extract the GIF.
Locate the sequence you want to convert into a GIF and fill the options in the Step 2 section. In this case, I want to extract 5.5 seconds of video starting from second 18; a sequence in which I shot an enemy bullet.
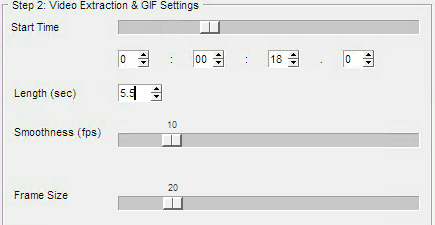
Length, Smoothness and Frame Size will affect the size of your GIF: the higher the values, the higher the size of the resulting file.
In Step 3 section, you can crop the image by dragging the square red helpers. In this case, I’m removing the black bands around the video. You can also use it to isolate each eye.
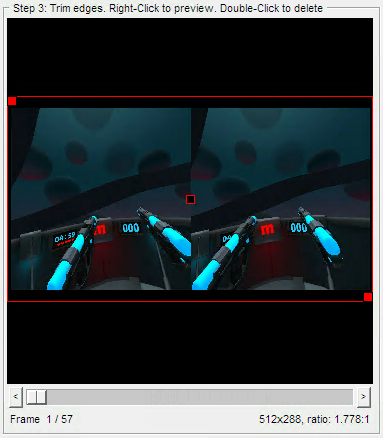
Notice that the size of the GIF is shown in the bottom-right corner of the preview. You can adjust this size by moving the Frame Size slider in the Step 2 section.
Finally, click on the Create GIF! button at the bottom of the window to start the conversion.
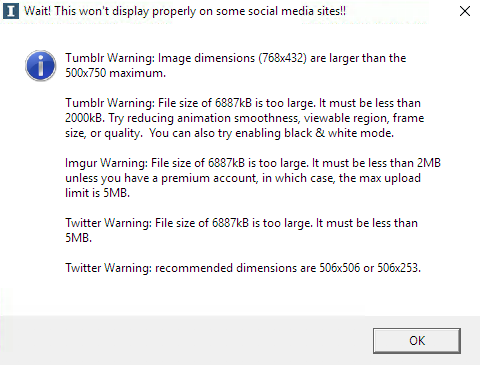
One of the things I love about Instagiffer is that, after finishing, it will display compatibility warnings about the GIF, testing on some of the most popular Internet services.
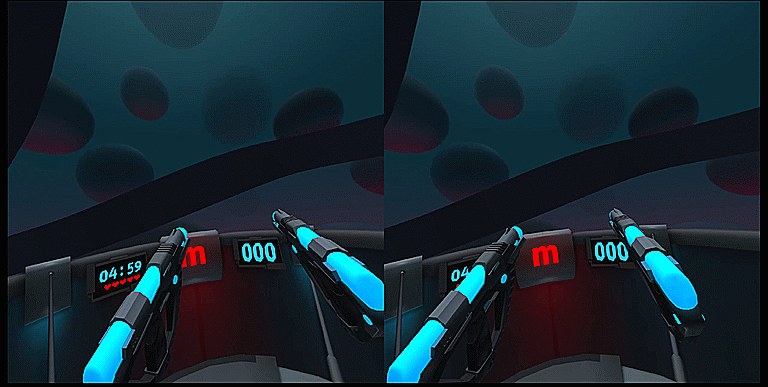
Click on the final result to see the animation. It’s really good!
If you are more into old-school tools, check out Kevin’s CLI utility Gifpardy and see how it goes.
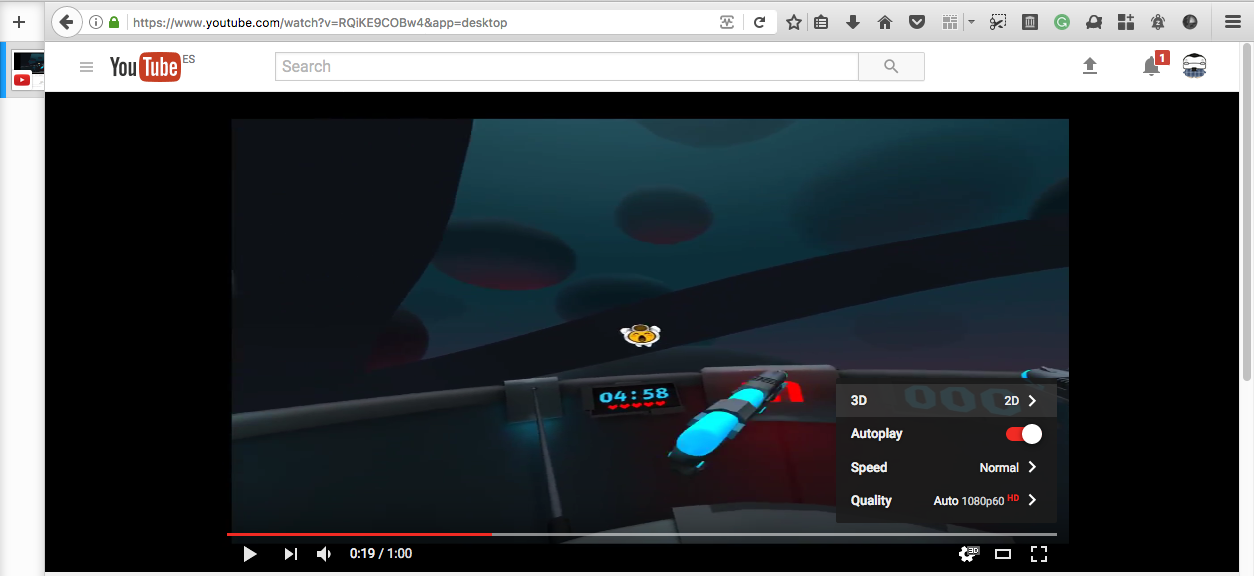
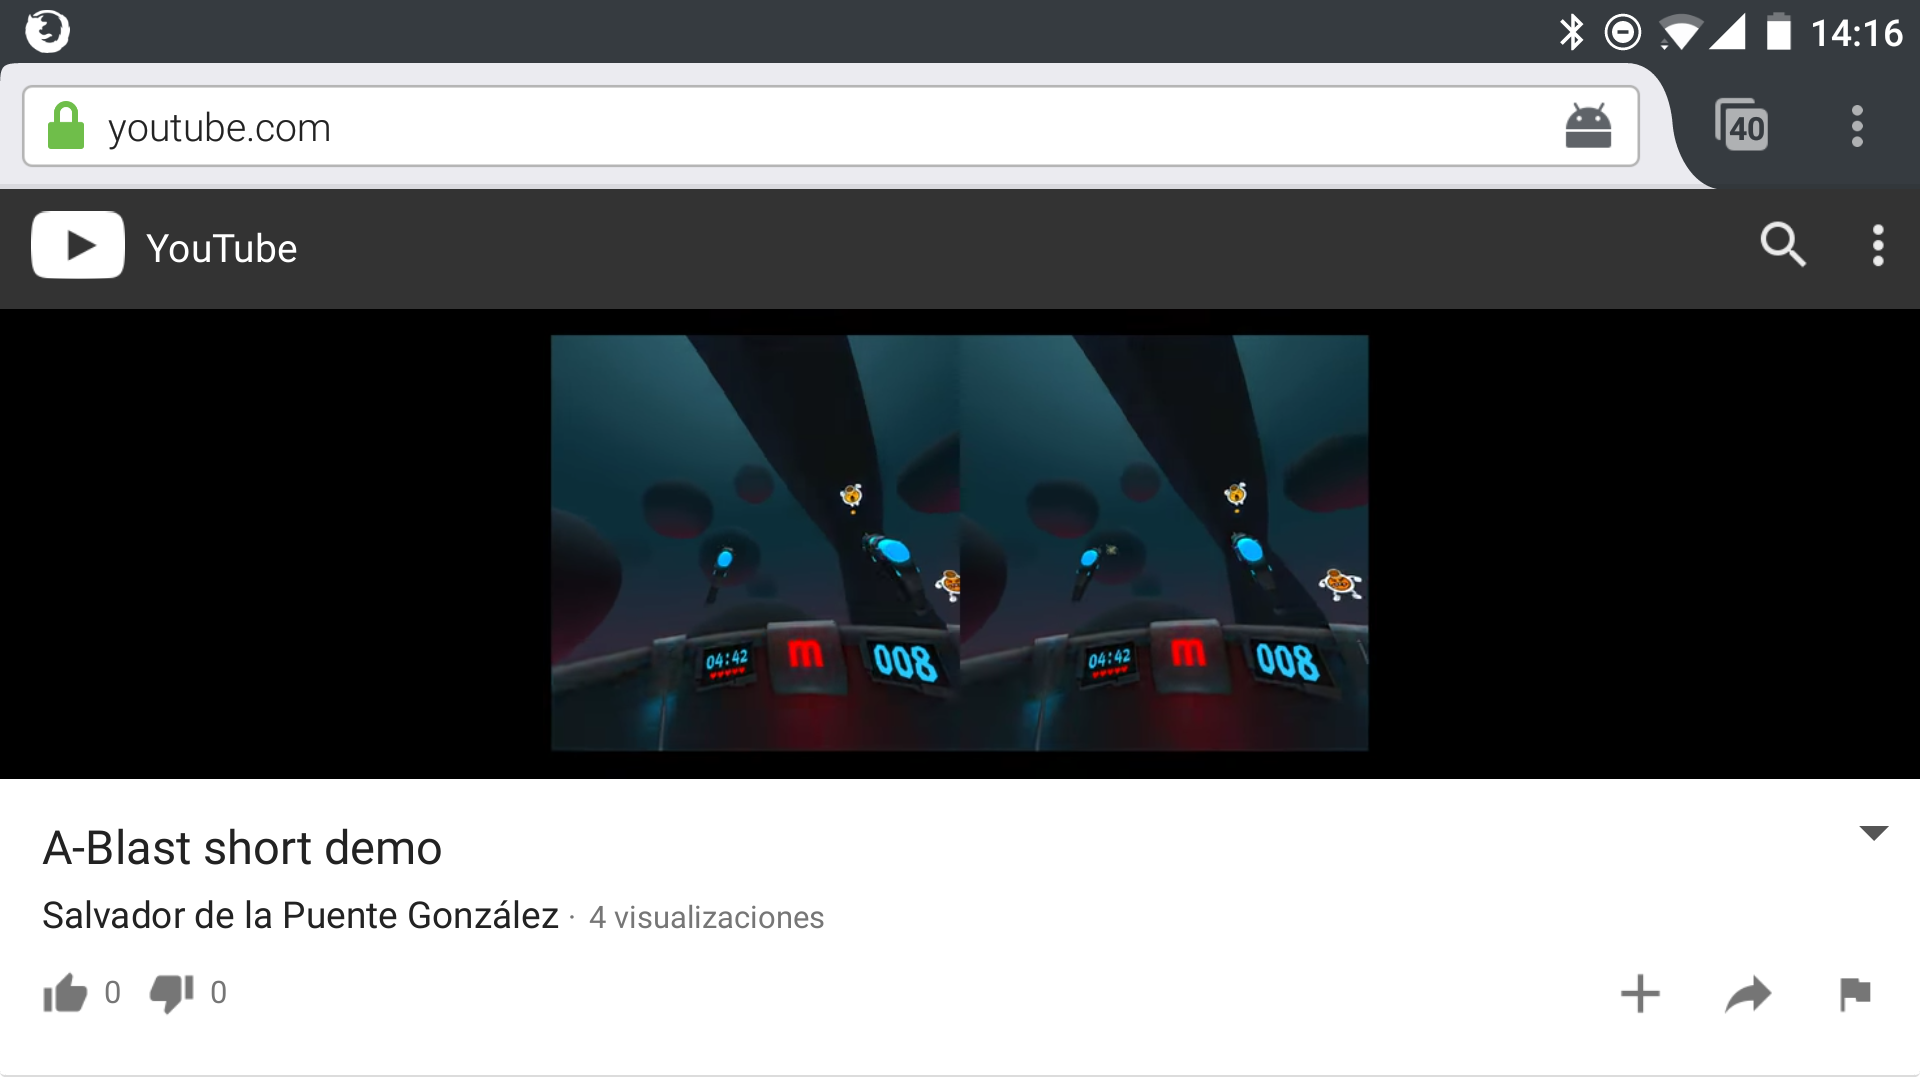
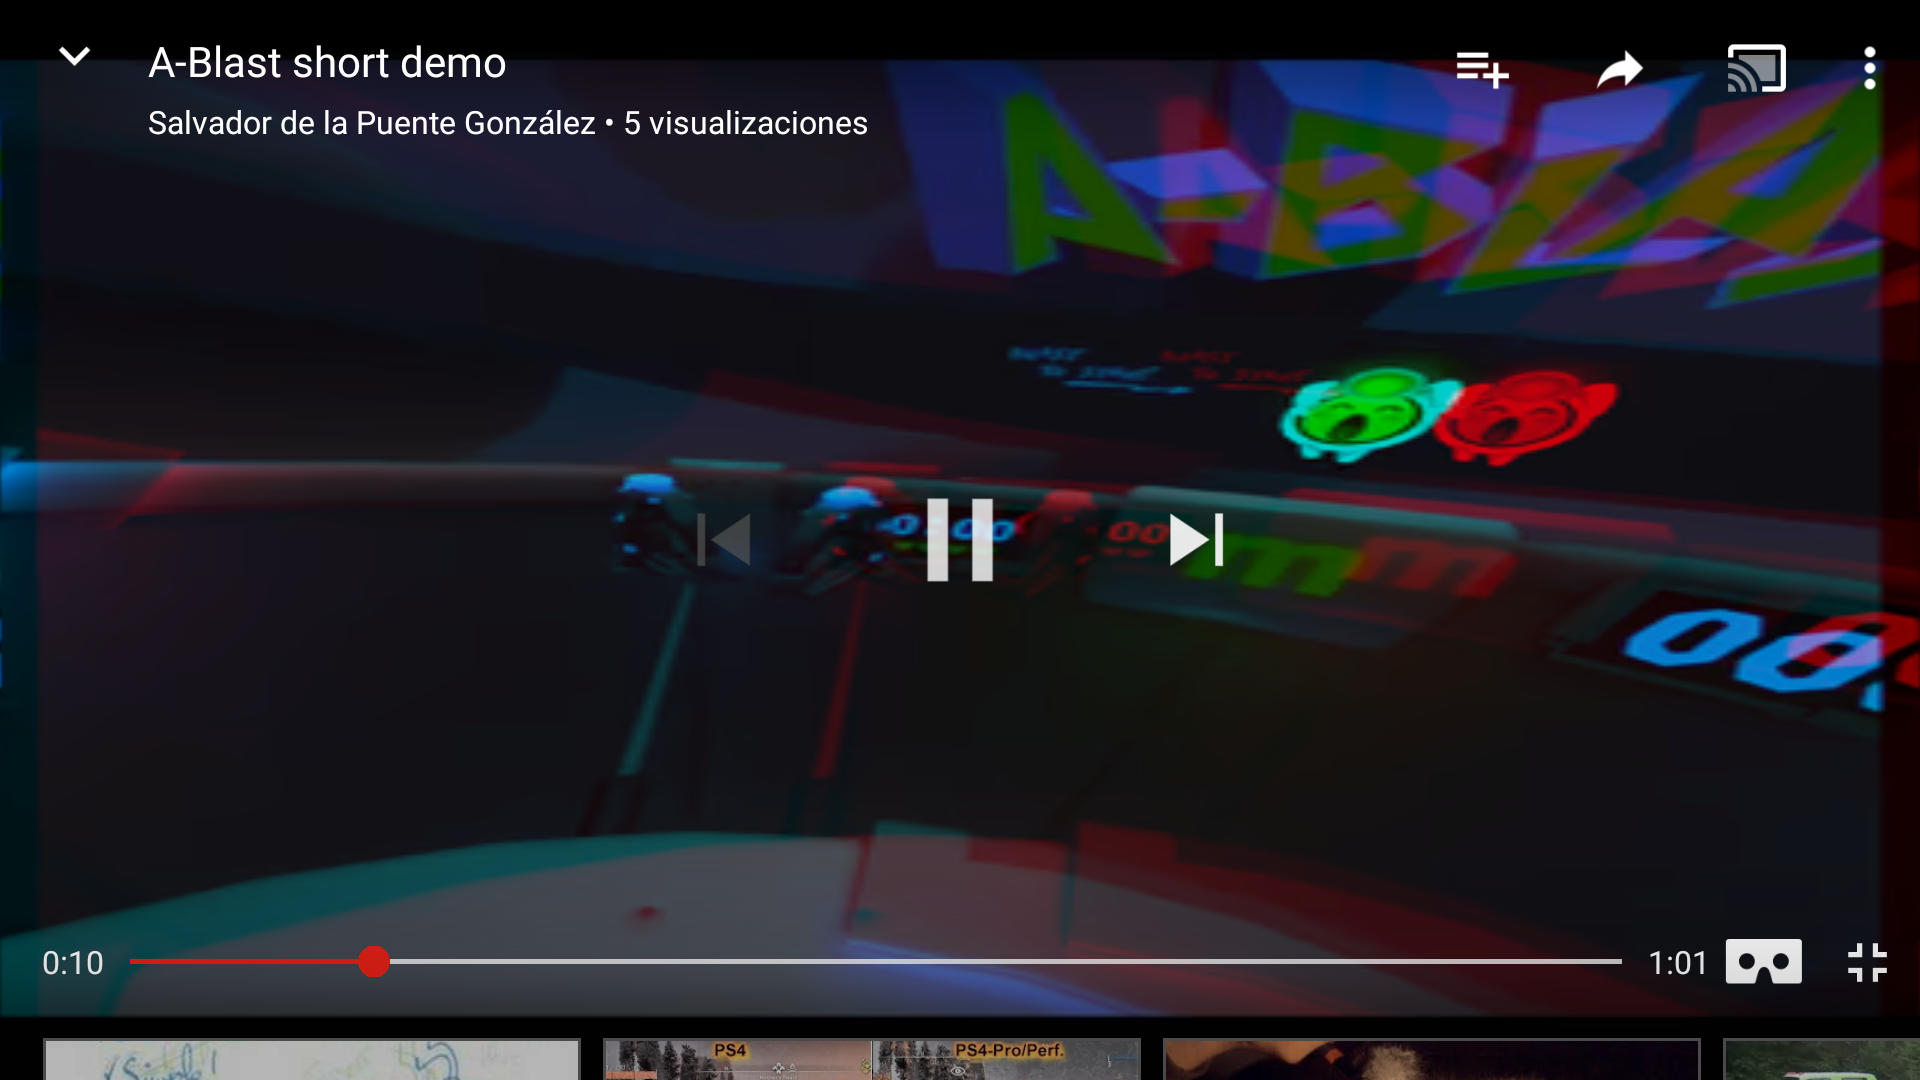
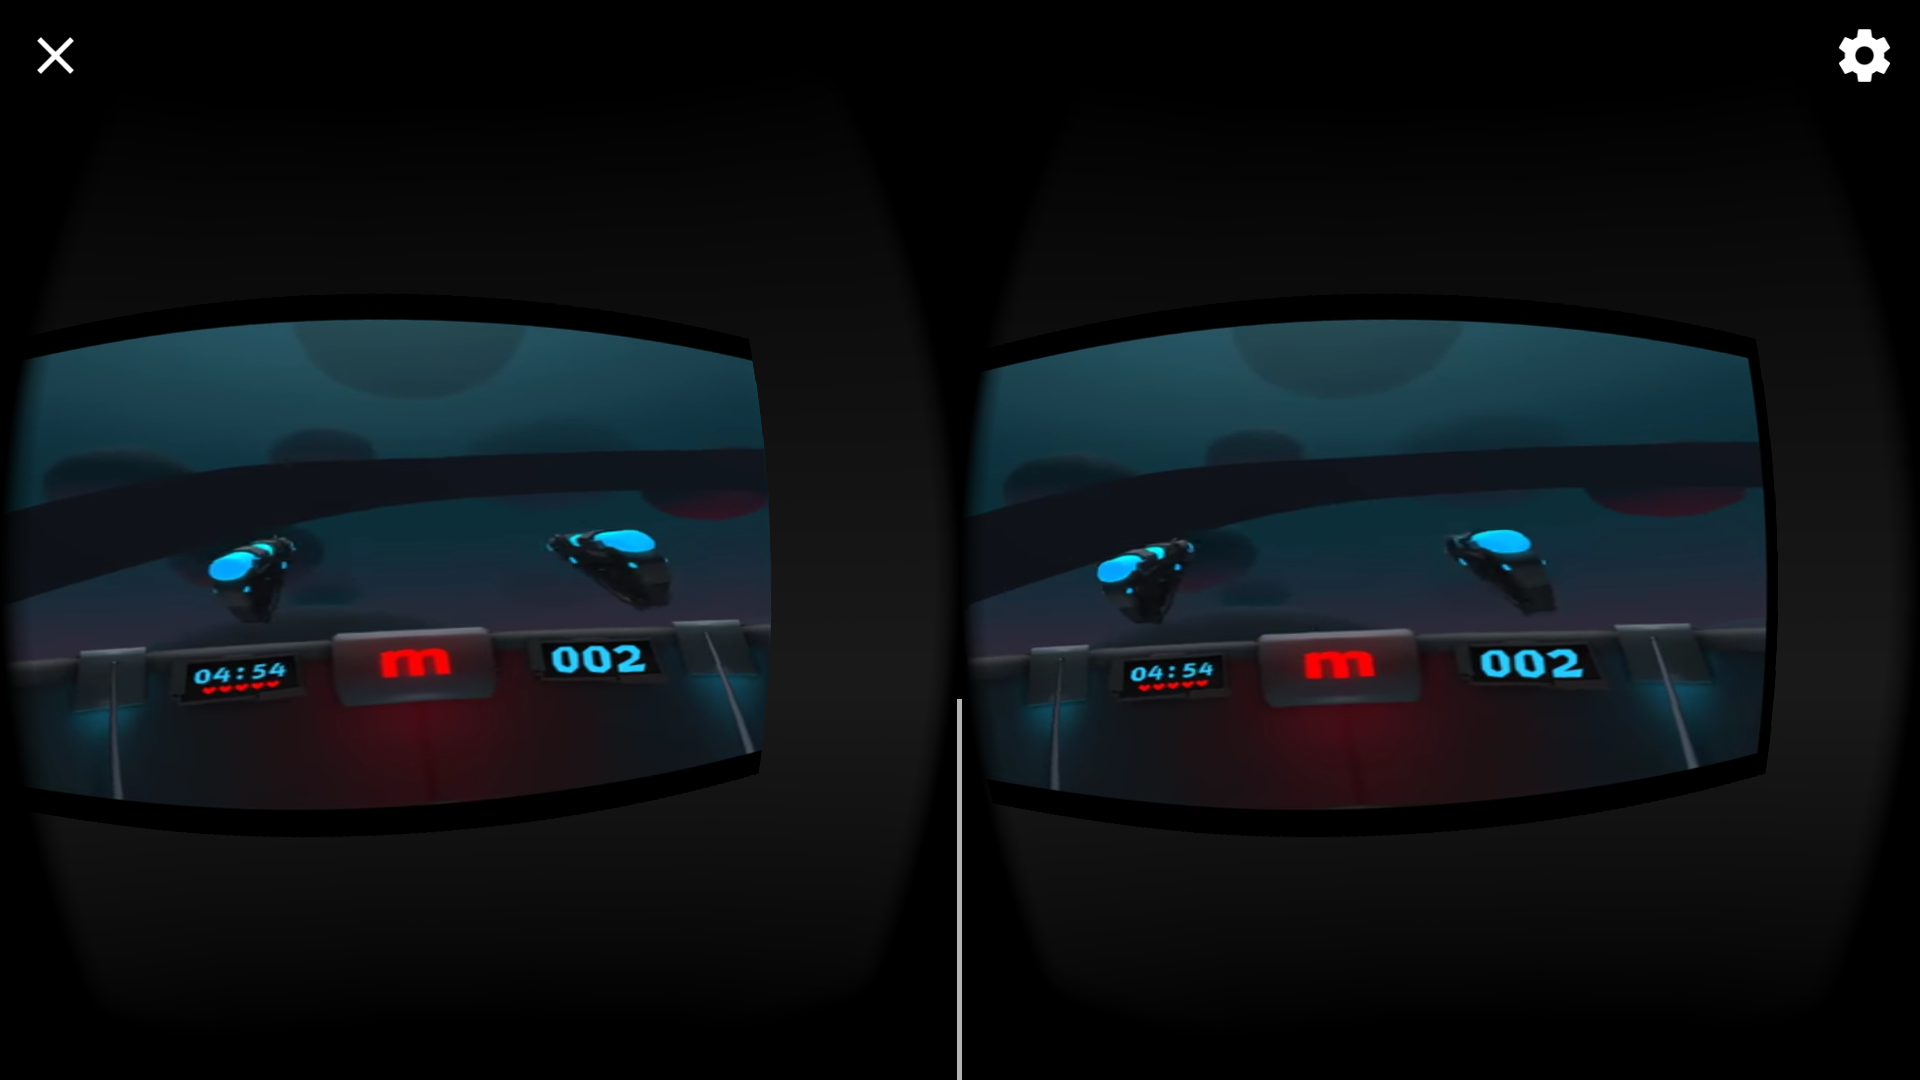
Make a 3D YouTube video
One of the advantages of recording both eyes is that you can assemble stereoscopic side-by-side 3D videos. You can use YouTube, for instance.
Just upload your video and edit it. Go to the Advanced settings tab inside the Info & Settings view.
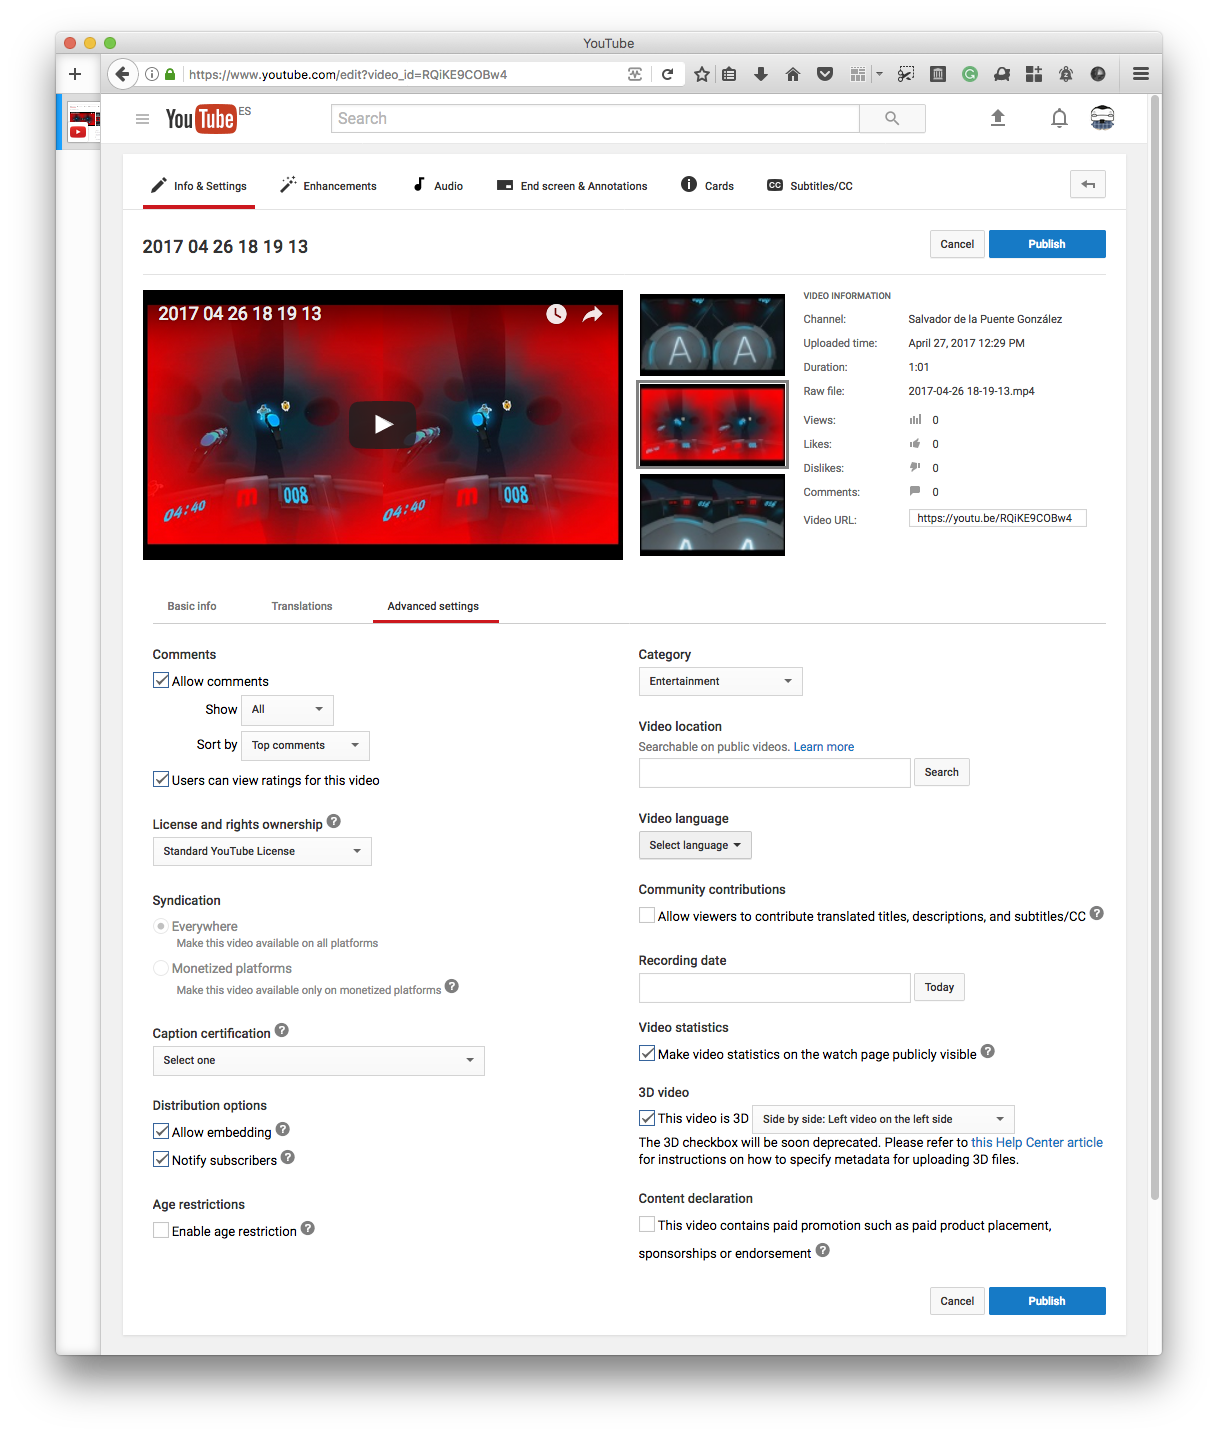
Check the box that says This video is 3D and select Side by side: Left video on the left side in the combo box.

The deprecation warning encourages you to do this step offline, with your favorite video editor.
Once you are done, YouTube will select the best option for displaying 3D content, applying the proper filters or corrections as needed.
For instance, you’ll see an anaglyph representation when viewing your video with the Firefox browser on desktop.

You can switch to a 2D representation as well.
When you view the video with Firefox for Android you will see both eyes side by side.
And if you try with the YouTube native app, an icon for Cardboard/Daydream VR will appear, transporting you to a virtual cinema where you can enjoy the clip.
In conclusion
Virtual reality is not widely adopted or easily accessible yet, but the tools are available now to reach more people and distribute your creative work by recording your WebVR demos in video. Discover VR galleries on Twitter, GIPHY or Tumblr, choose your best clips and share them!
Do you prefer high quality video? Check out the VR content on YouTube or Vimeo.
At Mozilla, we support the success of WebVR and aim to demonstrate that people can share and enjoy virtual reality experiences on the Web! Please share your WebVR projects with the world. We’d love to see what you’re making. Let us know on Twitter by tagging your project with #aframevr, and we’ll RT it! Follow @AframeVR and @MozillaVR for the latest developments and new creative work.
About Salva
Front-end developer at Mozilla. Open-web and WebVR advocate, I love programming languages, cinema, music, video-games and beer.
One comment