
The tools to get funded by the crowd should belong to the crowd.
That's why I want to show you how to roll your own crowdfunding site, in less than 300 lines of code. Everything in this tutorial is open source, and we'll only use other open-source technologies, such as Node.js, MongoDB, and Balanced Payments.
Here's the Live Demo.
All source code and tutorial text is Unlicensed.
0. Quick Start
If you just want the final crowdfunding site, clone the crowdfunding-tuts repository and go to the /demo folder.
All you need to do is set your configuration variables, and you’re ready to go! For everyone who wants the nitty gritty details, carry on.
1. Setting up a basic Node.js app with Express
If you haven’t already done so, you’ll need to install Node.js. (duh)
Create a new folder for your app. We’ll be using the Express.js framework to make things a lot more pleasant. To install the Express node module, run this on the command line inside your app’s folder:
npm install express
Next, create a file called app.js, which will be your main server logic. The following code will initialize a simple Express app,
which just serves a basic homepage and funding page for your crowdfunding site.
// Configuration
var CAMPAIGN_GOAL = 1000; // Your fundraising goal, in dollars
// Initialize an Express app
var express = require('express');
var app = express();
app.use("/static", express.static(__dirname + '/static')); // Serve static files
app.use(express.bodyParser()); // Can parse POST requests
app.listen(1337); // The best port
console.log("App running on http://localhost:1337");
// Serve homepage
app.get("/",function(request,response){
// TODO: Actually get fundraising total
response.send(
""+
"Your Crowdfunding Campaign
"+
"raised ??? out of $"+CAMPAIGN_GOAL.toFixed(2)+"
"+
"Fund This"
);
});
// Serve funding page
app.get("/fund",function(request,response){
response.sendfile("fund.html");
});
Create another file named fund.html. This will be your funding page.
Donation Page:
Optionally, you may also include a stylesheet at /static/fancy.css,
so that your site doesn’t look Hella Nasty for the rest of this tutorial.
@import url(https://fonts.googleapis.com/css?family=Raleway:200);
body {
    margin: 100px;
    font-family: Raleway; /* Sexy font */
    font-weight: 200;
}
Finally, run node app on the command line to start your server!
Check out your crowdfunding site so far at http://localhost:1337.
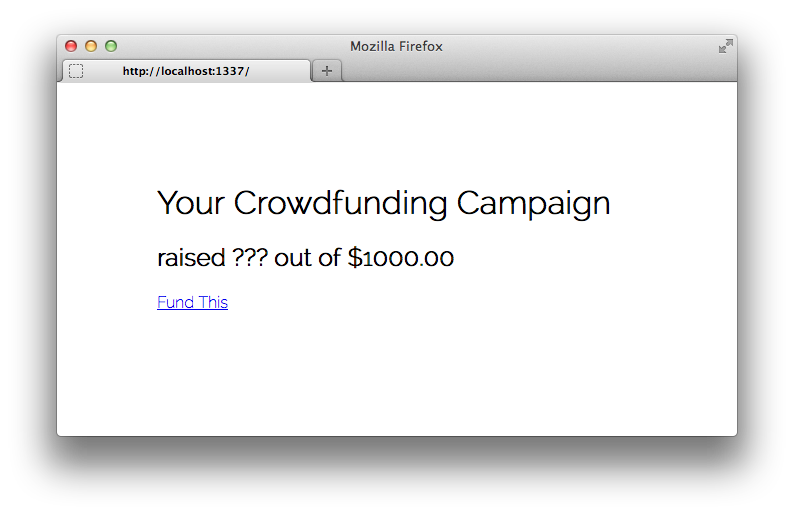
The homepage will display the Campaign Goal you set in the Configuration section of app.js. The donations page isn’t functional yet, so in the following chapters, I’ll show you how to accept and aggregate credit card payments from your wonderful backers.
2. Getting started with Balanced Payments
Balanced Payments isn’t just another payments processor. They’ve open sourced their whole site, their chat logs are publicly available, and they even discuss their roadmap in the open. These people get openness.
Best of all, you don’t even need to sign up to get started with Balanced!
Just go to this link, and they’ll generate a brand-new Test Marketplace for you,
that you can claim with an account afterwards. Remember to keep this tab open, or save the URL, so you can come back to your Test Marketplace later.

Click the Settings tab in the sidebar, and note your Marketplace URI and API Key Secret.
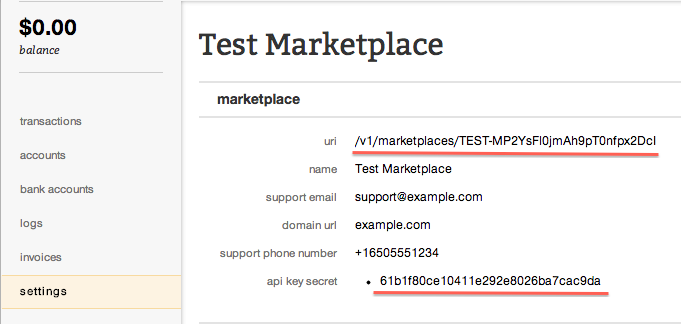
Copy these variables to the Configuration section of app.js like this:
// Configuration
var BALANCED_MARKETPLACE_URI = "/v1/marketplaces/TEST-YourMarketplaceURI";
var BALANCED_API_KEY = "YourAPIKey";
var CAMPAIGN_GOAL = 1000; // Your fundraising goal, in dollars
Now, let’s switch back to fund.html to create our actual payment page.
First, we’ll include and initialize Balanced.js. This Javascript library will securely tokenize the user’s credit card info, so your server never has to handle the info directly. Meaning, you will be free from PCI regulations. Append the following code to fund.html, replacing BALANCED_MARKETPLACE_URI with your actual Marketplace URI:
Next, create the form itself, asking for the user’s Name, the Amount they want to donate, and other credit card info. We will also add a hidden input, for the credit card token that Balanced.js will give us. The form below comes with default values for a test Visa credit card. Append this to fund.html:
Notice the Pay button does not submit the form directly, but calls a charge() function instead, which we are going to implement next. The charge() function will get the credit card token from Balanced.js,
add it as a hidden input, and submit the form. Append this to fund.html:
This form will send a POST request to /pay/balanced, which we will handle in app.js. For now, we just want to display the card token URI. Paste the following code at the end of app.js:
// Pay via Balanced
app.post("/pay/balanced",function(request,response){

    // Payment Data
    var card_uri = request.body.card_uri;
    var amount = request.body.amount;
    var name = request.body.name;

    // Placeholder
    response.send("Your card URI is: "+request.body.card_uri);

});
Restart your app, (Ctrl-C to exit, then node app to start again) and go back to http://localhost:1337.
Your payment form should now look like this:
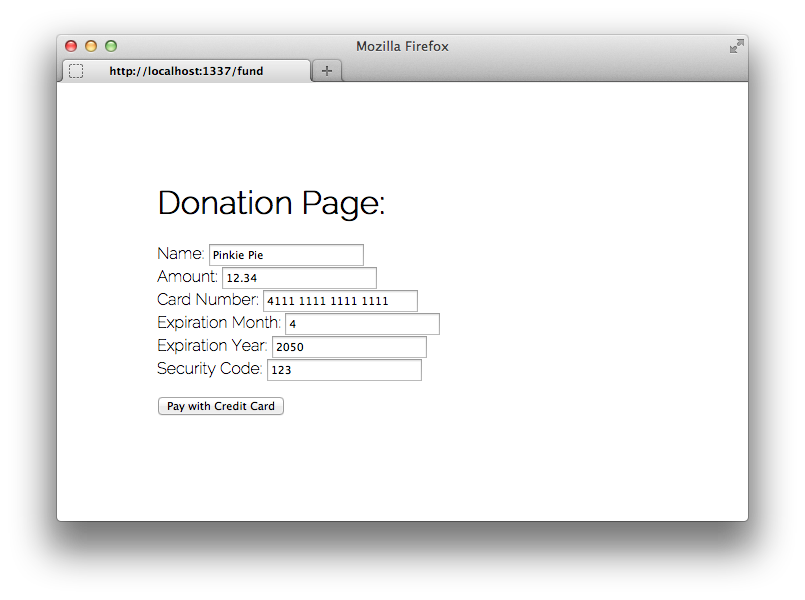
The default values for the form will already work, so just go ahead and click Pay With Credit Card. (Make sure you’ve replaced BALANCED_MARKETPLACE_URI in fund.html with your actual Test Marketplace’s URI!) Your server will happily respond with the generated Card URI Token.
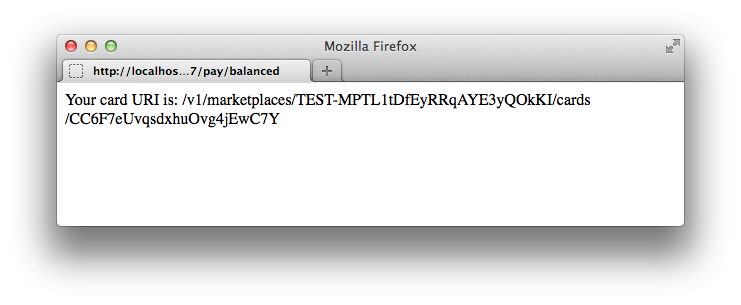
Next up, we will use this token to actually charge the given credit card!
3. Charging cards through Balanced Payments
Before we charge right into this, (haha) let’s install two more Node.js modules for convenience.
Run the following in the command line:
# A library for simplified HTTP requests.
    npm install request
npm install q
A Promises library, to pleasantly handle asynchronous calls and avoid Callback Hell.
Because we’ll be making multiple calls to Balanced, let’s also create a helper method. The following function returns a Promise that the Balanced API has responded to whatever HTTP Request we just sent it. Append this code to app.js:
// Calling the Balanced REST API
var Q = require('q');
var httpRequest = require('request');
function _callBalanced(url,params){

    // Promise an HTTP POST Request
    var deferred = Q.defer();
    httpRequest.post({

        url: "https://api.balancedpayments.com"+BALANCED_MARKETPLACE_URI+url,
        auth: {
            user: BALANCED_API_KEY,
            pass: "",
            sendImmediately: true
        },
        json: params

    }, function(error,response,body){

        // Handle all Bad Requests (Error 4XX) or Internal Server Errors (Error 5XX)
        if(body.status_code>=400){
            deferred.reject(body.description);
            return;
        }

        // Successful Requests
        deferred.resolve(body);

    });
    return deferred.promise;

}
Now, instead of just showing us the Card Token URI when we submit the donation form, we want to:
- Create an account with the Card URI
- Charge said account for the given amount (note: you’ll have to convert to cents for the Balanced API)
- Record the transaction in the database (note: we’re skipping this for now, and covering it in the next chapter)
- Render a personalized message from the transaction
Replace the app.post("/pay/balanced", ... ); callback from the previous chapter with this:
// Pay via Balanced
app.post("/pay/balanced",function(request,response){

    // Payment Data
    var card_uri = request.body.card_uri;
    var amount = request.body.amount;
    var name = request.body.name;

    // TODO: Charge card using Balanced API
    /*response.send("Your card URI is: "+request.body.card_uri);*/

    Q.fcall(function(){

        // Create an account with the Card URI
        return _callBalanced("/accounts",{
            card_uri: card_uri
        });

    }).then(function(account){

        // Charge said account for the given amount
        return _callBalanced("/debits",{
            account_uri: account.uri,
            amount: Math.round(amount*100) // Convert from dollars to cents, as integer
        });

    }).then(function(transaction){

        // Donation data
        var donation = {
            name: name,
            amount: transaction.amount/100, // Convert back from cents to dollars.
            transaction: transaction
        };

        // TODO: Actually record the transaction in the database
        return Q.fcall(function(){
            return donation;
        });

    }).then(function(donation){

        // Personalized Thank You Page
        response.send(
            ""+
            "Thank you, "+donation.name+"!
"+
            "You donated $"+donation.amount.toFixed(2)+".
"+
            "Return to Campaign Page
"+
            "
"+
            "Here's your full Donation Info:
"+
            "<pre>"+JSON.stringify(donation,null,4)+"</pre>"
        );

    },function(err){
        response.send("Error: "+err);
    });

});
Now restart your app, and pay through the Donation Page once again. (Note: To cover processing fees, you have to pay more than $0.50 USD) This time, you’ll get a full Payment Complete page, with personalized information!

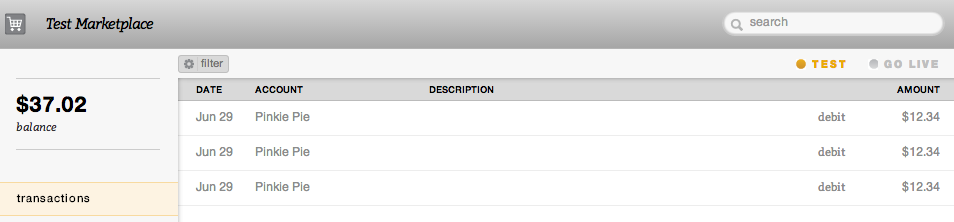
Furthermore, if you check the transactions tab in your Test Marketplace dashboard, you should find that money has now been added to your balance.
We’re getting close! Next, let’s record donations in a MongoDB database.
4. Recording donations with MongoDB
MongoDB is a popular open-source NoSQL database. NoSQL is especially handy for rapid prototyping, because of its dynamic schemas. In other words, you can just make stuff up on the fly.
This will be useful if, in the future, you want to record extra details about each donation, such as the donator’s email address, reward levels, favorite color, etc.
Start up a MongoDB database, and get its URI. You can use a remote database with a service such as MongoHQ, but for this tutorial, let’s run MongoDB locally (instructions for installing and running MongoDB on your computer).
Once you’ve done that, add the MongoDB URI to your Configuration section at the top of app.js.
// Configuration
var MONGO_URI = "mongodb://localhost:27017/test";
var BALANCED_MARKETPLACE_URI = "/v1/marketplaces/TEST-YourMarketplaceURI";
var BALANCED_API_KEY = "YourAPIKey";
var CAMPAIGN_GOAL = 1000; // Your fundraising goal, in dollars
Now, let’s install the native MongoDB driver for Node.js:
npm install mongodb
Add the following code to the end of app.js. This will return a Promise that we’ve recorded a donation in MongoDB.
// Recording a Donation
var mongo = require('mongodb').MongoClient;
function _recordDonation(donation){

    // Promise saving to database
    var deferred = Q.defer();
    mongo.connect(MONGO_URI,function(err,db){
        if(err){ return deferred.reject(err); }

        // Insert donation
        db.collection('donations').insert(donation,function(err){
            if(err){ return deferred.reject(err); }

            // Promise the donation you just saved
            deferred.resolve(donation);

            // Close database
            db.close();

        });
    });
    return deferred.promise;

}
Previously, we skipped over actually recording a donation to a database.
Go back, and replace that section of code with this:
// TODO: Actually log the donation with MongoDB
/*return Q.fcall(function(){
    return donation;
});*/

// Record donation to database
return _recordDonation(donation);
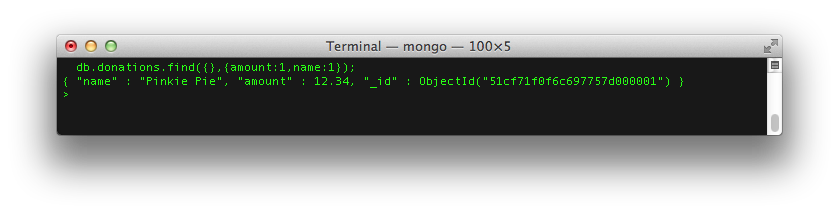
Restart your app, and make another donation. If you run db.donations.find() on your MongoDB instance, you’ll find the donation you just logged!
Just one step left…
Finally, we will use these recorded donations to calculate how much money we’ve raised.
5. Completing the Donation
Whether it’s showing progress or showing off, you’ll want to tell potential backers how much your campaign’s already raised.
To get the total amount donated, simply query for all donation amounts from MongoDB, and add them up. Here’s how you do that with MongoDB, with an asynchronous Promise for it. Append this code to app.js:
// Get total donation funds
function _getTotalFunds(){

    // Promise the result from database
    var deferred = Q.defer();
    mongo.connect(MONGO_URI,function(err,db){
        if(err){ return deferred.reject(err); }

        // Get amounts of all donations
        db.collection('donations')
        .find( {}, {amount:1} ) // Select all, only return "amount" field
        .toArray(function(err,donations){
            if(err){ return deferred.reject(err); }

            // Sum up total amount, and resolve promise.
            var total = donations.reduce(function(previousValue,currentValue){
                return previousValue + currentValue.amount;
            },0);
            deferred.resolve(total);

            // Close database
            db.close();

        });
    });
    return deferred.promise;

}
Now, let’s go back to where we were serving a basic homepage. Let’s change that, to actually calculate your total funds, and show the world how far along your campaign has gotten.
// Serve homepage
app.get("/",function(request,response){
// TODO: Actually get fundraising total
/*response.send(
""+
"Your Crowdfunding Campaign
"+
"raised ??? out of $"+CAMPAIGN_GOAL.toFixed(2)+"
"+
"Fund This"
);*/
Q.fcall(_getTotalFunds).then(function(total){
response.send(
""+
"Your Crowdfunding Campaign
"+
"raised $"+total.toFixed(2)+" out of $"+CAMPAIGN_GOAL.toFixed(2)+"
"+
"Fund This"
);
});
});
Restart the app, and look at your final homepage.

It’s… beautiful.
You’ll see that your total already includes the donations recorded from the previous chapter. Make another payment through the Donations Page, and watch your funding total go up.
Congratulations, you just made your very own crowdfunding site!
– – –
Discuss this on Hacker News
About Nick Liow
Thiel Fellow & Mozilla WebFWD alumni. Crowdfunding the creative commons with Commonly.cc.
About Robert Nyman [Editor emeritus]
Technical Evangelist & Editor of Mozilla Hacks. Gives talks & blogs about HTML5, JavaScript & the Open Web. Robert is a strong believer in HTML5 and the Open Web and has been working since 1999 with Front End development for the web - in Sweden and in New York City. He regularly also blogs at http://robertnyman.com and loves to travel and meet people.
14 comments