
Introducing MSE
Media Source Extensions (MSE) is a new addition to the Web APIs available in all major browsers. This API allows for things like adaptive bitrate streaming of video directly in our browser, free of plugins. Where previously we may have used proprietary solutions like RTSP (Real Time Streaming Protocol) and Flash, we can now use simpler protocols like HTTP to fetch content, and MSE to smoothly stitch together video segments of varied quality.
All browsers that support HTMLMediaElements, such as audio and video tags, already make byte-range requests for subsequent segments of media assets. One problem is that it’s up to each browser’s implementation of a media engine to decide when and how much to fetch. It’s also tough to stitch together or deliver smooth playback of segments of different quality without pauses, gaps, flashes, clicks, or pops. MSE gives us finer-grained control at the application level for fetching and playing back content.
In order to begin streaming, we need to figure out how to transcode our assets into a meaningful byte format for browsers’ media engines, determine what abstractions MSE provides, and figure out how to instruct the browser to play them back.
Having multiple resolutions of content allows us to switch between them while maintaining a constant viewport size. This is known as upscaling, and it’s a common technique for real-time rendering in video games to meet a required frame time. By switching to a lower quality video resolution, we can meet bandwidth limitations at the cost of fidelity. The loss of fidelity causes such artifacts as aliasing, in which curves appear jagged and blocky. This technique can often be seen by Netflix subscribers during peak viewing hours.
Rather than having an advanced protocol like RTSP handle bandwidth estimates, we can use a simpler network protocol like HTTP and move the advanced logic up one level into the application logic.
Transcoding
My recommended tools, ffmpeg and Bento4, are both free and open-source software (FOSS). ffmpeg is our Swiss army knife of transcoding, and Bento4 is a collection of great tools for working with mp4. While I’m partial to non-licensed codecs like webm/vp8-9/opus, current browser support for those containers and codecs is rather poor, so in this post we’ll just be working with mp4/h.264/aac. Both of the tools I’m working with are command line utilities; if you have nice GUI tools in your asset pipeline you’d like to recommend to our readers, let us know in the comments below.
We’ll start with a master of some file, and end up transcoding it into multiple files each of smaller resolutions, then segmenting the smaller-res whole files into a bunch of tiny files. Once we have a bunch of small files (imagine splitting your video into a bunch of 10-second segments), the client can use more advanced heuristics for fetching the preferred next segment.
Our smaller-res copies of the master asset
Proper fragmentation
When working with mp4 and MSE, it helps to know that the mp4 files should be structured so that metadata is fragmented across pieces of the container, and across the actual audio/video streams being fragmented, instead of clustered together. This is specified in the ISO BMFF Byte Stream Format spec, section 3:
“An ISO BMFF initialization segment is defined in this specification as a single File Type Box (ftyp) followed by a single Movie Header Box (moov).”
This is really important: Simply transcoding to an mp4 container in ffmpeg does not have the expected format and thus fails when trying to play back in a browser with MSE. To check and see if your mp4 is properly fragmented, you can run Bento4’s mp4dump on your mp4.
If you see something like:
  $ ./mp4dump ~/Movies/devtools.mp4 | head
  [<span class="red">ftyp</span>] size=8+24
    ...
  [<span class="red">free</span>] size=8+0
  [<span class="red">mdat</span>] size=8+85038690
  [<span class="red">moov</span>] size=8+599967
    ...
Then your mp4 won’t be playable since the [ftyp] “atom” is not followed immediately by a [moov] “atom.” A properly fragmented mp4 looks something like this —
  $ ./mp4fragment ~/Movies/devtools.mp4 devtools_fragmented.mp4
  $ ./mp4dump devtools_fragmented.mp4 | head
  [<span class="lime">ftyp</span>] size=8+28
    ...
  [<span class="lime">moov</span>] size=8+1109
    ...
  [<span class="orange">moof</span>] size=8+600
    ...
  [<span class="orange">mdat</span>] size=8+138679
  [<span class="orange">moof</span>] size=8+536
    ...
  [<span class="orange">mdat</span>] size=8+24490
    ...
  ...
— where mp4fragment is another Bento4 utility. The properly fragmented mp4 has the [ftyp] followed immediately by a [moov], then subsequent [moof]/[mdat] pairs.
It’s possible to skip the need for mp4fragment by using the -movflags frag_keyframe+empty_moov flags when transcoding to an mp4 container with ffmpeg, then checking with mp4dump:
$ ffmpeg <span class="hljs-attribute">-i</span> bunny<span class="hljs-built_in">.y4m</span> -movflags frag_keyframe+empty_moov bunny<span class="hljs-built_in">.</span>mp4Creating multiple resolutions
If we want to switch resolutions, we can then run our fragmented mp4 through Bento4’s mp4-dash-encode.py script to get multiple resolutions of our video. This script will fire up ffmpeg and other Bento4 tools, so make sure they are both available in your $PATH environment variable.
$ python2.7 mp4-dash-encode.py -b 5 bunny.mp4
$ ls
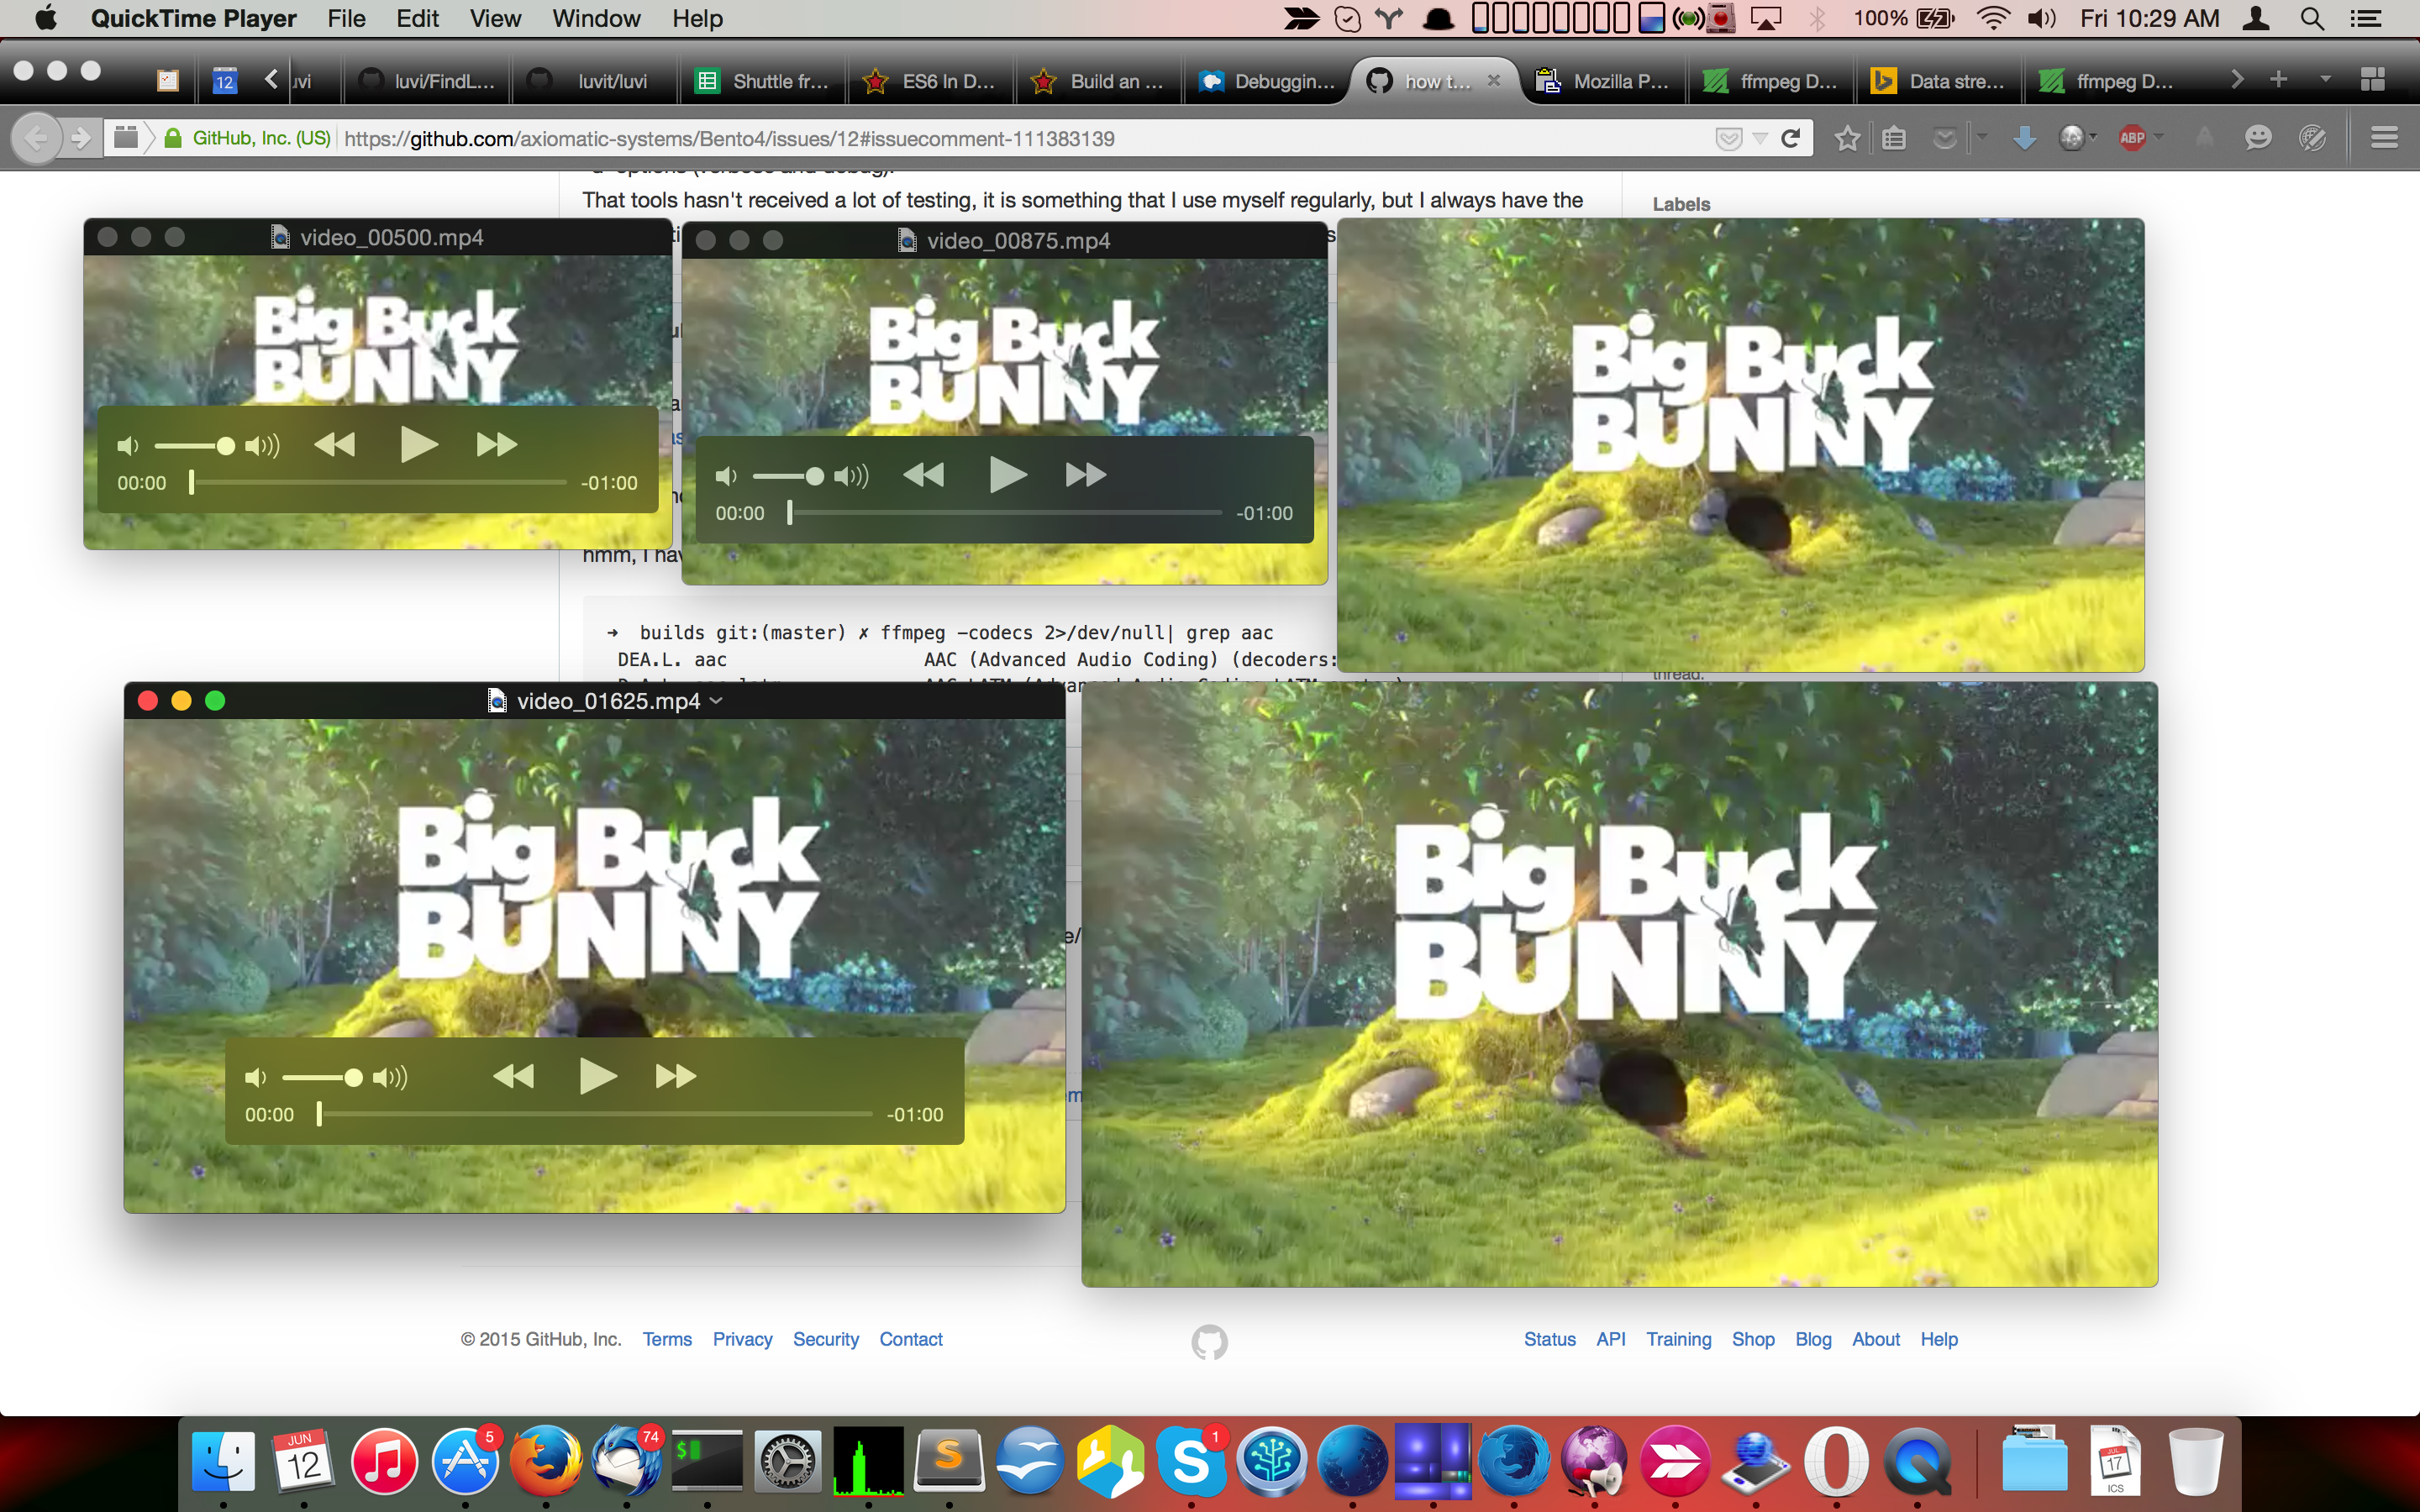
video_00500.mp4 video_00875.mp4 video_01250.mp4 video_01625.mp4 video_02000.mp4Segmenting
We now have 5 different copies of our video with various bit rates and resolutions. To be able to switch between them easily during playback, based on our effective bandwidth that changes constantly over time, we need to segment the copies and produce a manifest file to facilitate playback on the client. We’ll create a Media Presentation Description (MPD)-style manifest file. This manifest file containing info about the segments, such as the threshold effective bandwidth for fetching the requisite segment.
Bento4’s mp4-dash.py script can take multiple input files, perform the segmentation, and emit a MPD manifest that most DASH clients/libraries understand.
$ python2.7 mp4-dash.py --exec-dir=. video_0*
...
$ tree -L 1 output
output
├── audio
│   └── und
├── stream.mpd
└── video
    ├── 1
    ├── 2
    ├── 3
    ├── 4
    └── 5

8 directories, 1 file
We should now have a folder with segmented audio and segmented video of various resolutions.
MSE & Playback
With an HTMLMediaElement such as an audio or video tag, we simply assign a URL to the element’s src attribute and the browser handles fetching and playback. With MSE, we will fetch the content ourselves with XMLHttpRequests (XHRs) treating the response as an ArrayBuffer (raw bytes), and assigning the src attribute of the media element to a URL that points to a MediaSource object. We may then append SourceBuffer objects to the MediaSource.
Pseudocode for the MSE workflow might look like:
let m = new MediaSource
m.o<span class="hljs-function"><span class="hljs-title">nsourceopen</span> = <span class="hljs-params">()</span> =></span>
  let s = m.addSourceBuffer(<span class="hljs-string">'codec')</span>
  s.o<span class="hljs-function"><span class="hljs-title">nupdateend</span> = <span class="hljs-params">()</span> =></span>
    <span class="hljs-keyword">if</span> (numChunks === totalChunks)
      m.endOfStream()
    <span class="hljs-keyword">else</span>
      s.appendBuffer(nextChunk)
  s.appendBuffer(arrayBufferOfContent)
video.src = URL.createObjectURL(m)
Here’s a trick to get the size of a file: make an XHR with the HTTP HEAD method. A response to a HEAD request will have the content-length header specifying the body size of the response, but unlike a GET, it does not actually have a body. You can use this to preview the size of a file without actually requesting the file contents. We can naively subdivide the video and fetch the next segment of video when we’re 80% of the way through playback of the current segment. Here’s a demo of this in action and a look at the code.
Note: You’ll need the latest Firefox Developer Edition browser to view the demo and test the code. More information below in the Compatibility section. The MSE primer from WebPlatform.org docs is another great resource to consult.
My demo is a little naive and has a few issues:
- It doesn’t show how to properly handle seeking during playback.
- It assumes bandwidth is constant (always fetching the next segment at 80% playback of the previous segment), which it isn’t.
- It starts off by loading only one segment (it might be better to fetch the first few, then wait to fetch the rest).
- It doesn’t switch between segments of varying resolution, instead only fetching segments of one quality.
- It doesn’t remove segments (part of the MSE API), although this can be helpful on memory constrained devices. Unfortunately, this requires you to re-fetch content when seeking backwards.
These issues can all be solved with smarter logic on the client side with Dynamic Adaptive Streaming over HTTP (DASH).
Compatibility
Cross-browser codec support is a messy story right now; we can use MediaSource.isTypeSupported to detect codec support. You pass isTypeSupported a string of the MIME type of the container you’re looking to play. mp4 has the best compatibility currently. Apparently, for browsers that use the Blink rendering engine, MediaSource.isTypeSupported requires the full codec string to be specified. To find this string, you can use Bento4’s mp4info utility:
./mp4info bunny.mp4| grep Codec
    Codecs String: avc1.42E01E
Then in our JavaScript:
if (MediaSource.isTypeSupported('video/mp4; codecs="avc1.42E01E, mp4a.40.2"')) {
// we can play this
}
— where mp4a.40.2 is the codec string for low complexity AAC, the typical audio codec used in an mp4 container.
Some browsers also currently whitelist certain domains for testing MSE, or over-aggressively cache CORS content, which makes testing frustratingly difficult. Consult your browser for how to disable the whitelist or CORS caching when testing.
DASH
Using the MPD file we created earlier, we can grab a high quality DASH client implemented in JavaScript such as Shaka Player or dash.js. Both clients implement numerous features, but could use more testing, as there are some subtle differences between media engines of various browsers. Advanced clients like Shaka Player use an exponential moving average of three to ten samples to estimate the bandwidth, or even let you specify your own bandwidth estimator.
If we serve our output directory created earlier with Cross Origin Resource Sharing (CORS) enabled, and point either DASH client to http://localhost:<port>/output/stream.mpd, we should be able to see our content playing. Enabling video cycling in Shaka, or clicking the +/- buttons in dash.js should allow us to watch the content quality changing. For more drastic/noticeable changes in quality, try encoding fewer bitrates than the five we demonstrated.
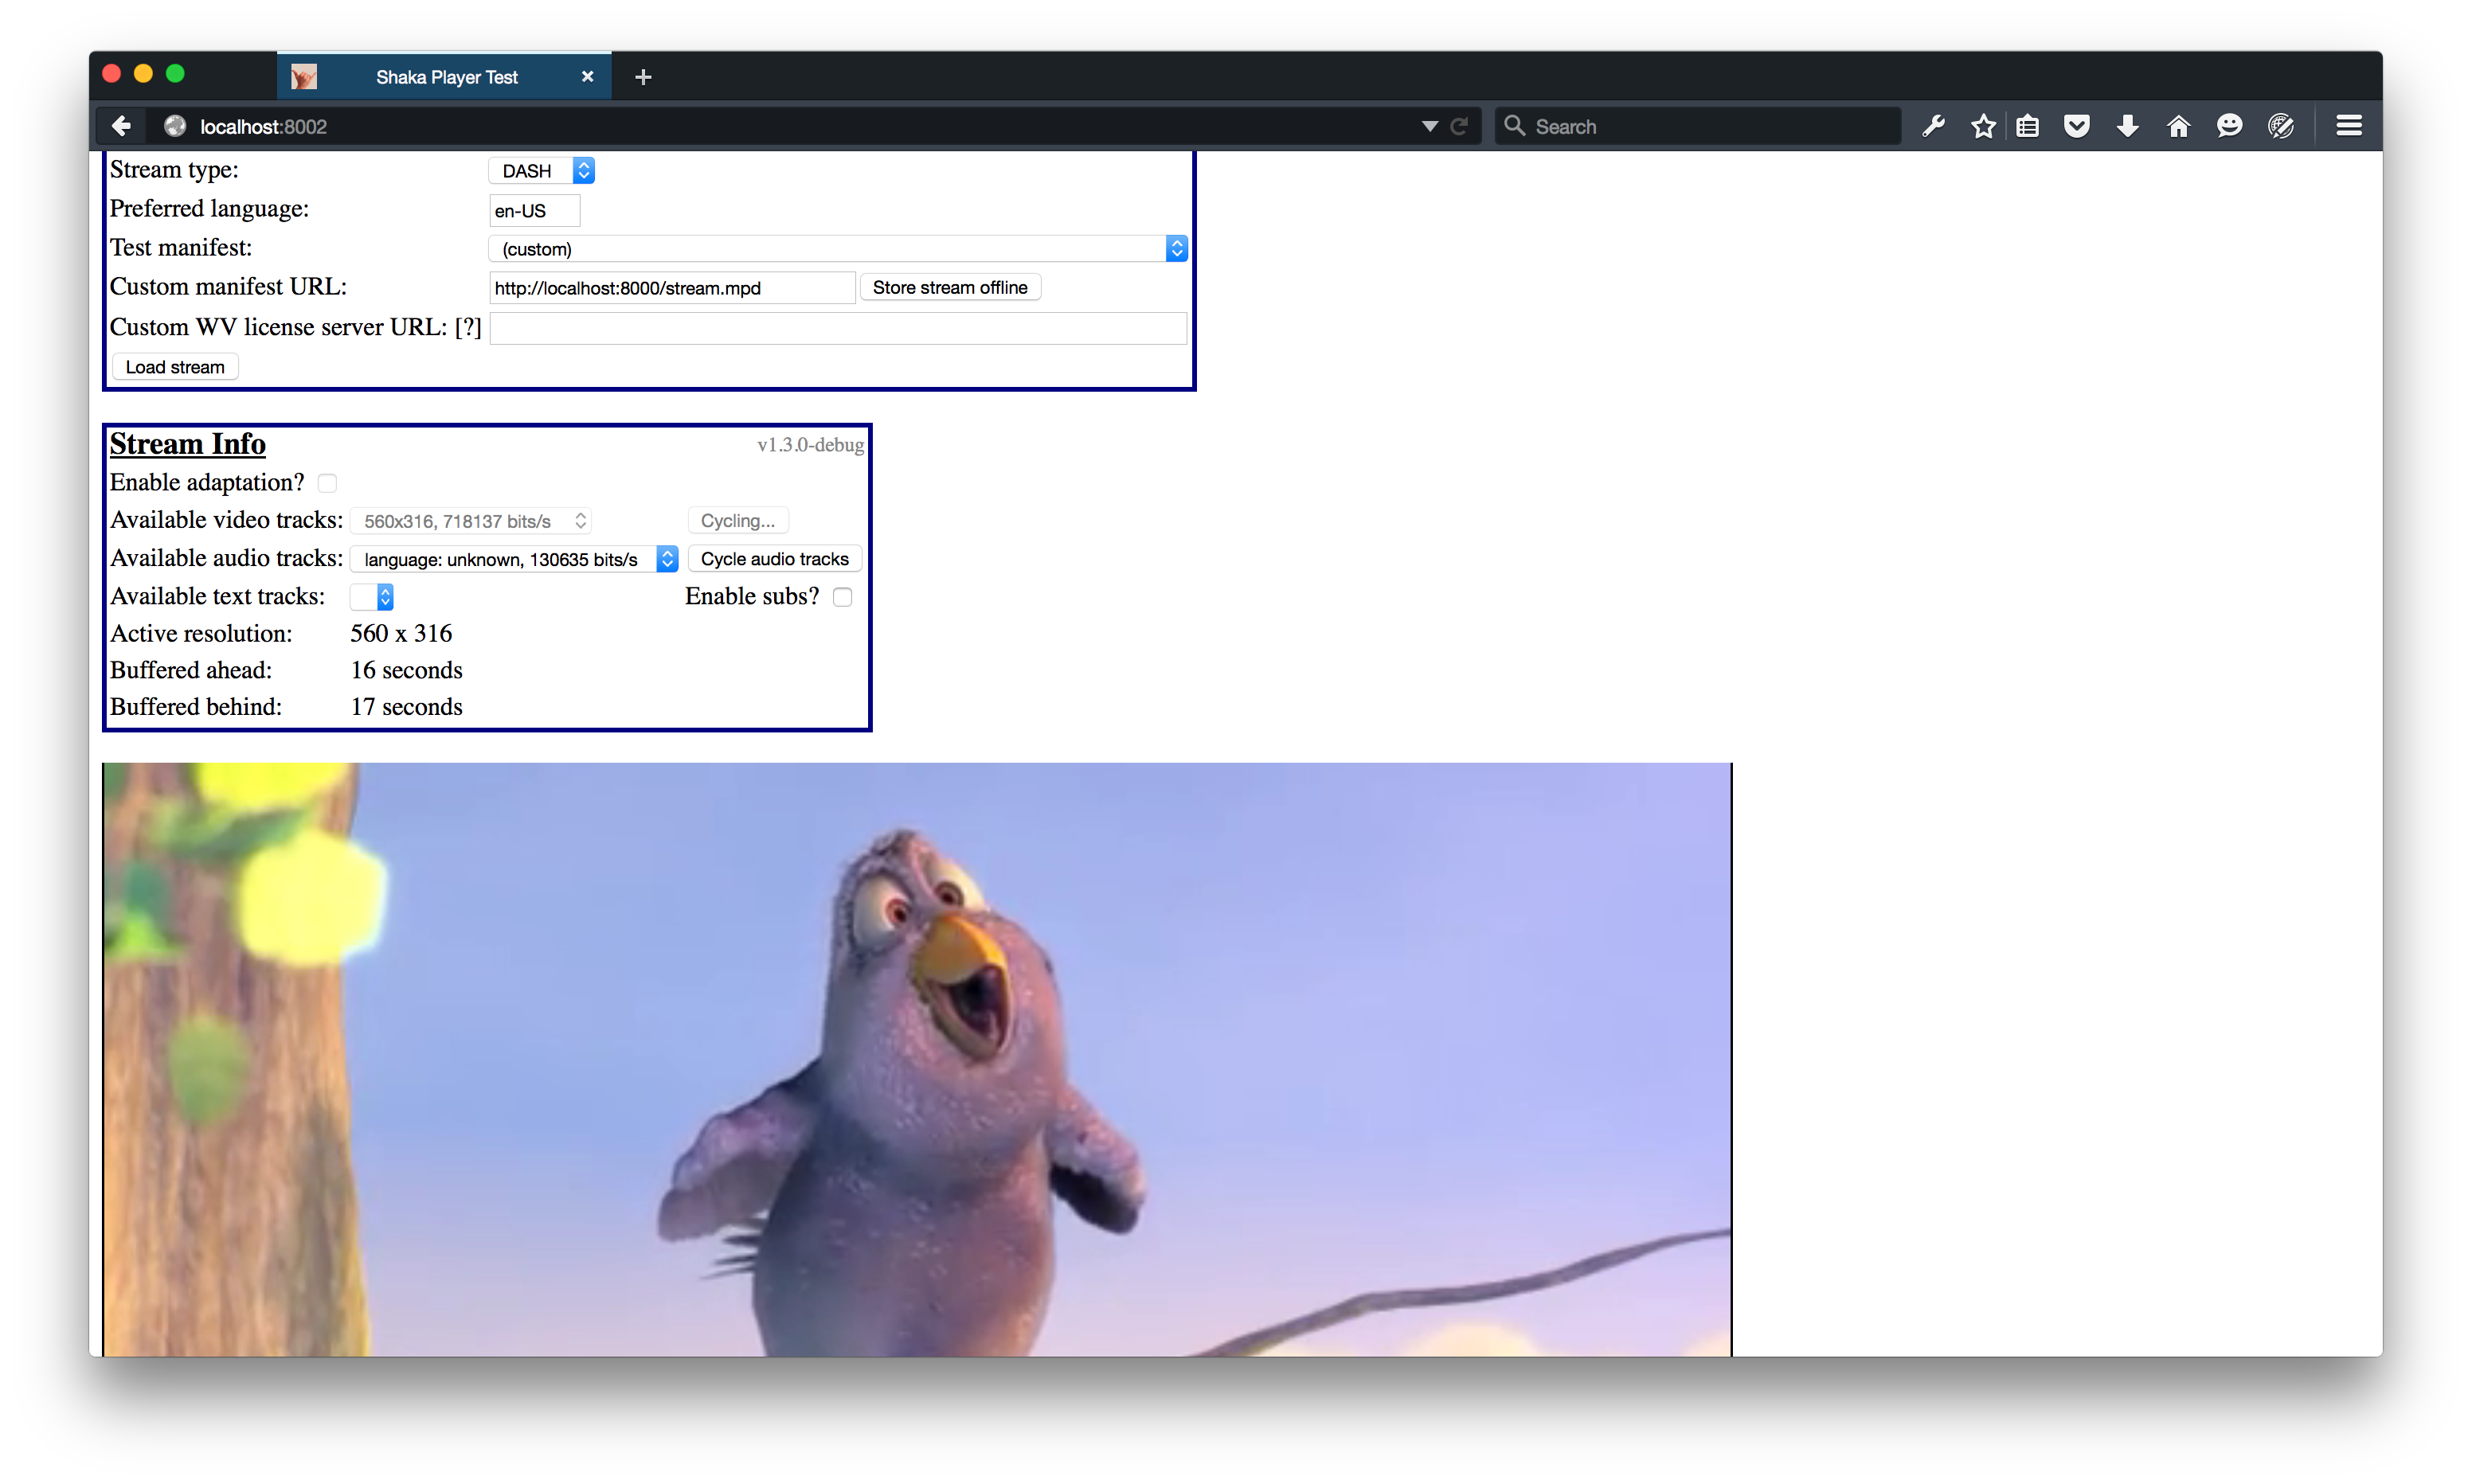
Shaka Player in Firefox Developer Edition
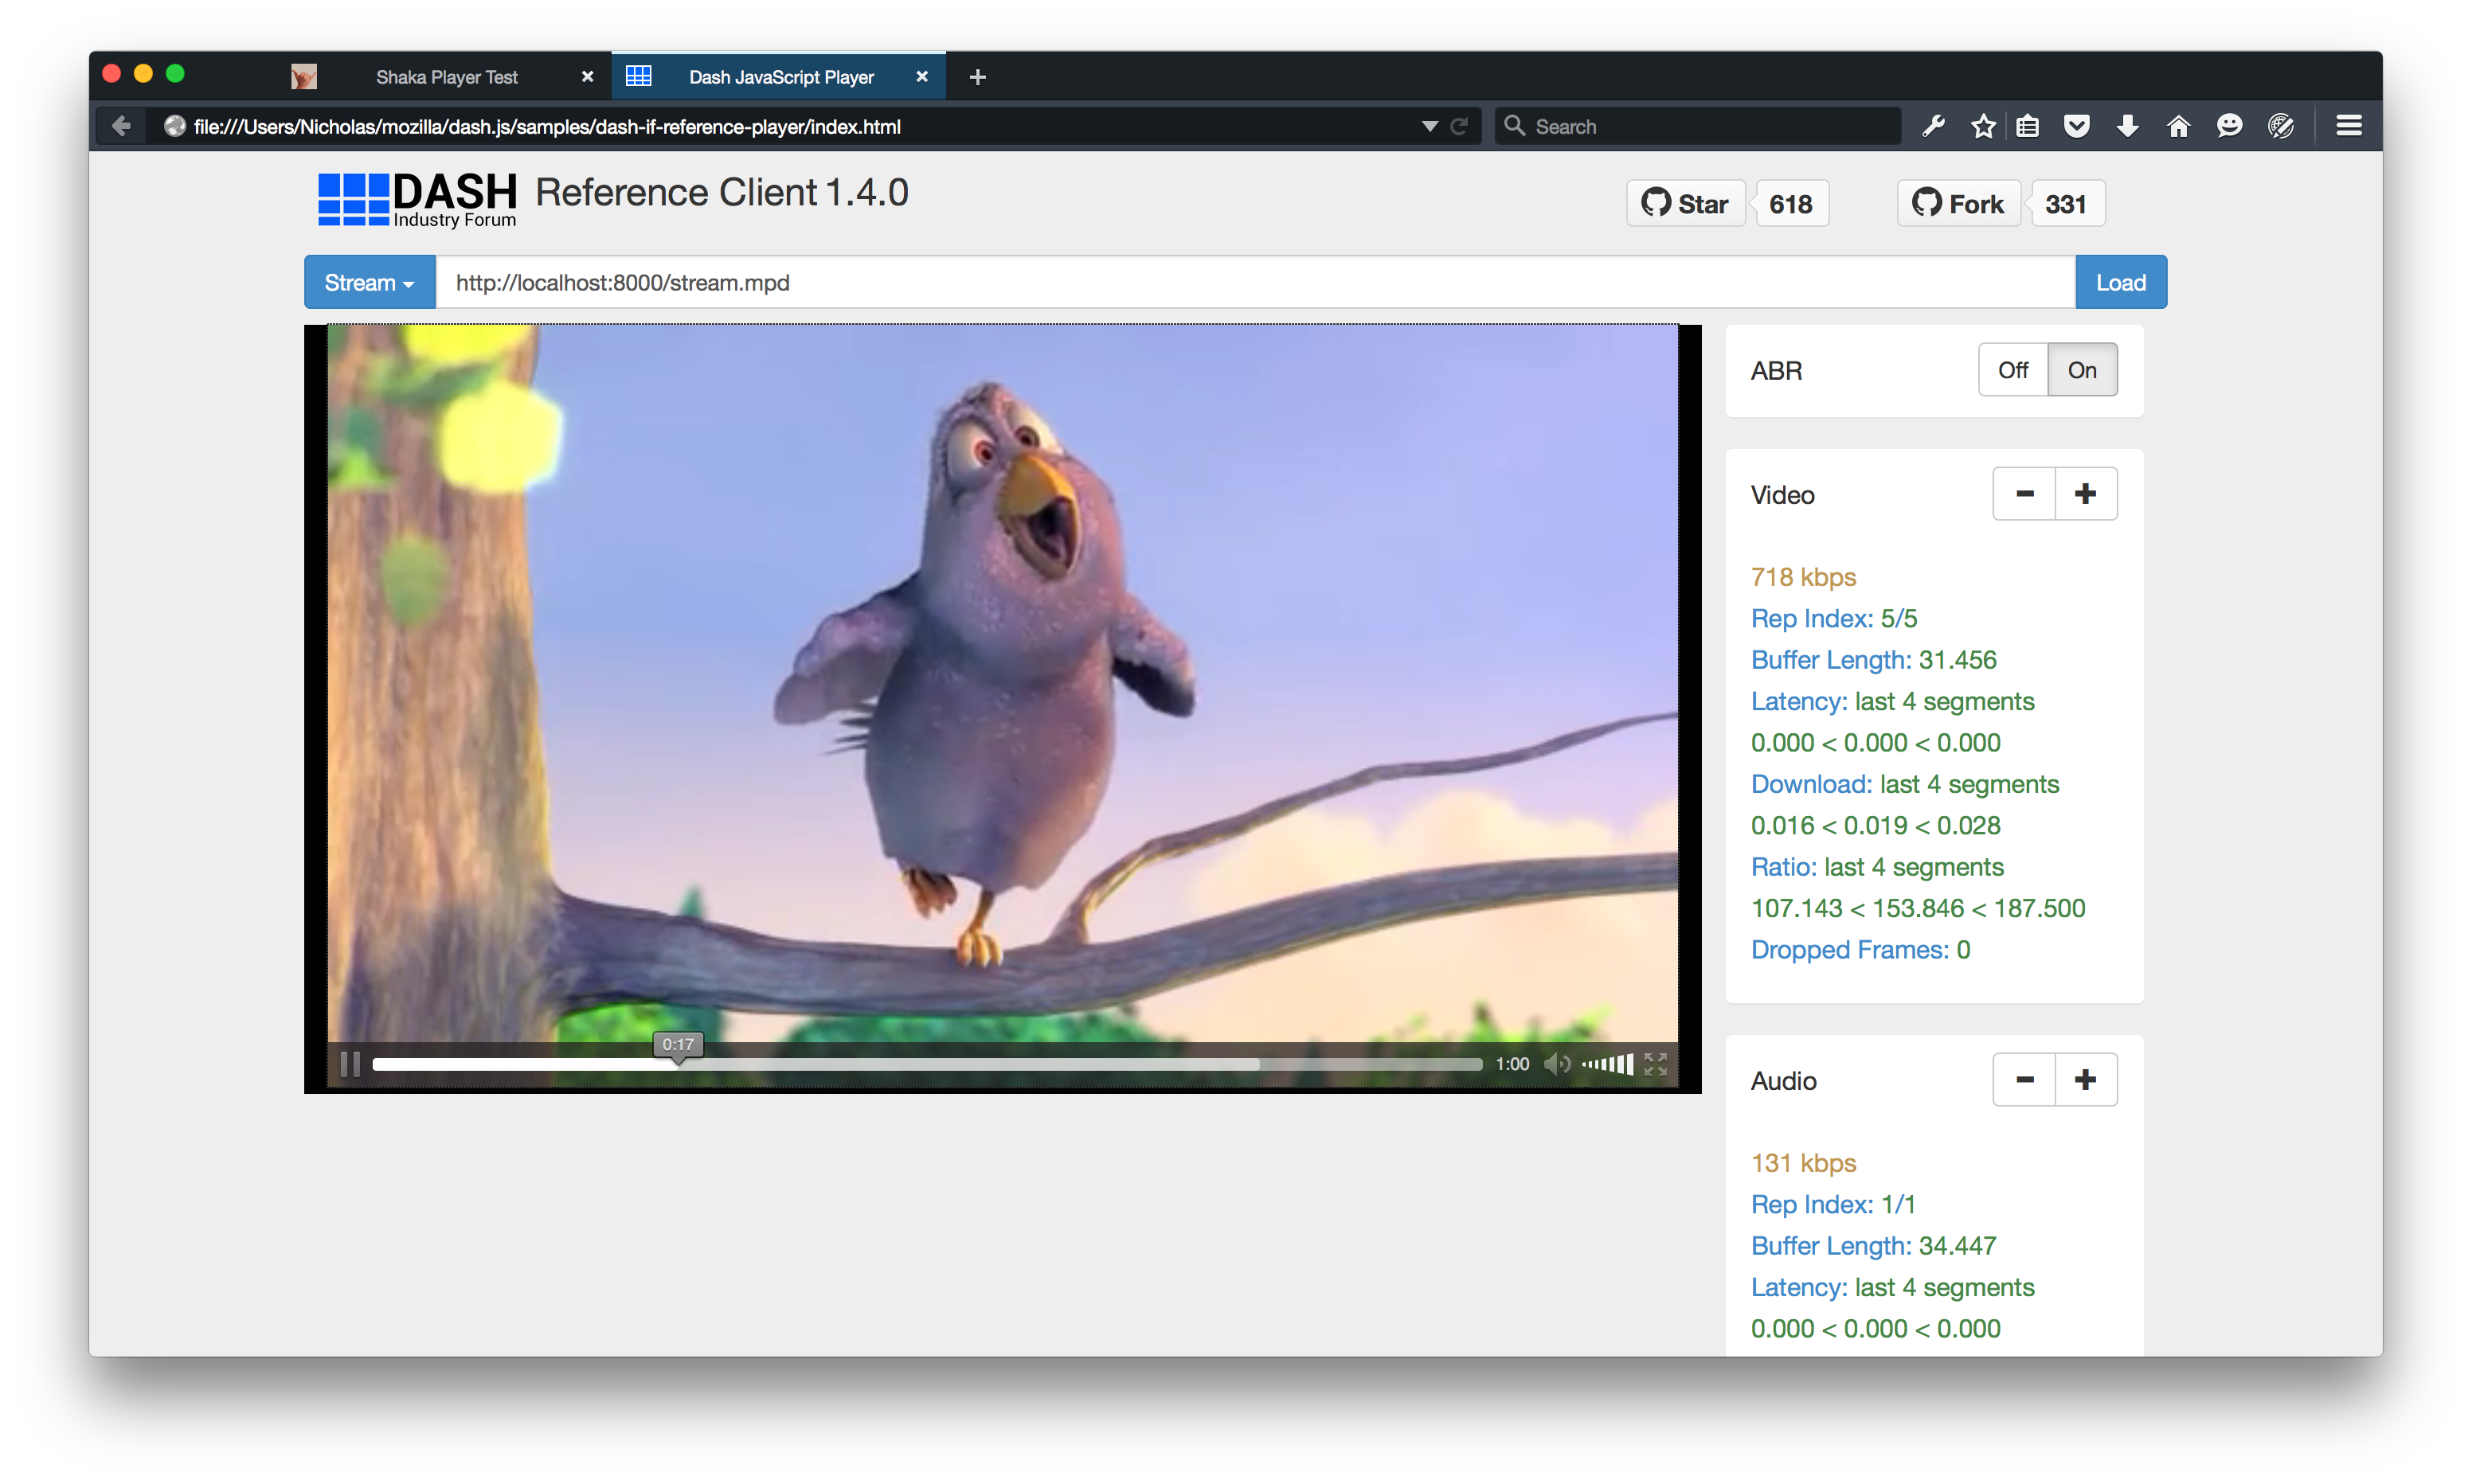
dash.js in Firefox Developer Edition
In conclusion
In this post, we looked at how to prep video assets for on-demand streaming by pre-processing and transcoding. We also took a peek at the MSE API, and how to use more advanced DASH clients. In an upcoming post, we’ll explore live content streaming using the MSE API, so keep an eye out. I recommend you use Firefox Developer Edition to test out MSE; lots of hard work is going into our implementation.
Here are some additional resources for exploring MSE:
- Video – AirMozilla Tech Talk: Adaptive Bitrate Streaming
- Slides – Let’s Make a Netflix: An Intro to Streaming Media on the Web
One comment