
A while back, I made a little toy that simulates carving pumpkins. It was during that narrow window when the WebOS-running TouchPad was new and hot.
Since then, web browsers have gown up a lot, and nowadays Mozilla is executing the vision of a browser-based operating system with Firefox OS. In any case, I’ve been digging back and dusting off some of my old apps. When you get your app running on FirefoxOS, you don’t just port it to yet another device – you port it to the web. So now, Halloween Artist runs on near anything, including those awesome (and affordable!) Firefox phones that are starting to spring up everywhere.
The platform-agnostic web app: http://halloweenartist.penduin.net
On the Firefox Marketplace: https://marketplace.firefox.com/app/halloween-artist
Play around with it before reading on, if Halloween Artist is new to you.
But enough history; the point of this post is to dive into the jack-o-lantern guts and talk about how the program actually works!
References
Before we begin, some links!
- To this day, I start here whenever I tinker with canvas
- Back in the day I only used mouse events, and just recently added actual touch support. Nowadays, I’d suggest going the other way ’round, or at least keeping both in mind.
- There are many guides for doing simple drawing programs using canvas. This one is very detailed.
Let’s go already!
The first step is to get ourselves a pumpkin image in the background, and a canvas layered on top. This canvas will track mouse and touch events and let the user trace out shapes.
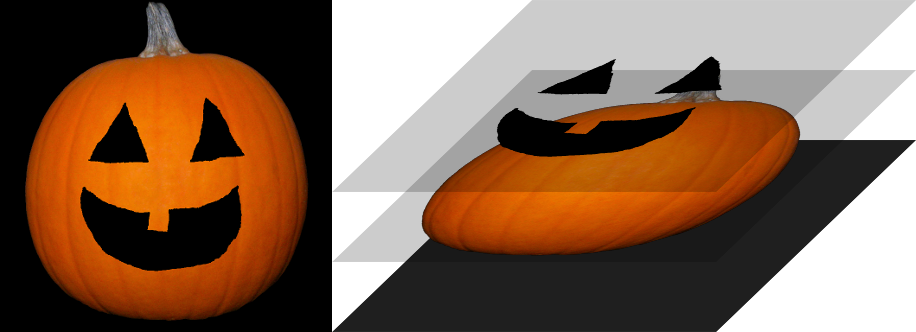
Next, we need an “inside” image that will show through the carved shapes. Over that, we’ll draw the pumpkin but with the user-drawn parts cut out (made transparent). As luck would have it, the canvas API has some handy compositing modes that are perfect for these tasks. The main operation we need is “source-out”. Keep the destination image, except where it intersects with the source shape. Then it’s just a matter of doing a normal, source-over composite.
var face = document.getElementById("draw");
var faceCtx = face.getContext("2d");
var glow = document.getElementById("glow");
var dest = document.getElementById("bg");
var destCtx = dest.getContext("2d");
var img = document.getElementById("pumpkin");

dest.width = dest.width;  // reset the destination canvas
faceCtx.globalCompositeOperation = "source-out";
faceCtx.drawImage(img,
                  0, 0, img.width, img.height,
                  0, 0, size, size);

// draw glowing background (to dest)
destCtx.drawImage(glow, 0, 0, glow.width, glow.height,
                  0, 0, size, size);

// apply the face
destCtx.globalAlpha = 1;
destCtx.globalCompositeOperation = "source-over";
destCtx.drawImage(face, 0, 0);

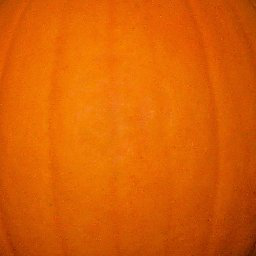
It’s a start! But to look like an actual carved pumpkin, we need to add some 3D magic to draw the inside edges. Actually, scratch that – we’re going to cheat! :^) We’ll start with a lower-resolution, slightly-blown-up pumpkin image:
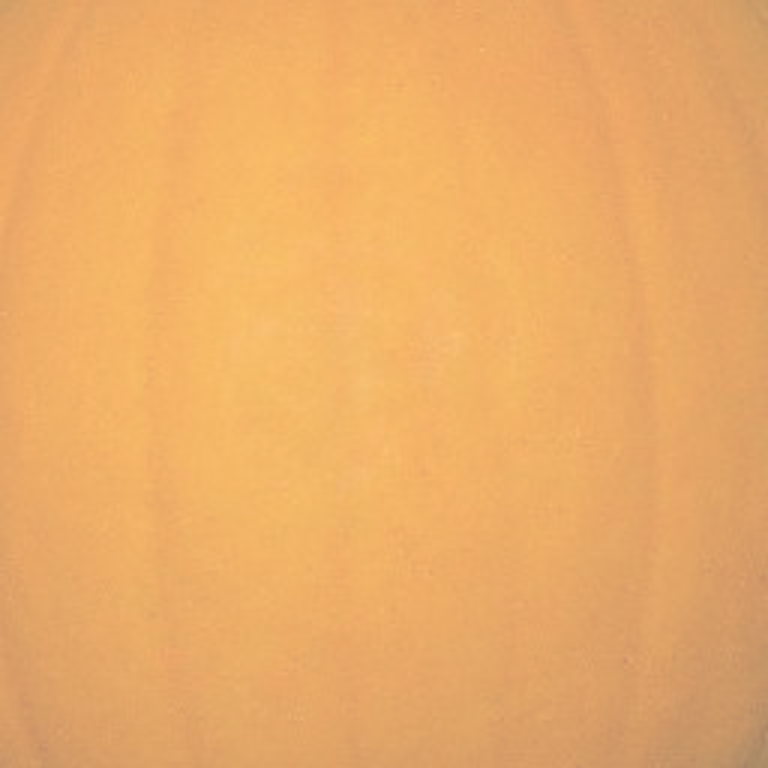
…then we’ll lighten it up using canvas’s “lighter” globalCompositeOperation and a globalAlpha value of, oh let’s say 0.5:
…then we’ll “source-out” the face, same as we did with the foreground:

…then shrink it a bit, center it, and draw it between the inside background and the outer face:

We’re getting there! But depending on the shape, our corners might not look very convincing.
Fortunately, all this cheating we’ve been doing – these composite operations and scaling – it’s all very fast. Even on mobile browsers. Let’s turn up the cheating to maximum and draw that middle layer in a loop, shrinking it less each time.
…While we’re at it, each step could lighten up the current layer to a lesser degree than the previous (more “inner”) one. And while we’re at that, let’s lighten it using a more yellow color; our first pass looks a little pinkish.
// build pumpkin by layer and draw it shrunk, inner to outer (to dest)
var i;
var darken = 0.4;

for(i = 56; i > 0; i -= 4) {
    // mix a color for the layer
    scratchCtx.globalCompositeOperation = "source-over";
    scratchCtx.globalAlpha = 1;
    scratchCtx.drawImage(glow, 0, 0, glow.width, glow.height,
                         0, 0, 768, 768);       // bright glow...
    scratchCtx.globalAlpha = 0.3;
    scratchCtx.drawImage(flick,                 // light...
                         0, 0, 16, 16, 0, 0, 768, 768);
    scratchCtx.globalAlpha = darken;
    scratchCtx.drawImage(flesh,                 // darken with flesh
                         0, 0, 256, 256, -8, 0, 768 + 16, 768);
    darken += 0.02;                             // ...more each time
    // cut out the face
    // NOTE: "face" is already the outer layer.
    //       we want to copy its alpha mask, so "-in" instead of "-out".
    scratchCtx.globalCompositeOperation = "destination-in";
    scratchCtx.globalAlpha = 1;
    scratchCtx.drawImage(face, 0, 0);

    // draw layer
    destCtx.drawImage(scratch, 0, 0, 768, 768,
                      i, i, 768 - (i * 2), 768 - (i * 2));
}
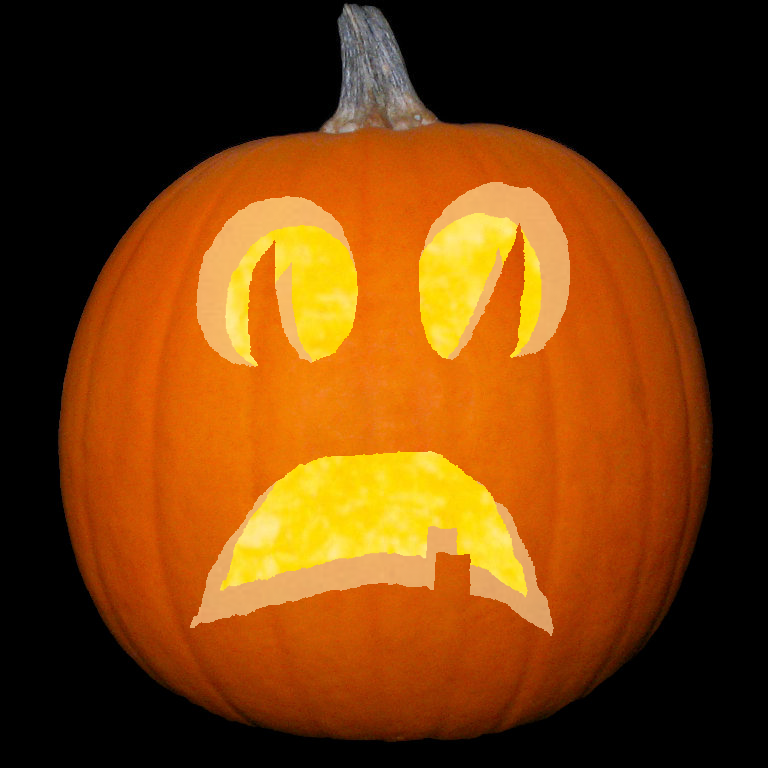
By putting that middle-layer step inside a loop and making a few tweaks, we get much more realistic edges:
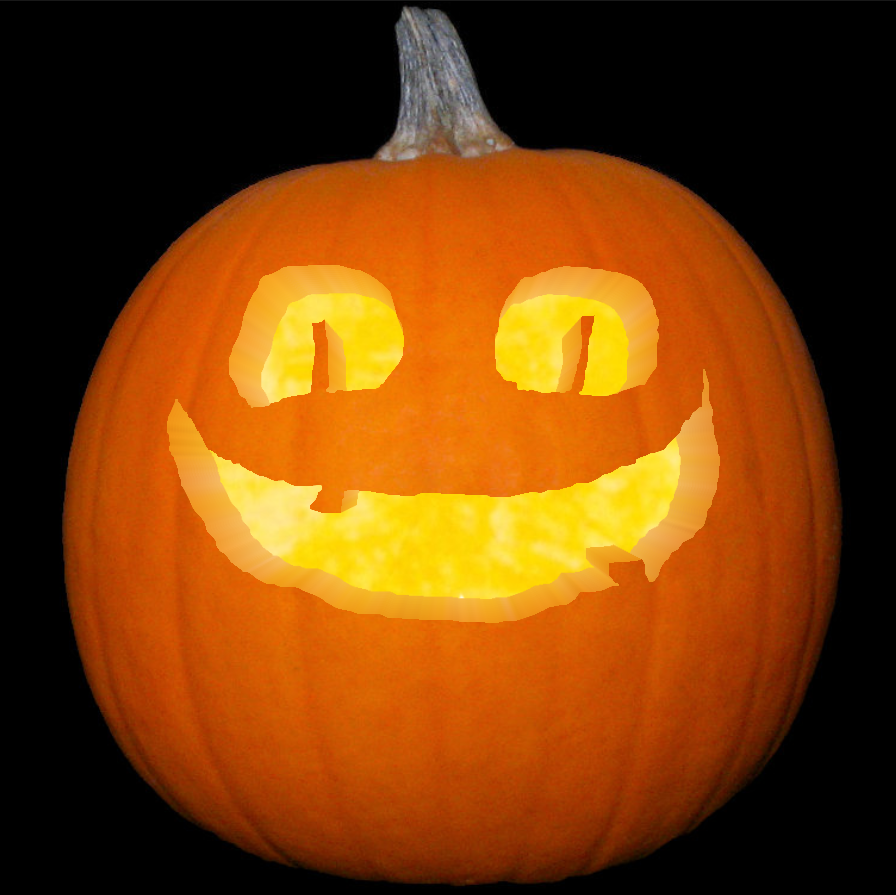
So, we draw a whole bunch of these middle layers, only to draw right over most of it during the next pass. It’s a bit wasteful if you think about it that way, but consider how much simpler this is than trying to simulate all these arbitrary cut-out surfaces “for real”. Instead, this code builds little bits of pumpkin shell, one layer at a time, from the inside out. It’s a fairly elegant illusion if I do say so myself; we can make a passably-realistic image with a sense of depth, without actually doing any complex calculations or intensive processing.
Adding polish
Warning: more history ahead. I’ll try to keep it brief and on-point. :^)
Figuring out how “deep” to start (how much to shrink), and how many steps to draw in between, all while keeping the “carve” function reasonably fast, was one of those fun bits of experimentation and compromise. On a high-resolution display, there can still be artifacts if you draw very steep, jagged shapes. But as far as bang per buck, compatibility with low-end devices, and the 99%-of-shapes use cases, I’m pretty pleased.
I wanted this to be pick-up-and-play friendly, so every day I’d load the latest version onto my TouchPad and hand it to my coworkers, giving them no instructions.
Early on, it was suggested that the carved image should flicker as if the candle inside were burning unevenly. Easy! The carve function now produces two images, the normal one and a slightly brighter version, which is positioned (using CSS) right over the main one. It fades in and out using a randomized timeout and CSS animation on the “opacity” property. A few minutes of polish, and the illusion was even better.
.fade {
    transition: opacity 0.5s linear;
    -moz-transition: opacity 0.5s linear;
    -webkit-transition: opacity 0.5s linear;
}
.fade.out {
    opacity: 0;
}
function animateFlicker() {
    var flicker = document.getElementById("flicker");

    if(HA.flickerTimer) {
        clearTimeout(HA.flickerTimer);
        HA.flickerTimer = null;
    }
    if(!HA.settings.flicker) {
        return;
    }

    if(flicker.className === "fade out") {
        flicker.className = "fade ";
    } else {
        flicker.className = "fade out";
    }
    HA.flickerTimer = setTimeout(animateFlicker, (Math.random() * 1000));
}
I forget who, but one coworker went right for the “Carve” button before drawing anything. Natural enough instinct. So, added some logic to see if any shapes had been drawn yet, and if not, give the user some quick instructions. I’m really glad I caught that, because in showing the app to more people later, about a quarter did the same thing. Much better to show a hint popup than have users wonder why nothing’s happening.
What if the user drew outside the pumpkin? All kinds of goofy artifacts, that’s what. So, I used that handy canvas compositing and masked the user’s input before carving. As a nice side effect, you can now carve all the way out to the edge of a pumpkin, as though you’d chopped it in half.

This solution led to another problem. When people realized they could recklessly carve giant holes, they’d see the empty, glowing inside surface of the pumpkin. Where was the light coming from?

So, between drawing the background and drawing the scaled flesh layers, I dropped in a candle. I actually took some photos of a nice white candle and GIMPed it into the shape of my blocky “penduin” avatar. May as well include some kind of signature in this program, eh? I made two different versions, one for each of the flicker-fading images, and made the flame a bit bigger on the brighter version. It gives a nice little touch of animation, and adds a bit more to the illusion.
Then of course there was the less exciting stuff. Take out those nasty hard-coded values and make it work at any screen size. Make sure touch and mouse support both work as expected. Rearrange the buttons if the screen is small and they’d be in the way. All that jazz.
Code on GitHub – Happy Halloween!
Well, that about covers it. You’re free and encouraged to poke around in the source if you’d like to learn more or add your own tweaks. (Mind the mess; I left some experimental tweaks and previous-attempts in there, commented out.) Halloween Artist is GPLv3, and since you might not feel like scraping down the source from the web app itself (and since my lousy DSL might be down at any given moment) I’ve made it available on GitHub.
Have fun, and Happy Halloween! :^)

About Owen Swerkstrom
Tinkerer since Construx. Programmer since Apple II. Linux guy since Slackware 2.1.
More articles by Owen Swerkstrom…
About Robert Nyman [Editor emeritus]
Technical Evangelist & Editor of Mozilla Hacks. Gives talks & blogs about HTML5, JavaScript & the Open Web. Robert is a strong believer in HTML5 and the Open Web and has been working since 1999 with Front End development for the web - in Sweden and in New York City. He regularly also blogs at http://robertnyman.com and loves to travel and meet people.
One comment